Setting Up Your First Grow Space: A Beginner's Guide
Growing gourmet and edible mushrooms at home is a rewarding, increasingly popular hobby. The skills involved — substrate preparation, environmental control, contamination prevention — are the same whether you are growing oyster mushrooms, lion's mane, or shiitake. This guide covers the fundamentals of setting up a functional first grow space for gourmet mushroom cultivation.
This guide is written for educational purposes focused on legal gourmet mushroom cultivation. The environmental principles, equipment, and techniques described apply broadly to mushroom cultivation.
Understanding What Mushrooms Need
Before purchasing a single piece of equipment, it helps to understand what mushrooms actually require at each stage of their life cycle.
Colonization stage (mycelium growing through substrate):
- Temperature: typically 70–80°F (21–27°C), species-dependent
- Humidity: less critical during colonization if containers are sealed
- Light: not required; indirect ambient light is fine
- Fresh air exchange: minimal; CO2 buildup during colonization is tolerable
- Contamination prevention: the primary concern at this stage
Fruiting stage (when mushrooms form and grow):
- Temperature: typically 65–75°F (18–24°C); some species prefer cooler
- Humidity: 80–95% relative humidity at the fruiting surface
- Fresh air exchange: critical — CO2 must stay below ~1000 ppm for healthy pins
- Light: indirect light (12 hours/day or natural ambient) triggers pinning in many species
- Substrate moisture: fruiting blocks or bags need adequate water content to sustain flushes
Understanding these two stages determines what your space needs to provide.
Choosing Your Grow Space
The ideal beginner grow space is:
- Small (easier to control humidity and temperature in a smaller area)
- Cleanable (non-porous surfaces, away from carpets and dust sources)
- Accessible (you need to check it daily during fruiting)
Common beginner options:
A spare closet: Works well. Easier to maintain humidity. Can be dedicated to colonization, fruiting, or both depending on size.
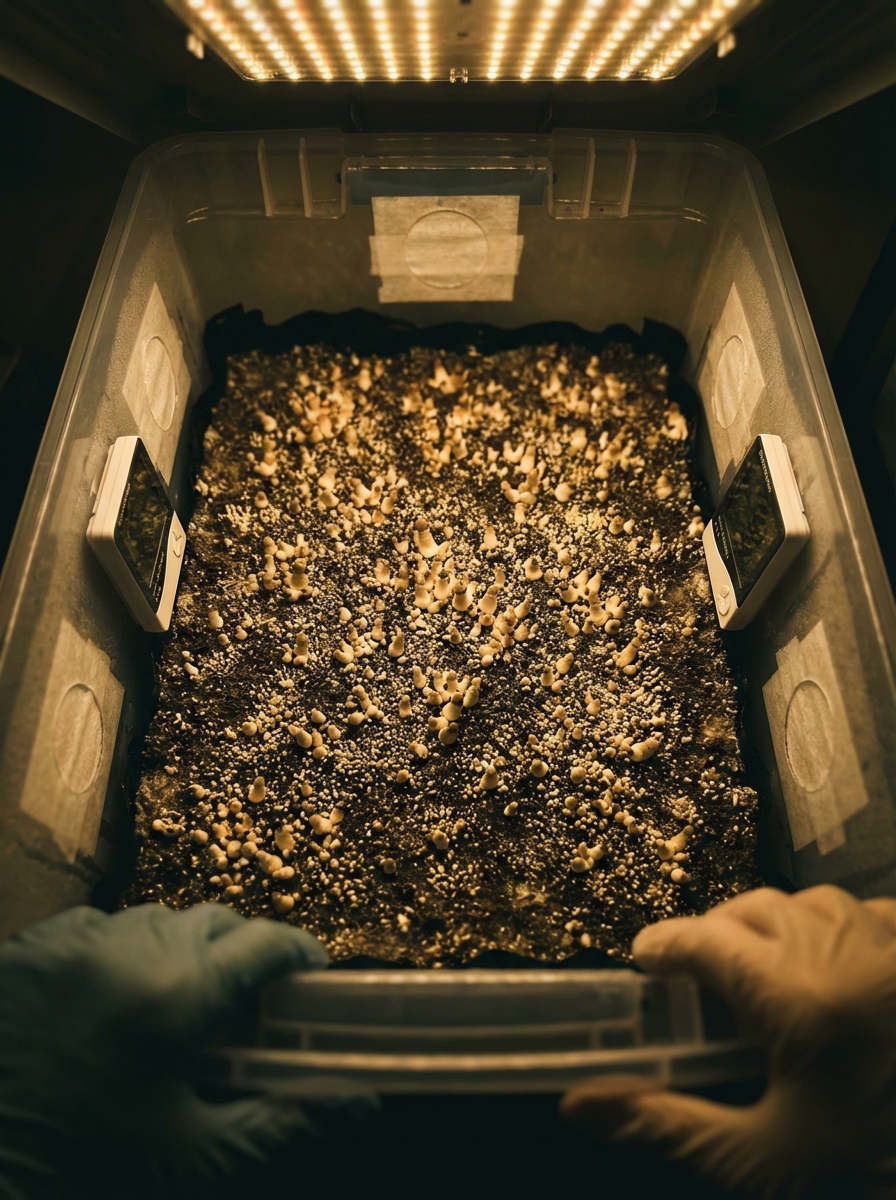
A plastic storage tent or growing tent: Mylar grow tents sold for plant cultivation work well for fruiting chambers. Inexpensive, reflective interior, and easy to hang equipment. A 2×2×4 ft tent is sufficient for a few simultaneous grows.
A modified plastic bin or shotgun fruiting chamber (SGFC): A simple fruiting chamber drilled with holes and filled with perlite. Passive humidity maintained through the perlite moisture. Requires manual fanning and misting. Very low cost.
A Martha tent setup: A wire shelving rack inside a greenhouse-style plastic tent, with an ultrasonic humidifier and a fan on a timer. This is a step up from the SGFC in automation and capacity.
Avoid spaces with:
- Heavy foot traffic kicking up dust
- Proximity to HVAC vents blowing unfiltered air
- High ambient mold spore counts (basements with moisture problems)
- Temperature extremes (garages in winter or summer, for example)
Essential Equipment List
Colonization phase
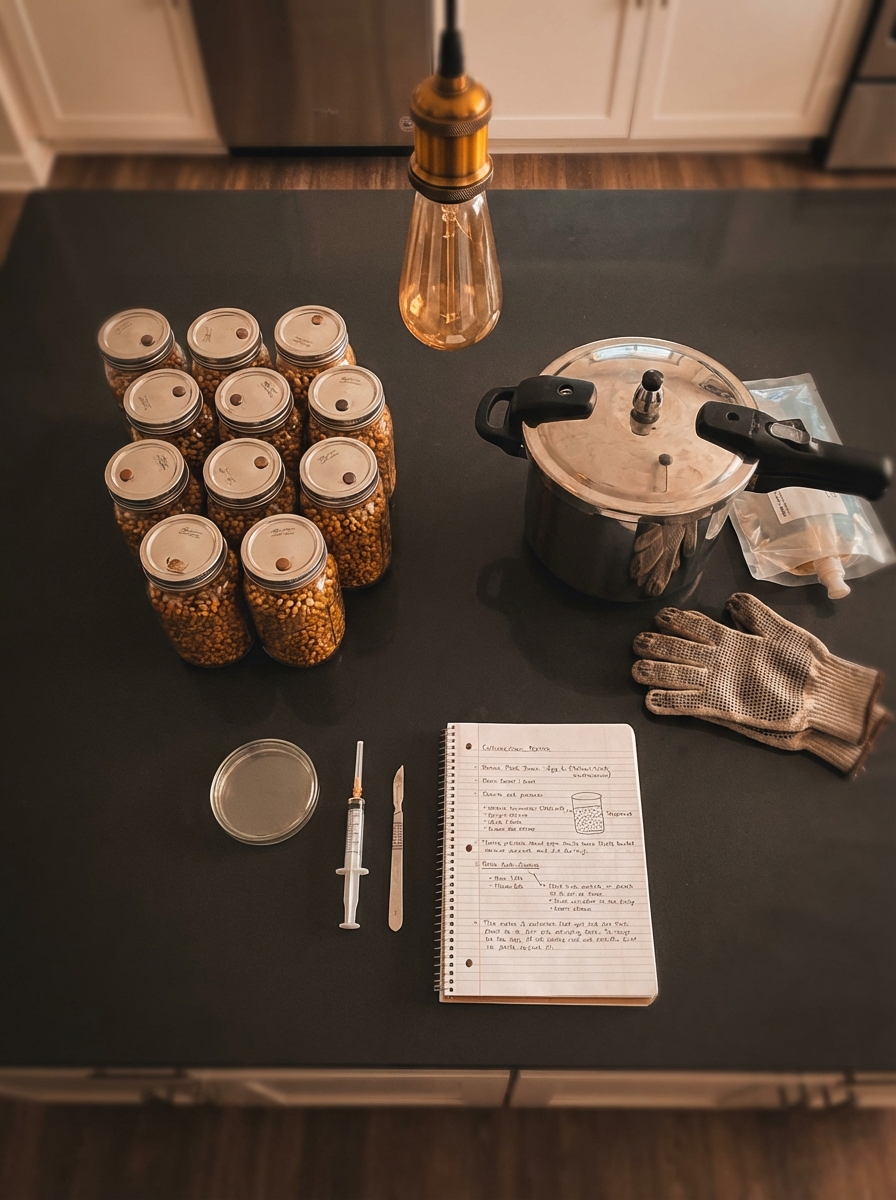
Pressure cooker: For sterilizing grain and supplemented substrates. A 23-quart pressure cooker is the minimum useful size for meaningful batch sizes. Sterilization at 15 PSI for 2–2.5 hours eliminates competing organisms.
Still air box (SAB) or laminar flow hood: Work area for inoculation without contaminating your cultures. A SAB is a large clear plastic storage bin placed on its side with armholes — still air inside reduces contamination pressure dramatically. A laminar flow hood (HEPA-filtered air) is more reliable but costs $300–700+.
Mason jars: For grain spawn preparation. Wide-mouth quart jars are standard. Polyfill and self-healing injection ports can be added to lids for syringe inoculation.
Isopropyl alcohol (70%): For sterilizing all work surfaces, hands, and tools.
Nitrile gloves: Worn during inoculation and transfers.
Alcohol lamp or butane torch: For flame sterilizing scalpels and inoculation loops.
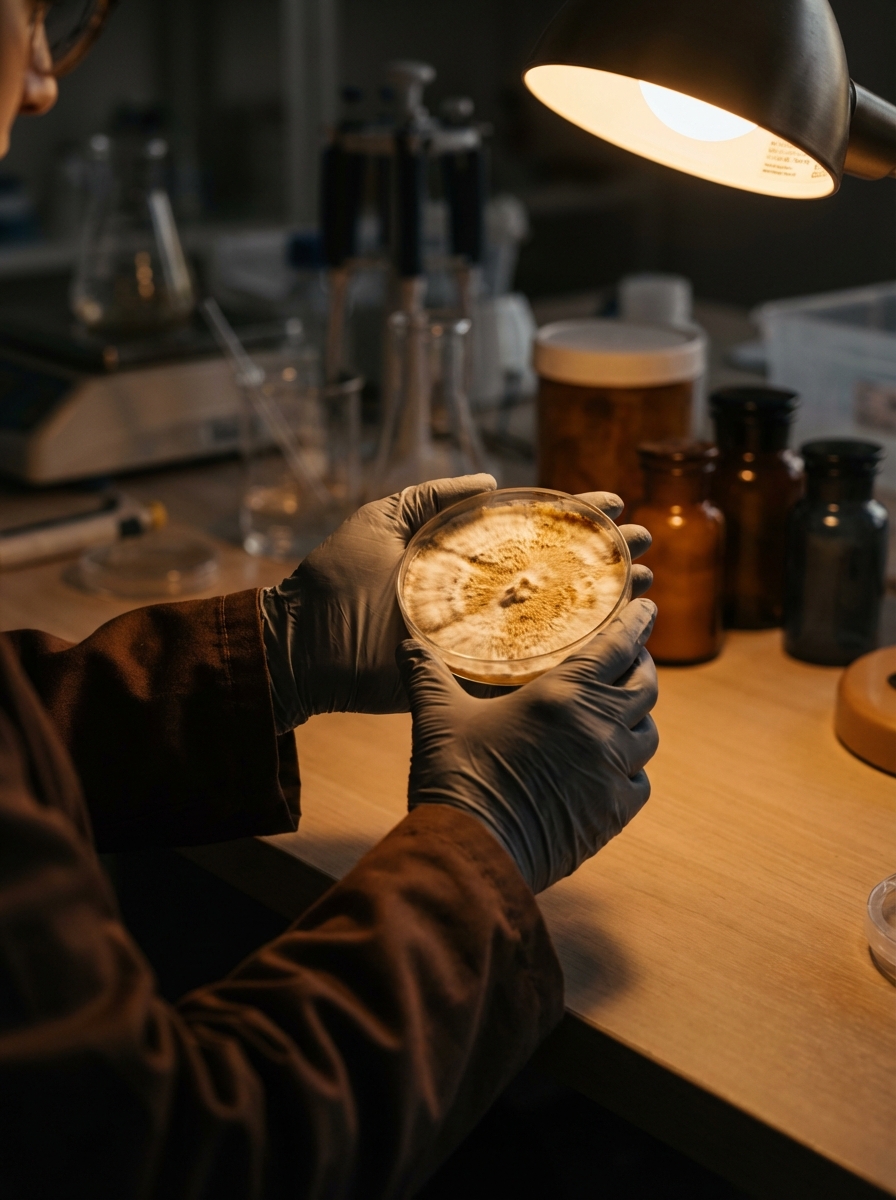
Syringes or agar plates: Your inoculum source. Liquid culture syringes are the most beginner-friendly starting point.
Fruiting phase
Fruiting chamber: See options above. For a Martha tent setup, you will also need:
- Wire shelving rack
- Ultrasonic humidifier with output hose routed into the tent
- Small fan (4–6 inch clip fan) on a timer for fresh air exchange
- Hygrometer/thermometer combo to monitor conditions inside the tent
Perlite: If using a SGFC, perlite soaked in water provides passive humidity. Do not use fine-grade vermiculite as a substitute — perlite maintains better airflow.
Spray bottle: For misting chamber walls and substrate surfaces. Use reverse osmosis or distilled water to avoid mineral deposits.
Humidity gauge: Knowing actual humidity, not estimated humidity, is essential. Analog greenhouse gauges are unreliable; use a digital probe hygrometer.

Contamination: The Central Challenge
The single biggest problem new growers face is contamination — unwanted molds, bacteria, or yeasts outcompeting mushroom mycelium. The most common culprits are:
Trichoderma (green mold): Fast-growing green or blue-green mold. Aggressive. Will outcompete mycelium if given any foothold. Most commonly introduced via inadequate sterilization or break-in contamination during inoculation.
Cobweb mold: White, wispy, fast-spreading. Often confused with mycelium by beginners. Usually addressed by reducing humidity and increasing fresh air exchange.
Wet rot / Bacillus: Bacterial contamination producing slimy, foul-smelling substrate. Typically caused by insufficient sterilization time or pressure.
Prevention principles:
- Sterilize grain spawn and supplemented substrates thoroughly (pressure cooker, not just pasteurization).
- Work in a still air box or flow hood; minimize air movement during inoculation.
- Flame sterilize all tools immediately before use.
- Wipe all jar and bag surfaces with 70% isopropyl before working.
- Inspect colonizing jars or bags daily and remove contaminated units immediately before spores spread.
Contamination is not a sign of failure. Every grower experiences it. The goal is to minimize its frequency through better technique and to catch it early before it spreads.
Environmental Control: Temperature and Humidity
Temperature: Most gourmet mushroom species colonize best at 70–75°F. Fruiting temperatures are typically 5–10°F lower, triggering pinning. A seedling heat mat can warm jars from below during colonization in a cool space. A small space heater with a thermostat controller works for warming an entire tent or closet.
Humidity: During fruiting, maintaining 85–95% RH at the fruiting surface is the goal. An ultrasonic humidifier controlled by a humidity controller (inkbird or similar) can automate this. Without automation, misting with a spray bottle 2–3 times daily and fanning to exchange fresh air achieves similar results with more effort.
Fresh air exchange: CO2 buildup inhibits pinning and causes stretched, malformed mushrooms. Some manual fanning 2–3 times daily is sufficient for most setups. A small fan on a 15-minutes-per-hour timer provides automated exchange.
Starting Small and Scaling Up
The most common beginner mistake is starting too large. A single grain jar and a small fruiting chamber teaches more than 20 jars across an elaborate setup, because you can observe each stage closely and understand what went wrong when it does.
A sensible first-grow approach:
- Prepare 2–4 quart jars of rye or popcorn grain, pressure sterilized.
- Inoculate with a liquid culture syringe of the species you want to grow.
- Allow to colonize in a warm, dark location (a kitchen cabinet works).
- When fully colonized, birth the blocks into a simple perlite SGFC.
- Observe fruiting conditions, mist and fan daily, and harvest at veil break.
Once you have completed this cycle successfully — understanding the look of healthy mycelium, the signs of contamination, the trigger for pinning, and the harvest timing — you are ready to scale.
Record-Keeping
Maintain a simple grow log. For each batch, record:
- Species and strain
- Substrate composition and preparation method
- Inoculation date
- Colonization start and completion dates
- Fruiting chamber conditions (temp, humidity range)
- Pin date and count
- Harvest date and weight (fresh and dry)
- Any contamination observed
Over 3–4 grows, patterns emerge. You will see which substrates perform best, which environmental conditions trigger the fastest pinning, and which strains are most reliable for your specific setup.
Safety and Legal Notes
Growing gourmet mushrooms — oyster, lion's mane, shiitake, reishi — is fully legal. Equipment, materials, and techniques in this guide are appropriate for gourmet species.
If you are in a jurisdiction where psilocybin cultivation is legal (Oregon service centers, Colorado, etc.), professional licensure and compliance requirements apply and differ significantly from home gourmet cultivation. Research your local law.
The skills covered here form the foundation of mycological practice. Mastering contamination control, environmental management, and the mushroom life cycle in a gourmet context provides the technical grounding that any serious cultivator — at any scale — relies on.