Wild Bird Seed (WBS) Tek
Everything you need to know about Wild Bird Seed (WBS) Tek — from materials to first harvest.
What You'll Need
- See full supply list in guide below.
Find grow supplies at vendors in our Directory.
Step-by-Step Process
Wild Bird Seed (WBS) Tek
Wild Bird Seed tek is widely regarded as the best starting grain spawn method for new cultivators. It's cheap, widely available, colonizes faster than brown rice flour, and tolerates minor preparation errors better than some other grains. This guide covers the complete process from store shelf to colonized spawn.
Why WBS
Wild bird seed is typically a mix of milo (sorghum), millet, sunflower seeds, and other small grains. This diversity is an advantage — different grains colonize at slightly different rates, and the mixture provides a range of nutrients and colonization surfaces.
Cost: A 20-lb bag costs $5–15 at Walmart, Home Depot, or any garden center. No specialty purchases required.
Availability: Available year-round, everywhere. No need to order online or visit homebrew suppliers.
Speed: WBS colonizes faster than BRF PF Tek jars — typically 2–3 weeks at 78°F vs. 3–4 weeks for BRF.
Forgiveness: The mix of grain sizes means there's some redundancy — if millet overcooks slightly, the milo and sunflower seeds compensate.
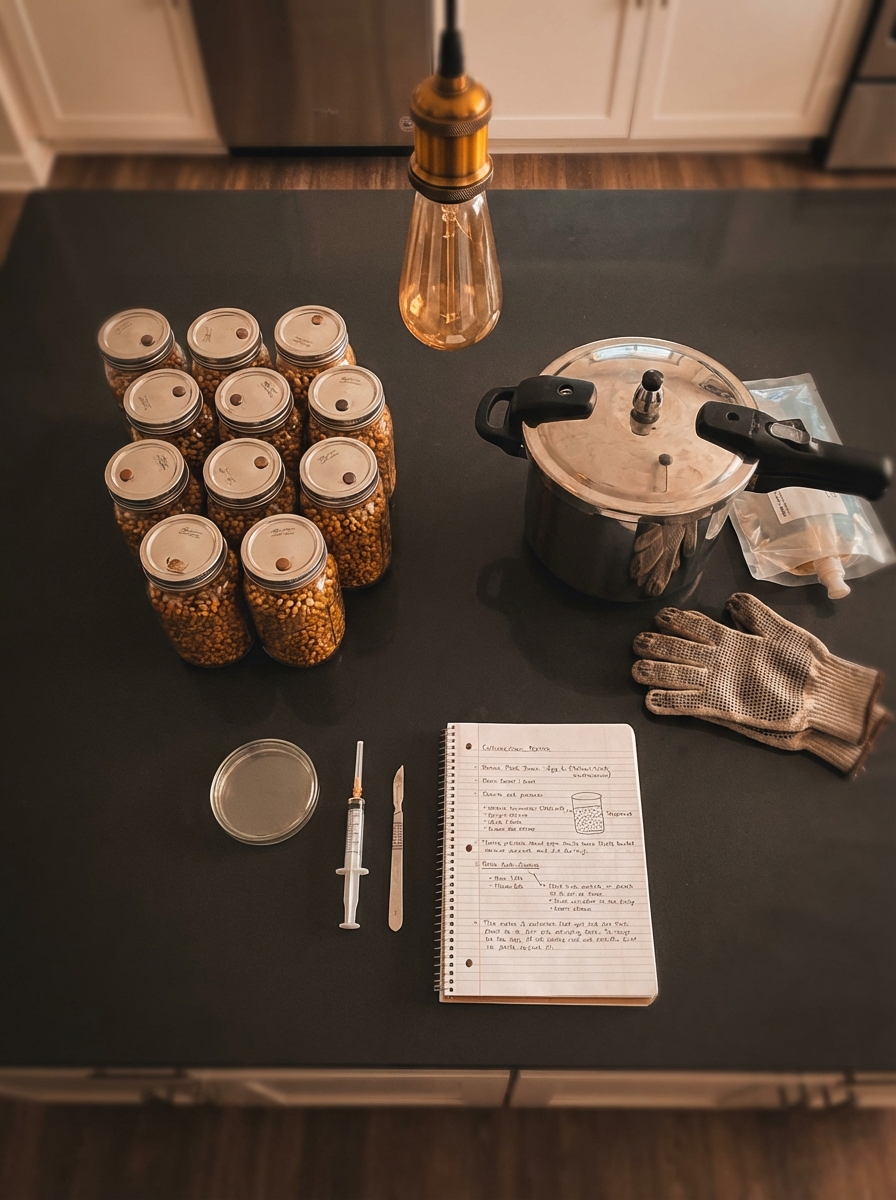
Equipment Needed
- Wild bird seed (10–20 lbs will make many jars)
- Wide-mouth mason jars (quart-size recommended; half-pints work but reduce yield per load)
- Pressure cooker (minimum 8-quart; 16-quart preferred)
- Metal trivet or rack for the pressure cooker bottom
- Heavy-duty foil
- Optional but highly recommended: self-healing injection port lids
Step 1: Rinse
Pour WBS into a large pot or bowl. Add water and agitate vigorously. The water will run dark with chaff, dust, and fine particles. Drain and repeat until the water runs mostly clear — typically 3–5 rinse cycles.
Why it matters: The dark rinse water contains fine particles that would otherwise char in the pressure cooker and become contamination vectors.
Step 2: Soak
After rinsing, cover the WBS with several inches of water and let soak overnight — 8–16 hours. The grains will absorb water and swell.
Don't skip this step: Soaking hydrates the grain evenly from the inside, which supports mycelium growth through the grain rather than just on the surface.
Step 3: Simmer
Drain the soaked WBS. Transfer to a pot and add water to cover. Bring to a simmer (not a rolling boil) and cook for 10–15 minutes. The grains should swell slightly but not burst or split open.
Sunflower seeds: These tend to split easily. Watch for this — some splitting is fine, but seeds split completely open create very wet conditions in the jar.
Visual check: Grain should look plump and slightly translucent. No hard white center when you bite one (though WBS grain is too small to bite — judge by feel).
Step 4: Drain and Dry
This is the most critical step. After simmering, drain thoroughly in a colander. Spread the wet WBS on:
- Clean towels
- Paper towels
- A clean baking sheet lined with foil
Allow to dry, stirring occasionally, until the grain surface is dry but the interior is still moist — typically 20–40 minutes at room temperature.
Field capacity test: Take a small handful and squeeze firmly. The grain should hold together very briefly then crumble when you open your hand. No water should drip or pool. If water drips, continue drying.
Why this matters: Grain that is too wet creates anaerobic (oxygen-poor) conditions in the jar that favor bacteria over mycelium. "Too wet" is the #1 cause of bacterial contamination in grain jars.
Step 5: Fill Jars
Fill mason jars 2/3 to 3/4 full with prepared WBS. Don't pack tightly — loose fill allows steam penetration during sterilization.
Lid preparation:
- Standard lids: Tighten finger-tight, then back off a quarter turn to allow steam movement during sterilization
- Injection port lids: Recommended — silicone plugs allow needle inoculation without opening the jar
Cover jar lids with heavy-duty foil to prevent condensation from entering during cooling.
Step 6: Sterilize
Place jars on a trivet in the pressure cooker. Add 2–4 cups of water. Lock lid and heat on high until pressure vent is releasing steam steadily, then adjust to maintain 15 PSI.
Sterilization time: 90 minutes at 15 PSI for quart jars.
For half-pint jars: 60–75 minutes is sufficient.
After sterilization, turn off heat and allow pressure to drop completely — typically 30–60 minutes. Do not rush cooling.
Step 7: Cool
After pressure releases, remove jars and place on a clean surface away from air currents. Allow to cool for 12–24 hours minimum.
Never inoculate warm jars. Warm jars create condensation when contacted by cooler syringe contents. Condensation = moisture on jar walls = bacteria.
Step 8: Inoculate
In a still air box (or with flow hood):
- Flame sterilize needle until red hot
- Cool 3–5 seconds
- Wipe injection port with 70% isopropyl alcohol
- Inject 1–2 ml of spore solution against the glass wall, not directly into the grain mass
- Inject at multiple points around the jar perimeter to distribute spores
Per jar: 1–2ml of spore syringe is adequate. More is not better — overdosing can introduce too much liquid.
Step 9: Incubate
Place inoculated jars in a warm location: 75–82°F is ideal. Avoid direct light but also don't store in total darkness — ambient light is fine.
Colonization timeline at 78°F:
- Day 3–7: White mycelium spots appear at inoculation points
- Day 7–14: Colonization spreading through grain
- Day 14–21: Jars typically fully colonized
Shake jars at 30–40% colonization to distribute mycelium through uncolonized grain — this speeds the final colonization phase.
Step 10: Verify Before Fruiting
A fully colonized WBS jar will be:
- Entirely white throughout
- Dense — grain clumps together but breaks apart when shaken
- Smelling like fresh mushroom mycelium (not sour, not ammonia)
Signs of contamination: Green, black, yellow, or pink patches. Sour or off smell. Wet slimy appearance. If contaminated, seal the jar in a bag and dispose of it without opening in your grow space.
Moving to Bulk Substrate
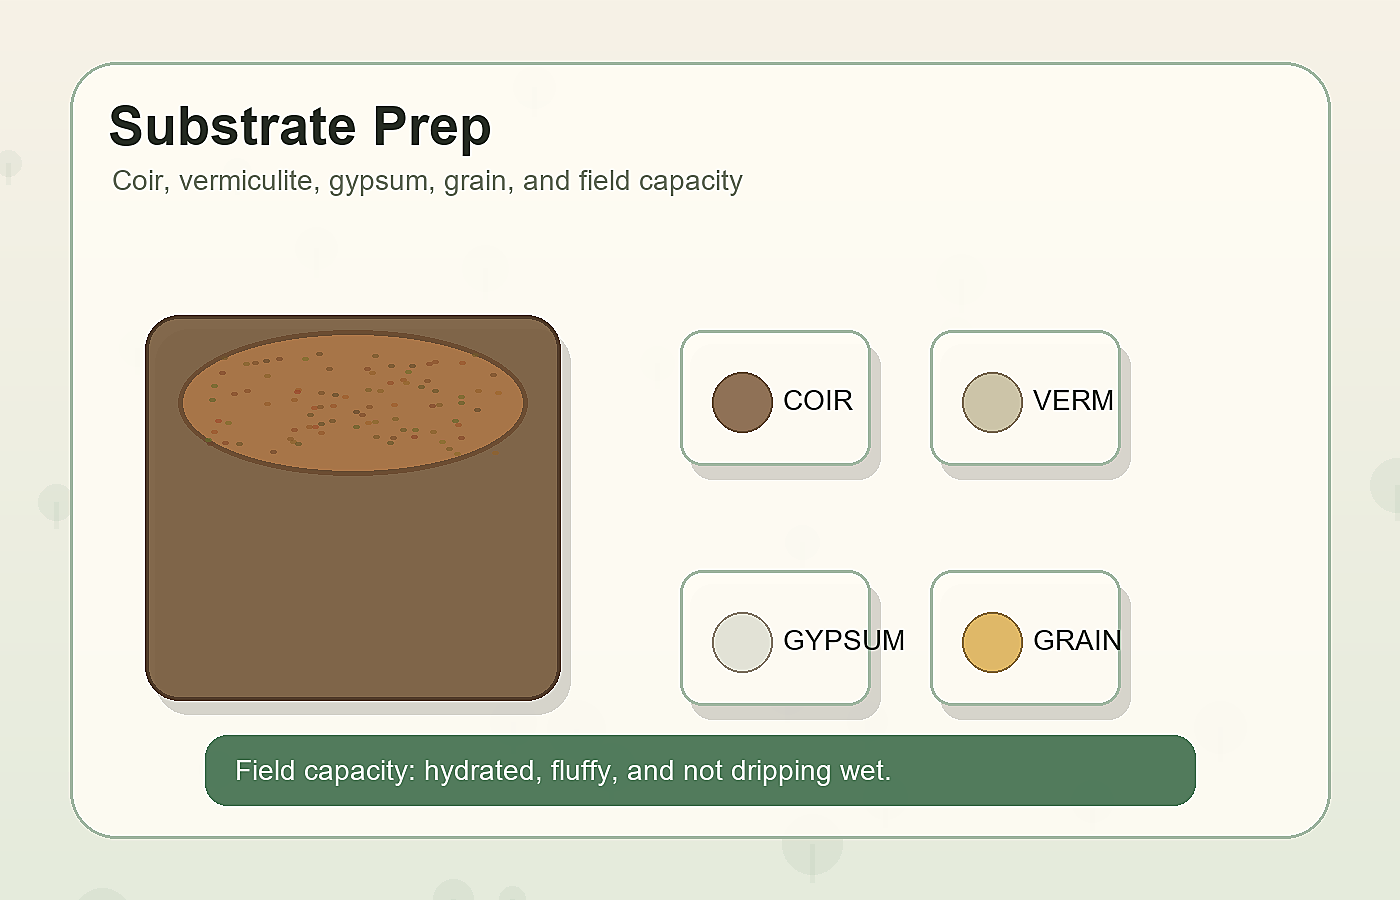
Colonized WBS jars are grain spawn — intermediate substrate, not the final growing medium. To fruit, you'll move the colonized grain into bulk substrate (commonly coco coir and vermiculite 50/50) at approximately 1:4 spawn-to-substrate ratio.
This is the transition from grain spawn to bulk tek (monotub or similar), where the actual fruiting occurs.
Common Problems & Troubleshooting
See the Contamination Guide for common issues.
Tips for Success
Take notes at every stage. Consistency beats perfection.