Making Spore Syringes: A Complete Guide
Everything you need to know about Making Spore Syringes: A Complete Guide — from materials to first harvest.
What You'll Need
- See full supply list in guide below.
Find grow supplies at vendors in our Directory.
Step-by-Step Process
Making Spore Syringes: A Complete Guide
Spore syringes — solutions of mushroom spores in sterile water, dispensed via syringe — are the most common starting point for Psilocybe cubensis cultivation in the United States. You can purchase them from established vendors, but making your own offers significant advantages: control over genetics, freshness, quantity, and cost. This guide covers spore print collection through syringe preparation and storage.
Why Make Your Own Syringes?
Cost: A single spore print can yield dozens of syringes at the cost of sterilized water. Commercial syringes run $10-20 each.
Freshness: Self-made syringes can be prepared immediately after print collection, when spore viability is highest.
Genetic access: Spore prints from your own cultivations preserve specific genetics that may not be available commercially.
Independence: Vendor availability is inconsistent, supply chains can be disrupted, and sourcing spores repeatedly from the same vendor increases paper trail. Self-sufficiency addresses all of these.
Legal Note
Psilocybe cubensis spores do not contain psilocybin — psilocybin is only produced when spores germinate into mycelium. Spores are legal to possess in most US states (California, Idaho, and Georgia are the main exceptions where possession of spores is explicitly illegal). The intent to cultivate spores is illegal everywhere except Oregon, Colorado, and a small number of municipalities. This guide is for educational purposes.
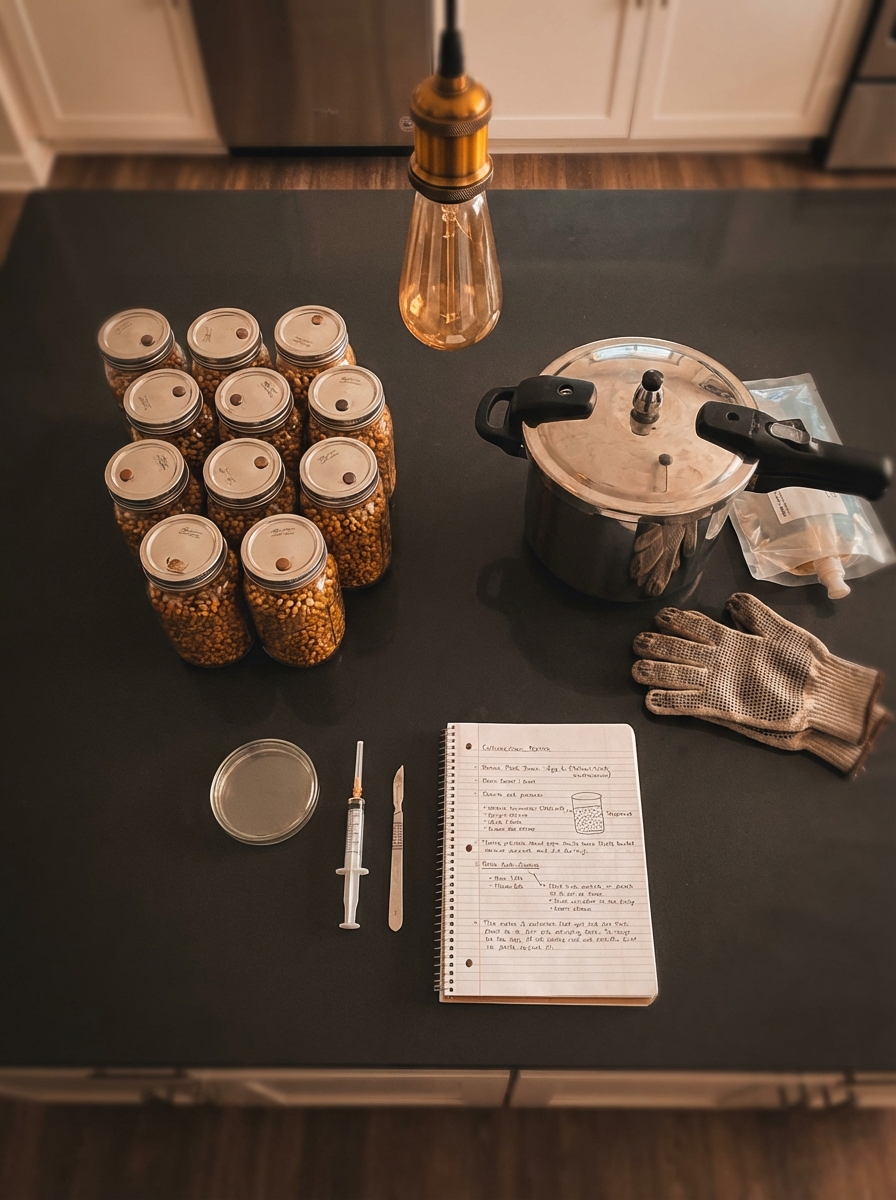
Equipment
For print collection:
- Mature Psilocybe cubensis fruiting bodies (veil recently torn or intact)
- Clean, dry glass jar with lid (for print storage) or aluminum foil
- Isopropyl alcohol (70%) for sterilizing surfaces
- Gloves and a dust mask (optional but recommended; spore inhalation in quantity is worth avoiding)
- Still air box or clean still environment
For syringe preparation:
- Distilled water (not tap — tap water contains chlorine and minerals that affect spore viability)
- Borosilicate glass mason jar (for sterilizing water)
- Pressure cooker
- 10-20ml sterile Luer-lock syringes
- 18-gauge needles
- Alcohol lamp or lighter
- Isopropyl alcohol (70%)
- Still air box or laminar flow hood
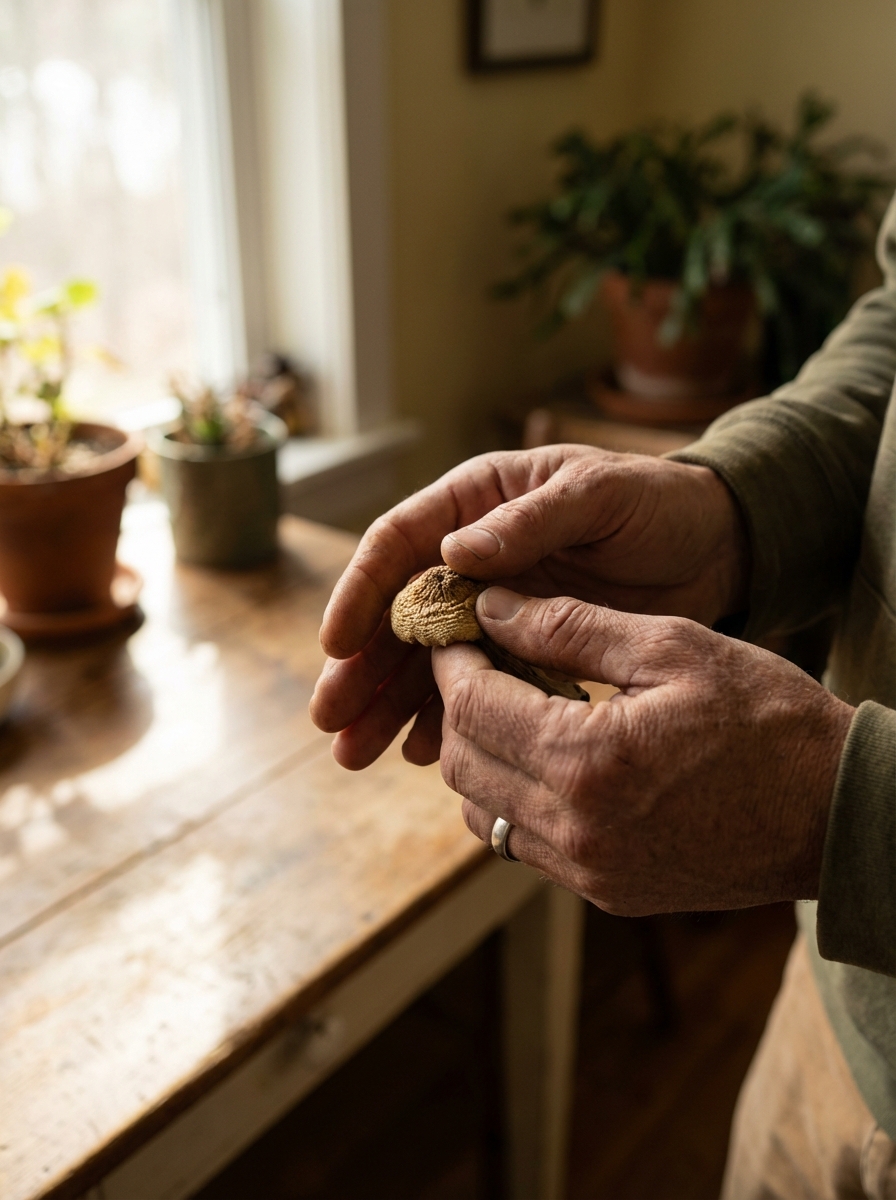
Step 1: Taking a Spore Print
Selecting the Mushroom
The best print specimens are:
- Fully mature: The veil (partial veil connecting cap edge to stem) should be partially or fully torn. A torn veil indicates the cap has opened enough to expose and release spores.
- Healthy: No signs of mold, bacterial contamination, or physical damage
- Dry: Moisture on the cap interferes with print taking
If you're harvesting at the right time (before full veil tear), some spore drops will still occur as the cap opens during print-taking.
Print-Taking Procedure
- Sterilize a clean surface with 70% isopropyl alcohol. Allow to dry.
- Work in a still air box or a still indoor environment with minimal air currents.
- Remove the stem from a mature fruiting body (twist gently at the base).
- Place the cap gill-side down on aluminum foil or in a glass jar lid. Glass-on-glass is cleaner than foil.
- Cover with a clean, dry glass bowl or jar inverted over the cap. This prevents air currents from dispersing spores.
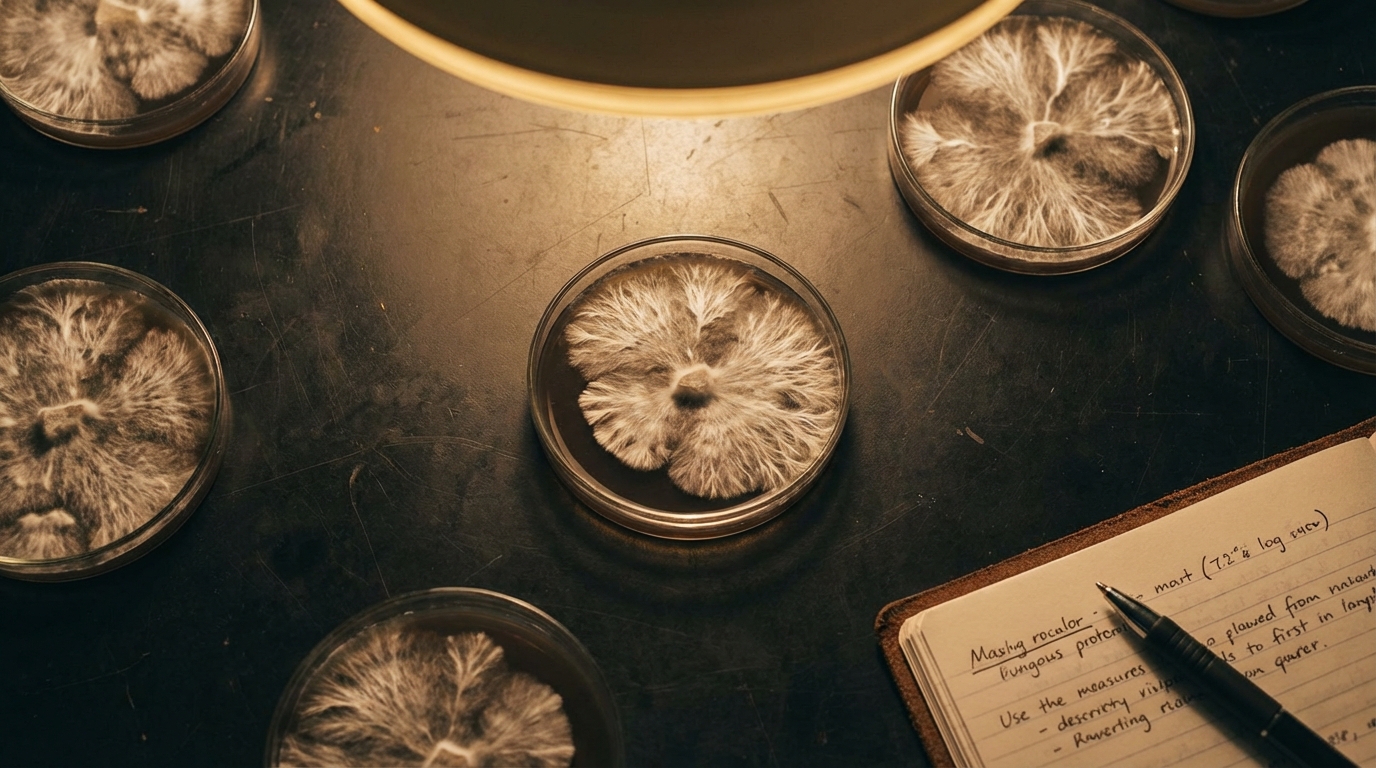
- Wait 12-24 hours. During this time, spores drop from the gills onto the surface.
- Carefully lift the cap. You should see a dark purple-brown spore print in the pattern of the gills.
- Allow the print to dry completely (1-2 hours) before sealing.
- Fold the foil around the print or place on glass directly into a jar and seal.
- Label with strain name and collection date.
Print Storage
Spore prints stored dry, sealed, and away from light retain viability for years. Refrigeration (not freezing) further extends viability. Some cultivators report viable prints after 5-10+ years under proper storage conditions.
Do not store prints in humid environments — moisture initiates germination and dramatically reduces shelf life.
Step 2: Sterilizing Water for Spore Solution
Distilled water must be sterilized before use. Unsterilized water introduces microorganisms that will colonize the syringe along with the spores, producing contaminated inoculant.
Sterilization Procedure
- Fill a mason jar with distilled water (approximately the volume of syringes you plan to fill — 100ml per 10 syringes of 10ml each).
- Loosely cover (don't seal airtight — pressure buildup could break the jar).
- Pressure cook at 15 PSI for 30-45 minutes.
- Allow to cool completely to room temperature before use (minimum 4 hours; overnight is safer).
The sterilized water should be used within 48-72 hours of sterilization. If storing longer, seal properly and refrigerate.
Step 3: Hydrating the Print
Why Hydrate First
Spores must first be transferred into water before syringe preparation. Adding water directly to a print and drawing the result into a syringe is technically possible but risks:
- Incomplete spore suspension
- Introducing air bubbles
- Non-uniform spore density across syringes
Better approach: hydrate the print in a small volume of sterilized water, then distribute equally.
Hydration Procedure
- In your still air box or at a laminar flow hood, sterilize a clean surface.
- Open the sterilized water jar inside the still air box.
- Draw 10-15ml of sterilized water into a sterile syringe.
- Open the spore print and spray or drip the water directly onto the spore print surface. Use all 10-15ml over the print.
- Use a sterile scalpel or glass stirring rod to gently lift and mix the spores into the water.
- Draw the spore-water solution back into the syringe.
- If using multiple prints, combine in the jar and redistribute.
- Immediately cap the syringe and refrigerate for 12-24 hours — the hydration period allows spores to fully rehydrate and distribute evenly.
Step 4: Filling Syringes
Equipment Preparation
Before filling syringes, ensure:
- Syringes are sterile (new, in sealed packaging, or autoclaved)
- Needles are sterile
- All work surfaces are wiped with 70% isopropyl alcohol
- You're working in a still air box or near a laminar flow hood
Filling Procedure
- Attach a sterile needle to the syringe.
- Draw the spore solution up into the syringe, filling to the desired volume (typically 10ml per syringe).
- Remove air bubbles by holding the syringe needle-up and tapping gently.
- Cap the needle.
- Label the syringe with strain name and date.
- Repeat for all syringes.
Spore Density
A good spore syringe should appear slightly cloudy or speckled under light. Very dark or opaque solutions are overly dense (spore clumping can impede germination); clear or nearly clear solutions may be too dilute.
The target density: you should be able to see individual specks or a slight cloudiness when the solution is backlit — not completely clear, not opaque.
Step 5: Storage
Short-Term (Up to 6 Months)
Refrigerate at 35-40°F (2-4°C). Do not freeze standard spore syringes — freezing without a cryoprotectant (glycerol) damages spore cell walls.
Cold storage slows any microbial activity and maintains spore viability. A properly prepared, refrigerated syringe typically remains viable for 6-12 months.
Long-Term
For very long-term storage, a spore print (properly sealed and dry) outlasts syringes significantly. Keep a master print in a sealed container in the refrigerator; make fresh syringes from it as needed rather than storing large numbers of pre-made syringes.
Quality Testing
Before using syringes for an important grow, test viability:
- Inoculate one grain jar per syringe batch
- Observe for germination at 5-10 days
- Visible white mycelium within 14 days confirms viable spores
If you see no germination at 14 days, the spores may be non-viable (damaged, too old) or the strain may be a poor colonizer. Test the syringe against a known-good agar plate for more definitive germination assessment.
Troubleshooting
Syringe turns green or develops visible mold: Contamination during preparation. Discard and sterilize all equipment thoroughly before repeating.
No germination on grain test: Try agar plate — some strains germinate slowly on grain but readily on agar. If no germination on agar either, spores are likely non-viable.
Spores settling and clumping: Normal over time. Shake well before use. Clumping doesn't indicate non-viability.
Syringe appears completely clear: Too dilute or the print was old and non-viable. More common with aged prints (5+ years in imperfect storage). Test on agar before abandoning.
Common Problems & Troubleshooting
See the Contamination Guide for common issues.
Tips for Success
Take notes at every stage. Consistency beats perfection.