Advanced Monotub Techniques: Optimizing Your Grow
Everything you need to know about Advanced Monotub Techniques: Optimizing Your Grow — from materials to first harvest.

What You'll Need
- See full supply list in guide below.
Find grow supplies at vendors in our Directory.
Step-by-Step Process
Advanced Monotub Techniques: Optimizing Your Grow

The monotub method — colonizing and fruiting substrate in a single, sealed or semi-sealed tote — is the most popular bulk cultivation technique among home growers. Basic monotub technique is straightforward, but experienced cultivators have developed numerous refinements that consistently produce higher yields, larger fruits, and more flushes per tub. This guide covers advanced techniques for growers who have mastered the fundamentals.
The Foundation: Understanding What Drives Yield
Before optimizing, understand the variables that most influence monotub yield:
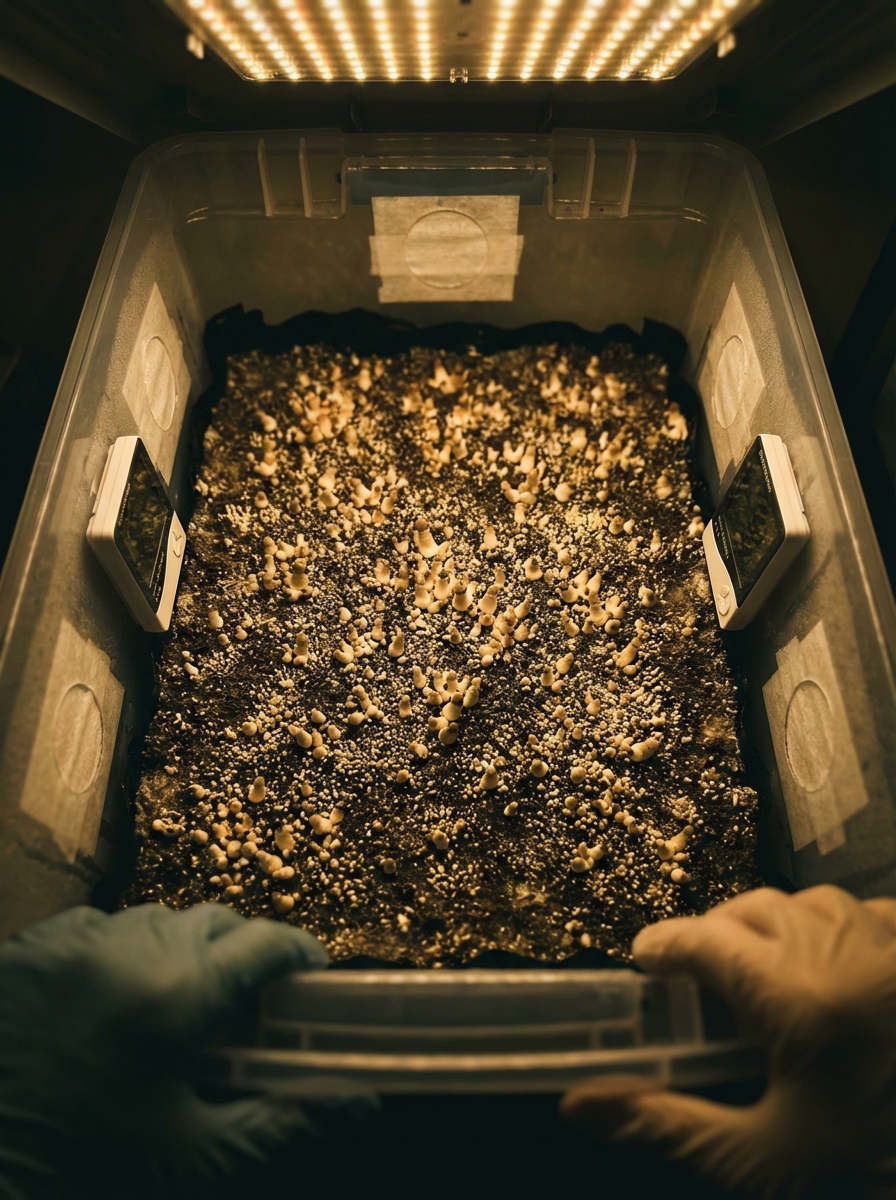
Colonization quality: Fully colonized, heavily pinned substrate produces more than partially colonized substrate rushed to fruiting. Complete colonization and then wait for consolidation — the period after colonization when the mycelium strengthens before pinning begins.
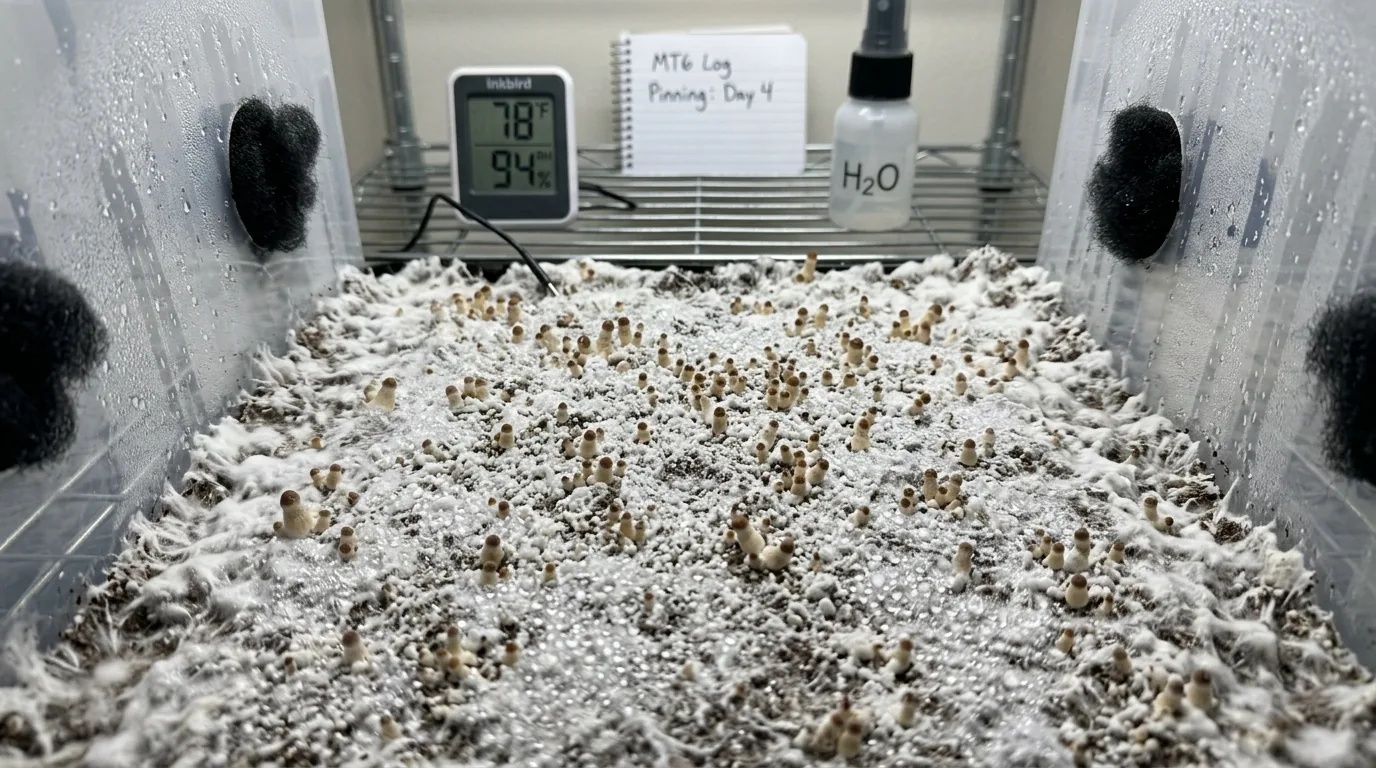
Environmental consistency: Psilocybe cubensis is sensitive to fluctuations. Consistent temperature (75-80°F colonization, 70-75°F fruiting), consistent humidity (90-95% relative humidity during fruiting), and consistent fresh air exchange matter more than any single optimization.
Substrate water content: Field capacity — moist enough that a handful produces only one or two drops when squeezed hard — is the target. Too dry: poor yield. Too wet: increased anaerobic contamination risk.
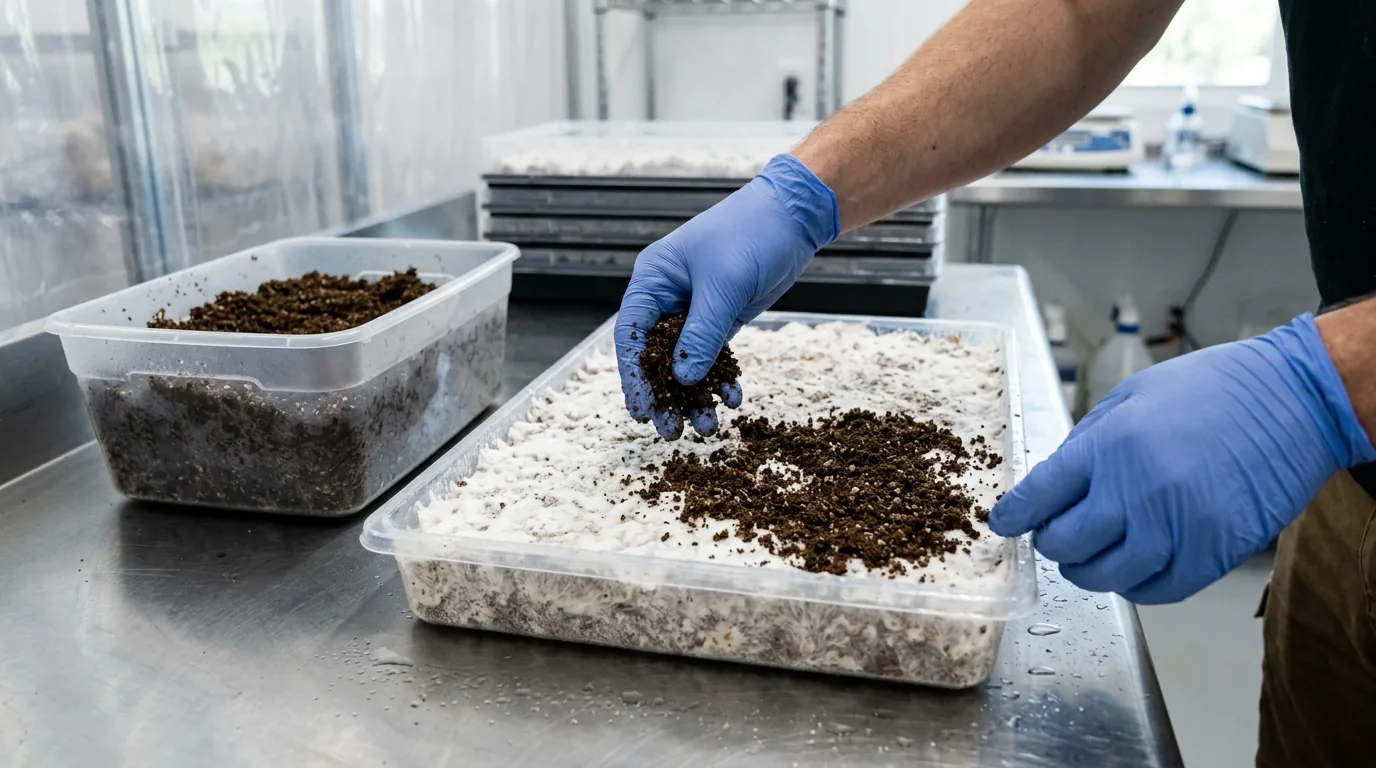
Substrate Optimization
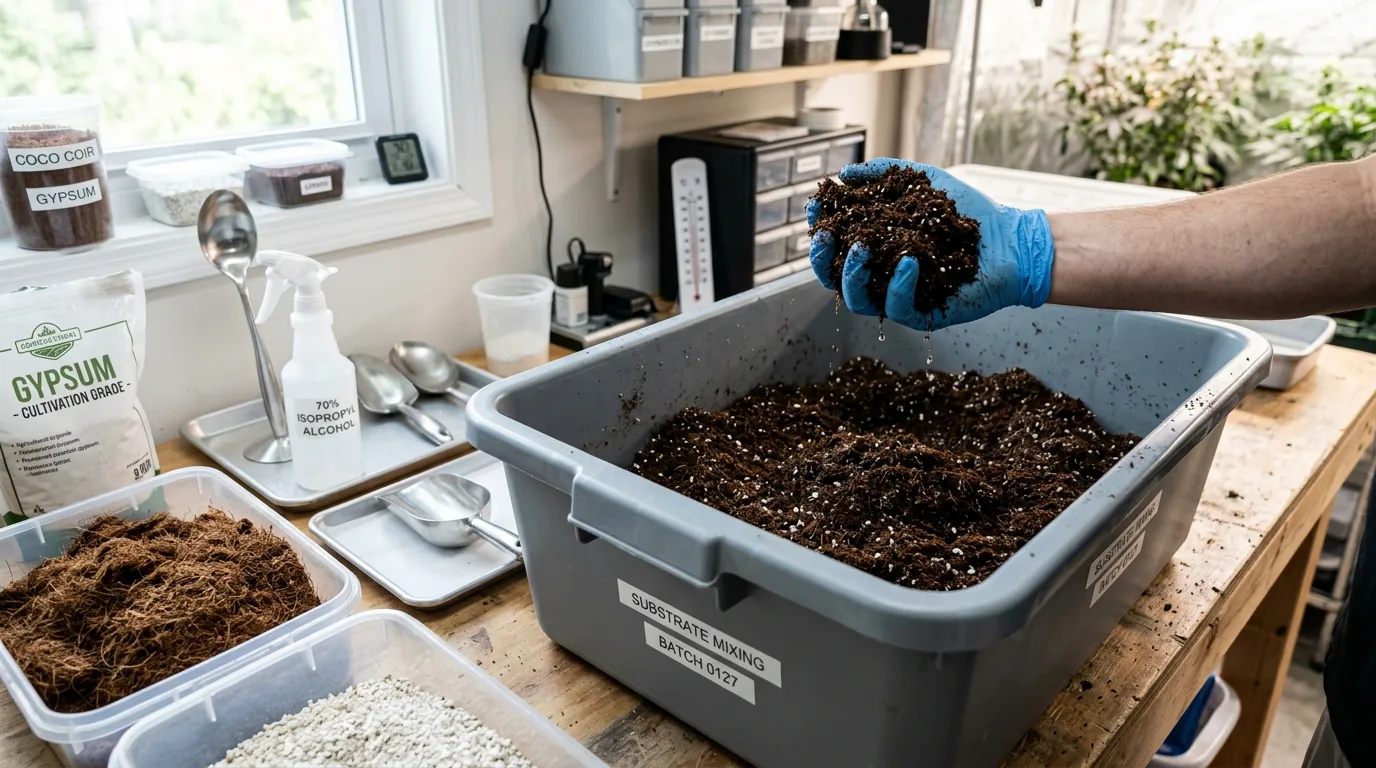
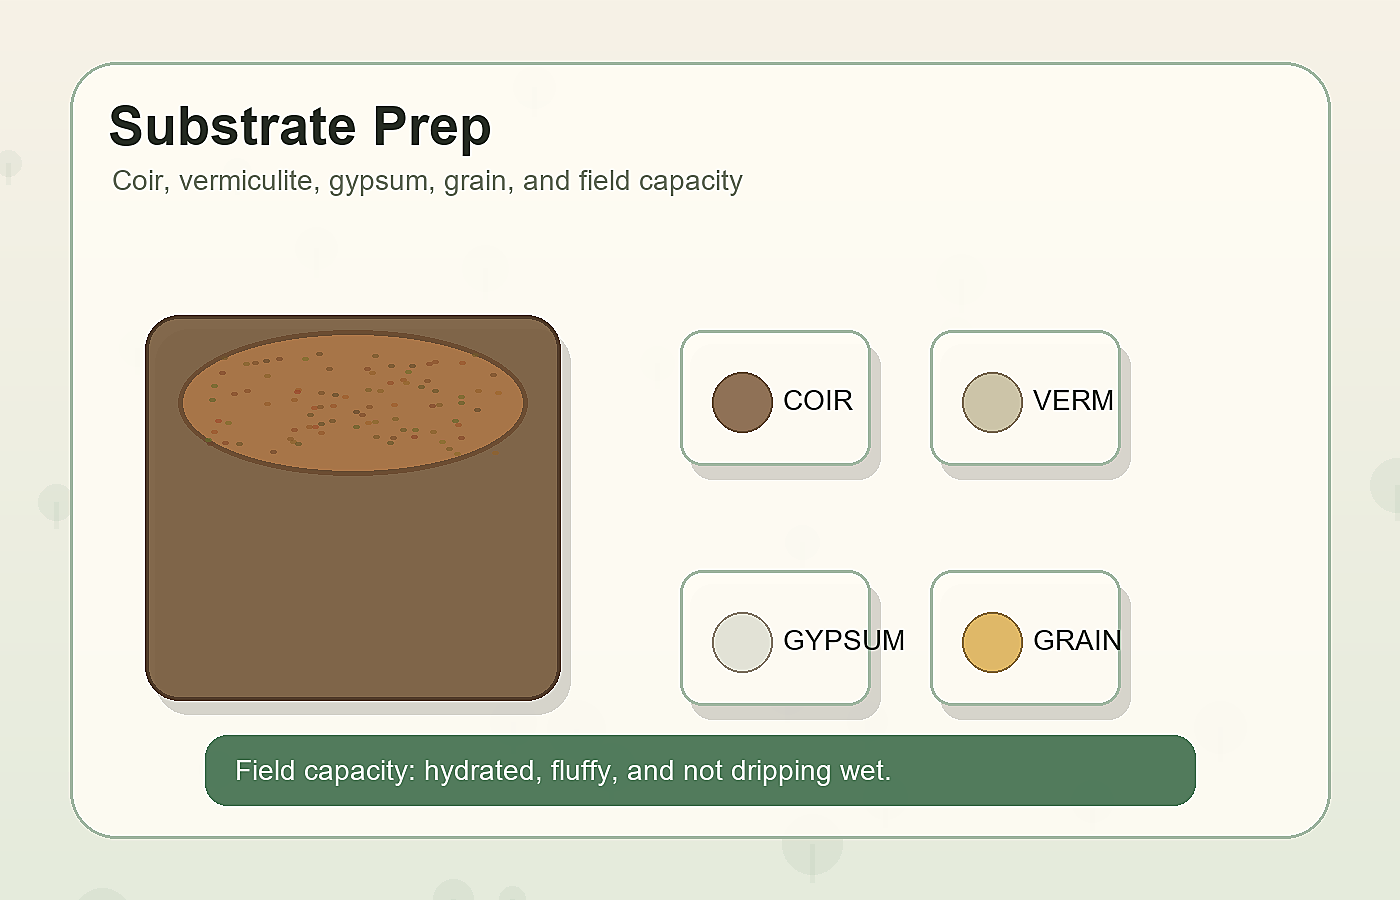
Coco Coir and Vermiculite Ratios
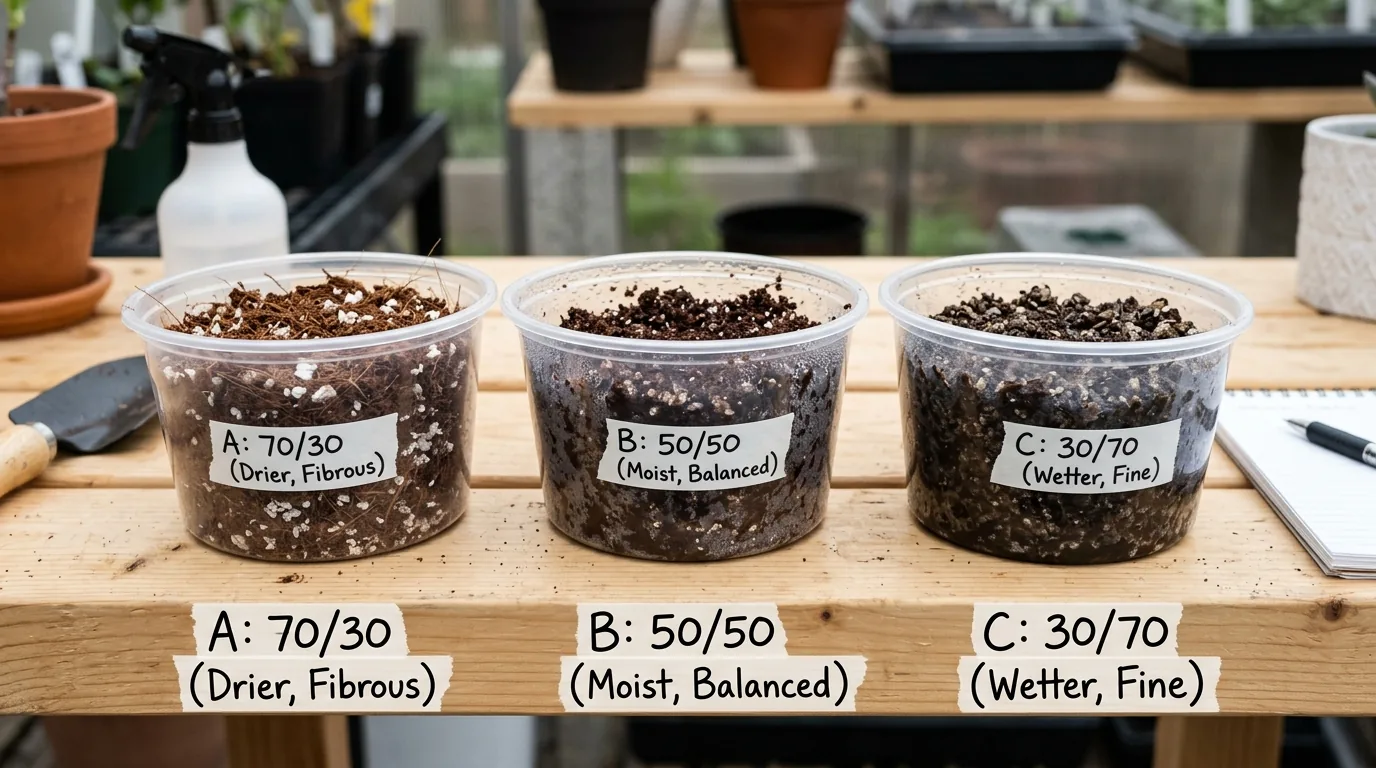
Standard BRF-based bulk substrates are increasingly supplemented or replaced by coco coir/vermiculite (CVG) mixes. The CVG ratio affects both water retention and structure:
High-verm mix (70:30 CVG:verm): More crumbly, faster drying, better drainage. Good for humid climates or growers who tend to overwater.
Standard (50:50): The most common starting point. Reliable across conditions.
High-coir mix (70:30 coir:verm): Retains more moisture, produces denser substrate. Better for dry climates.
Adding gypsum: 1-2% agricultural gypsum (calcium sulfate) added to CVG substrate improves structure, prevents compaction, and provides calcium that mycelium uses. 1 tablespoon per quart of substrate is a common ratio.
Grain-to-Bulk Ratios
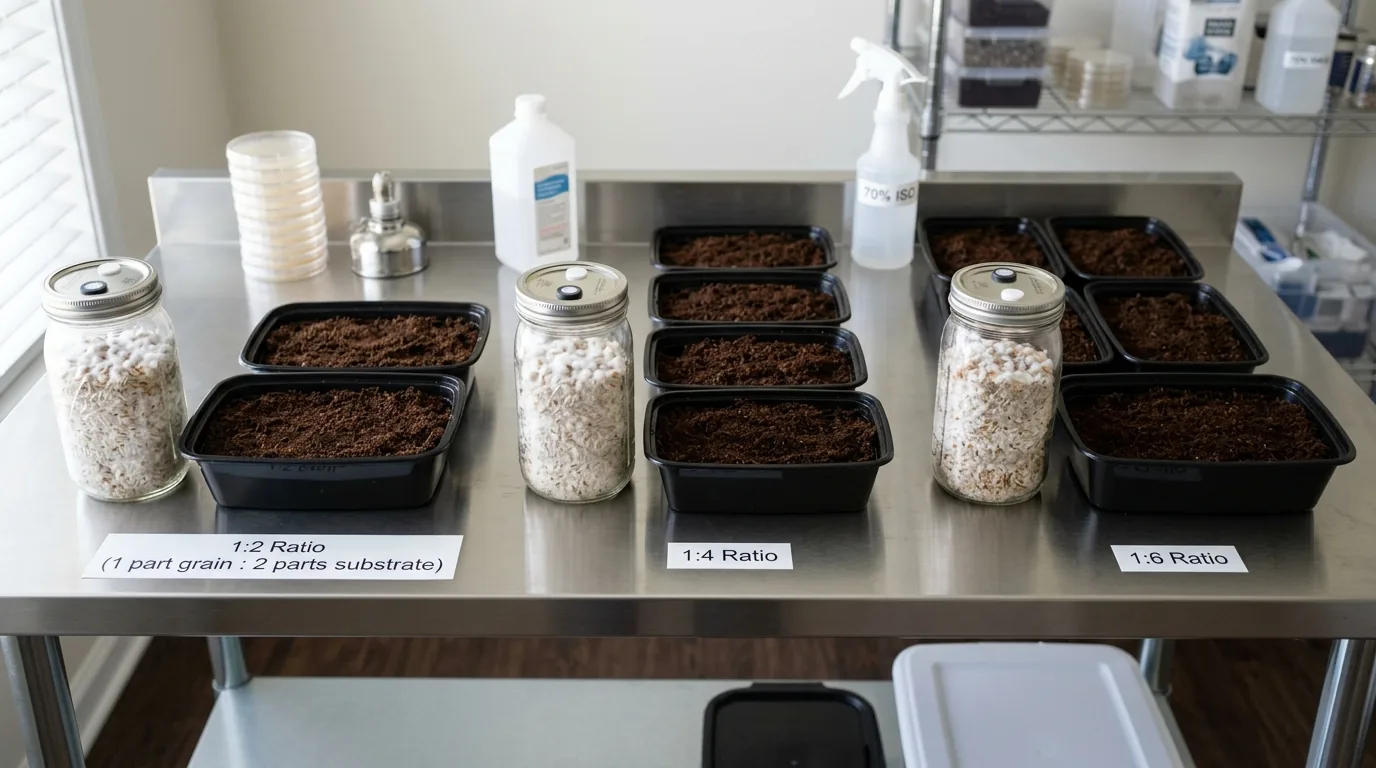
The ratio of colonized grain spawn to bulk substrate significantly affects colonization speed and contamination risk:
Standard (1:4 grain:bulk): Reliable, lower contamination risk due to low grain nutrient load in the mix.
Aggressive (1:2 or 1:3 grain:bulk): Faster colonization, more robust mycelium network in the bulk. Higher contamination risk if not using impeccably clean materials.
Layer mixing vs. thorough mixing: Some cultivators mix grain and bulk thoroughly (faster colonization); others layer grain under or between bulk substrate (slower but reduced contamination risk from open mixing).
Pinning Optimization
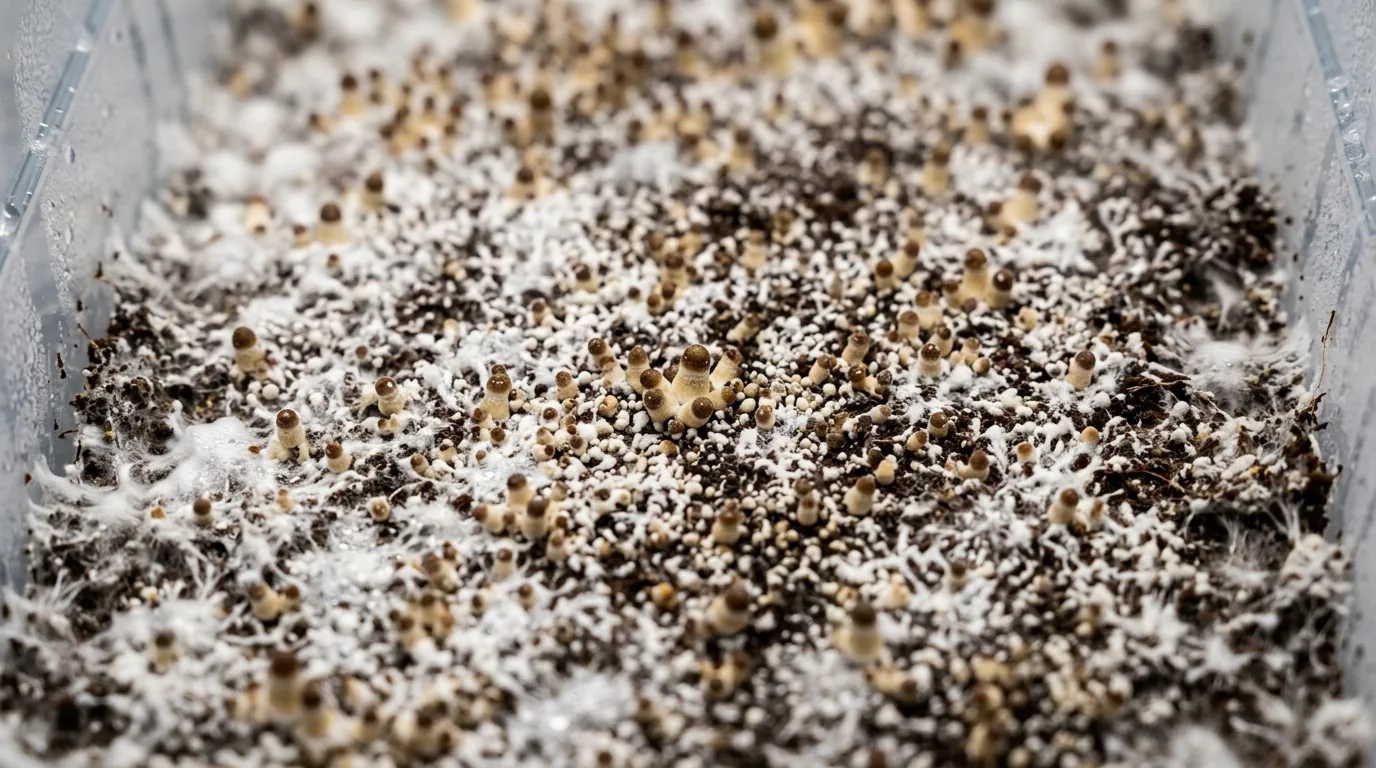
The Consolidation Wait

After full colonization is visible, wait an additional 3-7 days before initiating fruiting conditions. During consolidation, the mycelium strengthens the substrate network, develops rhizomorphic growth patterns, and deposits metabolic reserves that will feed fruiting body development. Rushing to fruiting before consolidation is complete is a common cause of sparse pinning.
Consolidation indicators:
- Mycelium changes from rope-like (rhizomorphic) growth to a solid white mat
- The surface may develop a slight blue-green cast (oxidation — normal)
- The tub feels lighter as the substrate stabilizes
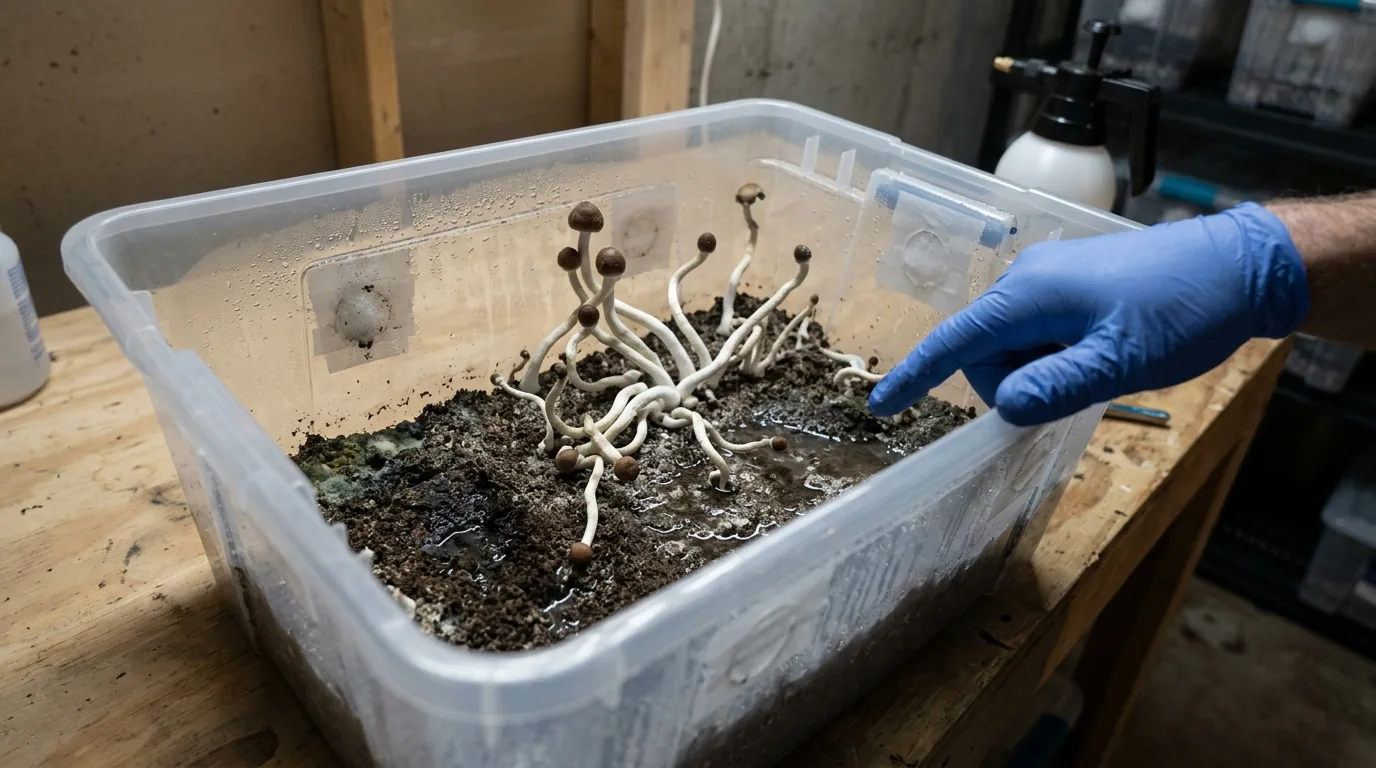
Pinset Initiation Techniques
Cold shocking: Moving the tub to a colder environment (10-15°F cooler than colonization temperature) for 12-24 hours triggers fruiting initiation. A refrigerator (not freezer) works well. Return to fruiting temperature after the cold shock.
FAE bump: Dramatically increasing fresh air exchange (opening the tub fully for 15 minutes, then resuming normal FAE) simulates an environmental change that triggers pinning.
Light exposure: Mycelium uses light as a directional cue, not as an energy source. Even indirect ambient light (12 hours light/12 hours dark) signals the direction pins should grow toward. Orient your lighting so pins grow upward rather than sideways.
Wetting the surface: Some growers spray the top casing layer (or the substrate surface in uncased monotubs) with clean water to simulate rain — a natural pinning trigger for Psilocybe in the wild.
Casing Layer Techniques
Adding a thin casing layer (0.5-1cm) of plain hydrated vermiculite, coco coir, or moist peat moss on top of the colonized bulk substrate provides:
- A pin-initiating interface (many Psilocybe species pin most readily at the substrate/air interface)
- A moisture reservoir that prevents the top of the substrate from drying between mistings
- A buffer against direct environmental disruption
Field capacity casing preparation: Hydrate casing material to field capacity before applying. Dry casing will pull moisture from the colonized substrate; oversaturated casing risks anaerobic contamination.
Fruiting Chamber Environment: Advanced Control
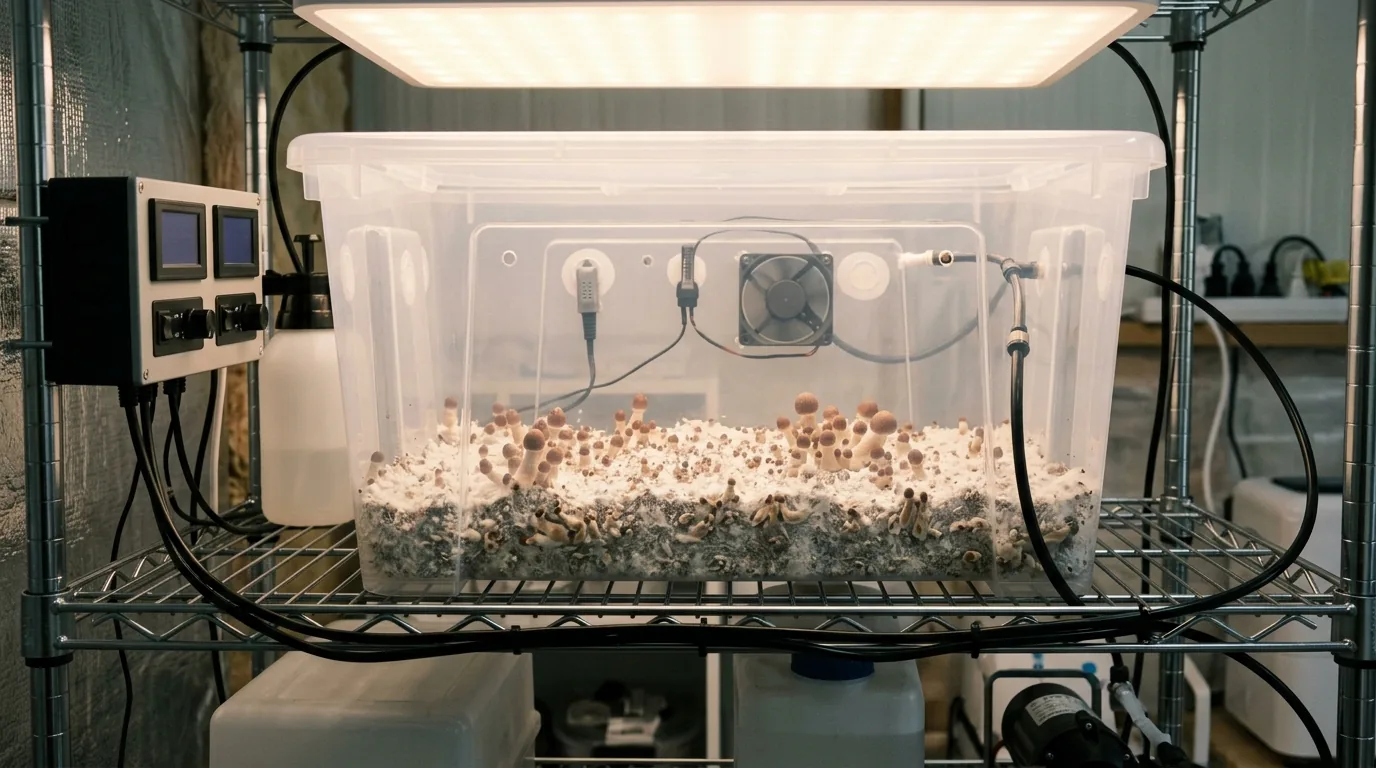
Temperature Gradients
A 5°F temperature difference between the bottom (warmer) and top (cooler) of the tub can encourage pins to form at the top surface — where the fruiting bodies are most accessible. A heat mat under the tub, combined with a cooler ambient room temperature, achieves this gradient.
Caution: Heat mats under substrate can also create hot spots that damage mycelium. Keep the mat on a low setting and monitor with a probe thermometer.
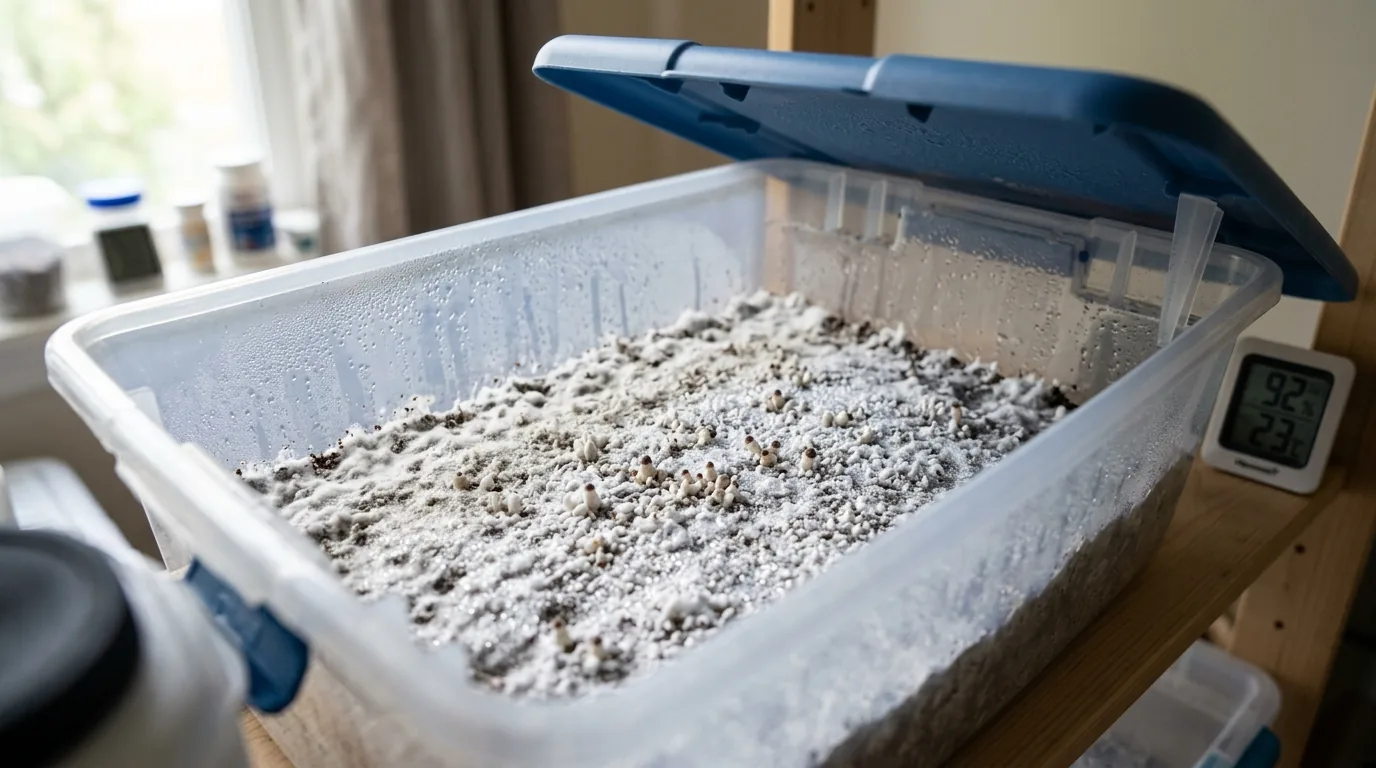
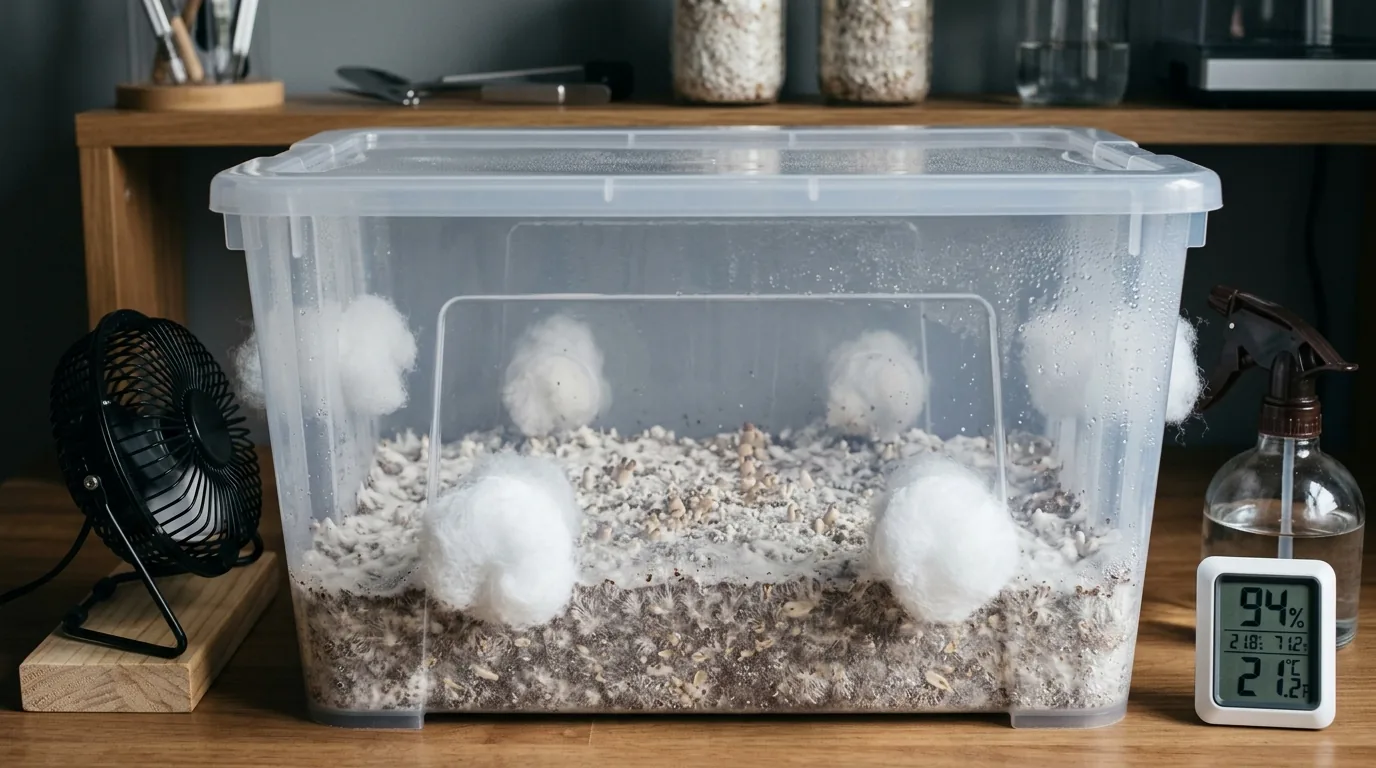
Humidity Maintenance

The difference between 85% and 95% relative humidity is substantial for pinning density and abort rate:
- Below 85%: Pinning may not initiate; fruit bodies abort during development
- 85-90%: Adequate for most grows
- 90-95%: Optimal for most Psilocybe cubensis strains
- Above 95%: Risk of bacterial wet rot, stem elongation without cap development
Measuring humidity: Hygrometers are inexpensive and essential. Digital probe hygrometers are more accurate than analog dial types.
Maintaining humidity without over-misting:
- Mist the walls and airspace of the fruiting chamber rather than directly on the substrate surface
- A wet paper towel on the substrate surface (replaced when dry) maintains surface humidity without waterlogging
- In dry climates, automated ultrasonic humidifiers with a controller maintain more consistent humidity than manual misting
Fresh Air Exchange Calibration
FAE requirements are higher than most new growers expect:
- Too little FAE: CO2 buildup causes stem elongation (tall, thin fruits), reduced cap size, and poor development
- Too much FAE: Rapid drying that prevents pinning and damages developing fruits
Optimal FAE protocol: 3-5 short periods of fresh air exchange per day — either from fan bursts (15-30 seconds) or manual fanning. The goal is CO2 dilution, not constant airflow.
FAE and humidity balance: Each FAE event drops relative humidity. The timing of misting and FAE should be coordinated — mist, then fan, rather than fanning immediately before misting.
Harvest Timing and Post-Harvest Management
Optimal Harvest Window
Harvest just before or as the veil (the membrane connecting cap to stem) begins to tear — typically when caps are 50-75% open. The flush of blue coloration (bruising) that occurs after harvest is normal and doesn't affect potency.
Why harvest before veil break: Psilocybin concentration peaks before sporulation begins. After the veil breaks, spores release (blue to purple-black drop), which stains the substrate and can reduce subsequent flush yields. Sporulation also signals the mycelium to shift energy from psilocybin production to spore dispersal.
Post-Harvest Substrate Recovery
After each flush:
- Remove all aborts and partial fruits: These will mold if left on the substrate and spread contamination.
- Rest and rehydrate: Allow the substrate to dry slightly (FAE without misting for 24 hours), then rehydrate by pouring cold clean water over the substrate and draining the excess after 30-60 minutes. This "flood and drain" technique replenishes moisture depleted during fruiting.
- Consolidation period: Wait 5-7 days at colonization temperature before resuming fruiting conditions. This allows the mycelium network to recover.
Multi-Flush Yields
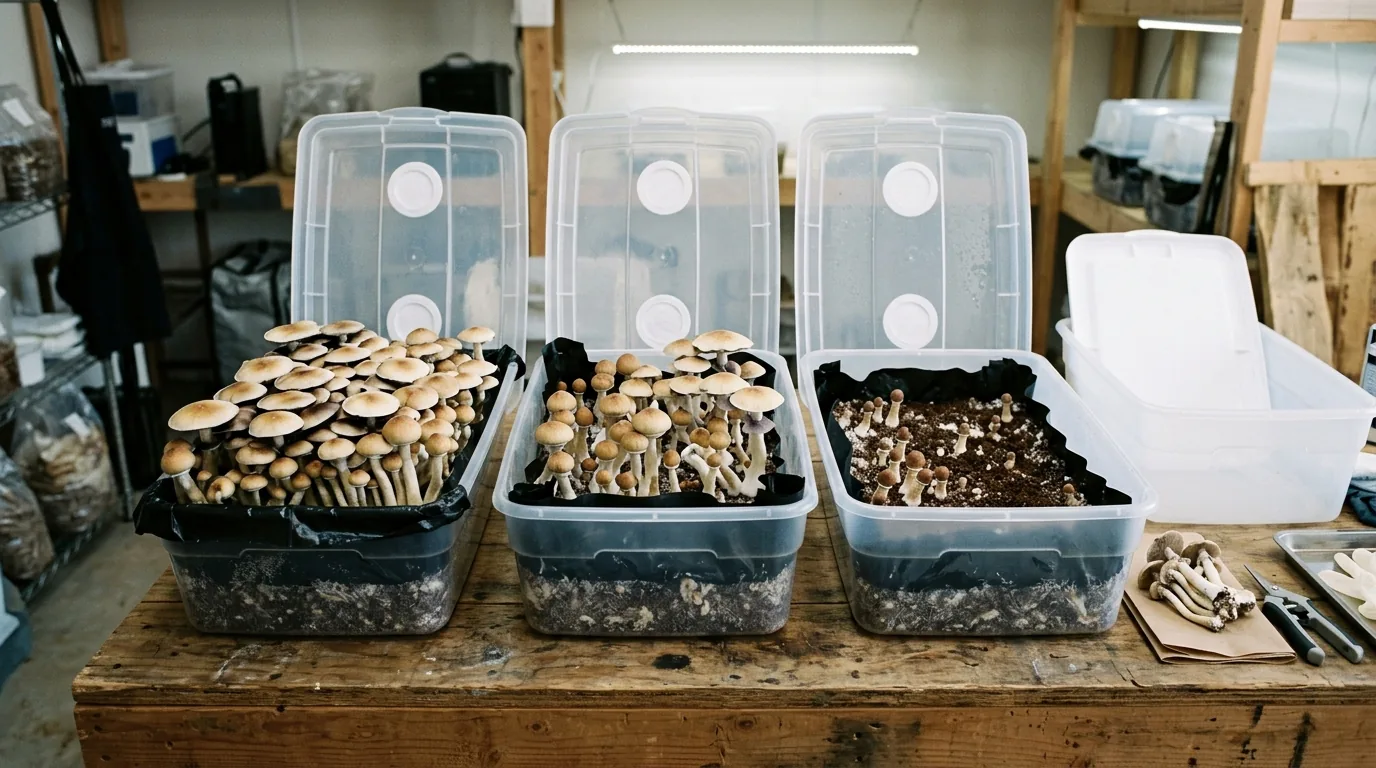
Well-managed monotubs typically produce 3-5 flushes, with the first and second flush being the most productive. Yields commonly drop after flush 3 as the substrate depletes.
Substrate depletion indicators: Substrate darkens (brown/grey rather than white); pins take longer to initiate; abort rates increase; fruits are smaller.
After substrate depletion, the spent substrate can be composted or used as garden amendment.
Common Advanced Mistakes

Pinning too early: Starting fruiting conditions before full consolidation produces sparse, uneven pins.
Over-misting: Direct misting on developing fruit bodies causes bacterial rot. Mist the walls, not the fruits.
Inconsistent temperature: Even 5°F temperature swings during fruiting can abort pins mid-development.
Ignoring CO2: In sealed or poorly ventilated setups, CO2 accumulation causes the characteristic "leggy" fruits — tall stems with small, underdeveloped caps — even when all other conditions are correct.
Not removing aborts: A single rotting abort introduces bacterial or mold inoculation that can compromise subsequent flushes.
Common Problems & Troubleshooting
See the Contamination Guide for common issues.
Tips for Success
Take notes at every stage. Consistency beats perfection.