Uncle Ben's Tek
Everything you need to know about Uncle Ben's Tek — from materials to first harvest.
What You'll Need
- See full supply list in guide below.
Find grow supplies at vendors in our Directory.
Step-by-Step Process
Uncle Ben's Tek: The Easiest Path to First Fruits
Uncle Ben's Tek (UB Tek) is arguably the simplest method for growing Psilocybe cubensis that produces reliable results. It requires no pressure cooker, no grain spawn preparation, and no mixing of substrate — the entire grain substrate comes pre-sterilized and ready to inoculate inside the retail bag. The technique exploits the already-pasteurized Uncle Ben's Ready Rice packets (or equivalent), which can be inoculated directly after a simple flame-sterilized needle puncture.
This method trades yield-per-harvest for simplicity. A single UB pouch yields 1–4g of dry mushrooms on average, but with zero prep time and minimal equipment, it's the method most likely to result in actual fruiting mushrooms for a first-time grower.
Why Uncle Ben's Works
Ready Rice pouches are:
- Pre-cooked and pasteurized — the manufacturing process eliminates competing organisms
- Sealed and airtight — the packaging prevents recontamination until you open it
- Nutritionally appropriate — cooked brown rice provides carbohydrates and moisture at roughly the right field capacity for mycelium colonization
- Widely available — sold at every grocery store; the brown rice variety is preferred
The mycelium colonizes the rice grains from the inoculation point and gradually takes over the whole bag. Because the grain is already hydrated and structured, no pre-processing is needed.
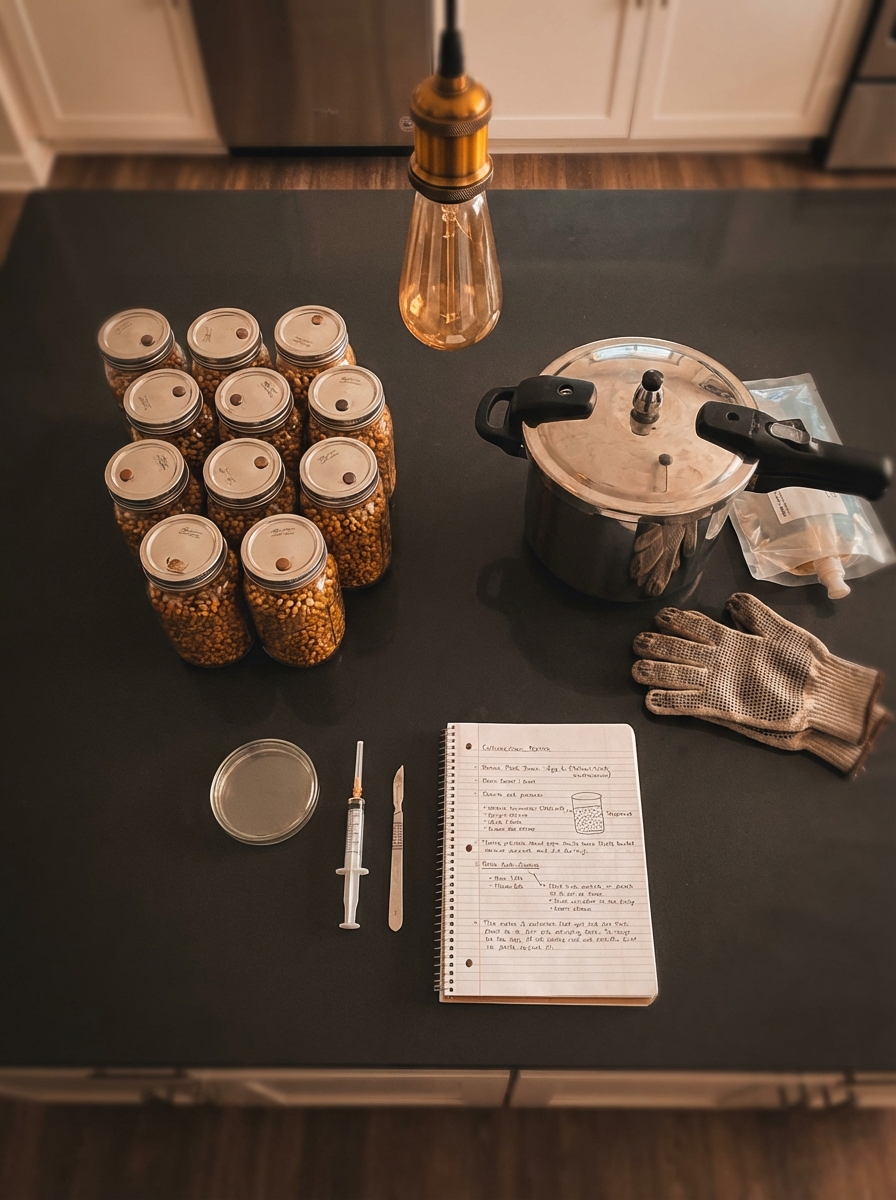
What You Need
Equipment
- Spore syringe — from a reputable vendor; 10–12mL is standard
- Alcohol lamp or butane lighter — for sterilizing the needle
- Isopropyl alcohol (70%) — for wiping the injection site
- Micropore tape (surgical tape) — to cover injection holes after inoculation
- Latex or nitrile gloves
- Surgical mask — optional but reduces contamination from breath
- Clear plastic storage tote — for fruiting chamber (optional for early fruits, required for bulk)
Substrate
- Uncle Ben's Ready Rice — Brown Rice variety (90-second pouches)
- Jasmine and whole grain varieties also work
- Avoid flavored or seasoned varieties
One syringe typically inoculates 6–8 pouches. Buy in a 6-pack or 12-pack.
Step 1: Inoculation
Flame Sterilize the Needle
- Hold the needle in the flame of your lighter for 5–10 seconds until the metal glows red.
- Let it cool for 5 seconds — do not blow on it or wave it, just let it cool in still air.
- Pull back the plunger slightly to draw a small bubble of air into the syringe — this breaks the suction and prevents spore solution from dripping.
Prepare the Pouch
- Put on gloves. Wipe the outside of the pouch with an isopropyl-soaked paper towel, focusing on the corner seam area where you'll inject.
- Identify the corner seam. The thick border seam is strong enough to receive a needle without tearing.
Inject
- Push the needle through the corner seam of the pouch at a 45-degree angle.
- Inject 1–2mL of spore solution. You do not need much — more is not better, and excess moisture can cause problems.
- Withdraw the needle.
- Immediately cover the injection point with a small piece of micropore tape. This tape is breathable (allows gas exchange) but blocks contaminants.
Repeat
Repeat for all pouches. Re-flame the needle between each pouch or at minimum between different spore syringes.
Step 2: Colonization
Environment
- Place inoculated pouches upright in a warm location (75–80°F / 24–27°C is ideal)
- Avoid direct sunlight — a shelf, closet, or drawer works
- Do not open the pouches during colonization
- No light is needed during this phase
Timeline
| Days After Inoculation | Expected Observation | |------------------------|----------------------| | 0–5 | No visible growth — mycelium establishing | | 5–10 | White fuzz or threads visible at injection site | | 10–21 | White mycelium spreading through the rice | | 21–30 | Full colonization — pouch turns entirely white |
Fully colonized pouches look solid white throughout. Healthy mycelium is bright white and rope-like. Any green, black, gray, or pink patches indicate contamination — those pouches should be discarded outside in a sealed bag.
Consolidation
After full colonization, let the colonized pouches sit an additional 7 days at room temperature without opening. This "consolidation" phase allows the mycelium to strengthen and improves fruiting rates.
Step 3: Initiating Fruiting
After colonization and consolidation, the mycelium needs environmental cues — fresh air, humidity, and a temperature drop — to produce mushrooms.
Method A: Fruit in the Bag (Easiest)
- Open the top of the colonized pouch by tearing or cutting off the top inch.
- Fan the opening 3–4 times to introduce fresh air.
- Mist the surface lightly with filtered or distilled water in a spray bottle — just enough to see droplets on the surface, not pooling water.
- Cover the opening loosely with a single sheet of dry paper towel or a piece of loosely draped plastic bag — not sealed, just resting.
- Place in a brighter location (indirect light or 12h/day light cycle).
Method B: Shotgun Fruiting Chamber (Higher Yield)
For maximum yield, birth (remove) the colonized rice cake from the bag:
- Open the pouch from the top or side and gently tear the bag away from the cake.
- Dunk the cake in cold water for 12–24 hours to rehydrate.
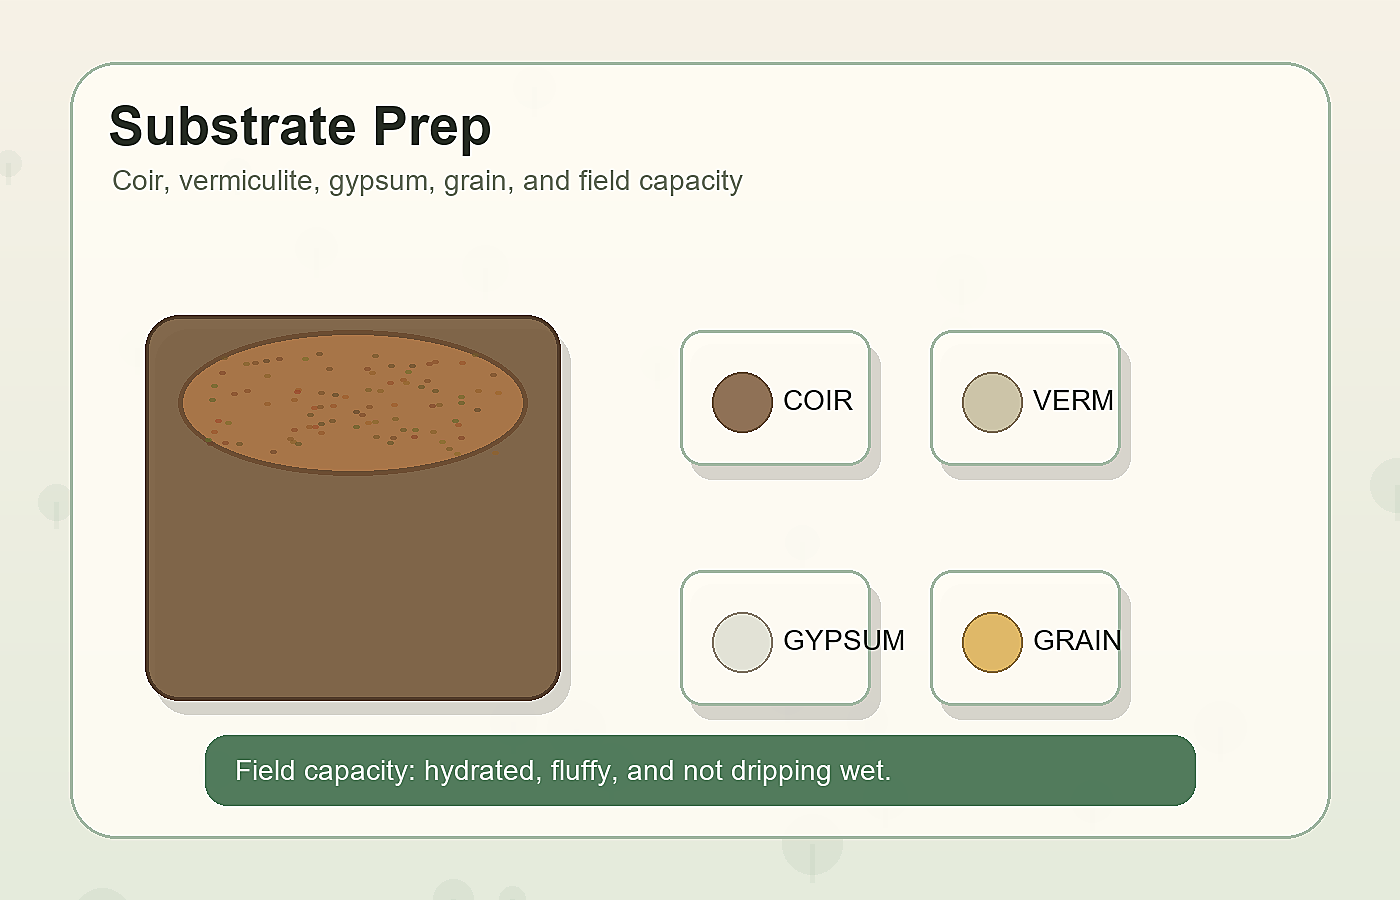
- Roll the wet cake in dry vermiculite (like rolling a ball in sand) — this creates a moisture reservoir on the surface.
- Place in a shotgun fruiting chamber (a plastic tote with holes drilled on all sides, filled with perlite humidified by misting).
Step 4: Fruiting and Harvest
Signs of Fruiting
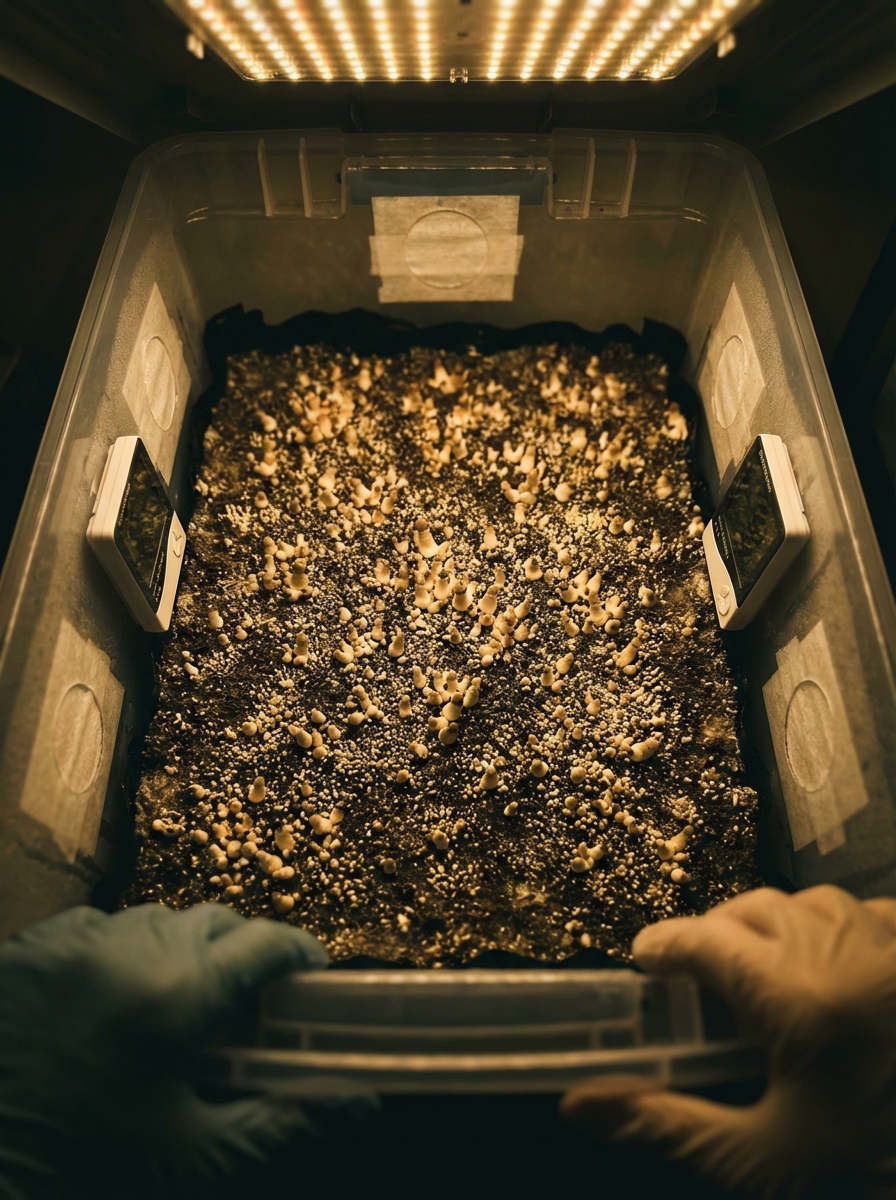
Within 3–10 days of initiating fruiting, you should see:
- Small white or yellow bumps (pins) forming on the surface
- Pins elongating into recognizable mushroom shapes over 3–7 days
Harvest Timing
Harvest immediately before or just as the veil underneath the cap tears. Once the veil tears, the mushroom drops spores which coat everything in a dark purple-brown powder and make subsequent flushes more susceptible to contamination.
To harvest: grip the base of the mushroom firmly near the substrate and twist gently while pulling upward. The mushroom should release cleanly. Do not leave stub ends in the substrate.
Multiple Flushes
After the first harvest:
- Remove any dead pins or leftover stem bases — they mold quickly
- Mist lightly and fan
- Repeat fruiting conditions
Expect 2–3 flushes from a UB pouch. Yield decreases with each flush. Total dry weight per pouch typically ranges from 1–5g depending on strain and conditions.
Drying and Storage
Fresh mushrooms are 90%+ water. They must be dried before storage:
- Pre-dry on a paper towel — spread harvested mushrooms out and fan for 6–12 hours until the outer surface is no longer wet to the touch
- Final dry in a food dehydrator at the lowest setting (95–100°F) for 4–8 hours until cracker-dry (snaps rather than bends)
- Store in an airtight container with a silica gel desiccant packet in a cool, dark location
Properly dried mushrooms store for 1–2 years without significant potency loss.
Troubleshooting
| Problem | Likely Cause | Solution | |---------|--------------|----------| | No growth after 3 weeks | Dead spores or failed injection | Start over with fresh syringe | | Green/black patches | Contamination | Discard pouch immediately | | Fluffy white mycelium but no pins | Needs FAE, temperature drop | Open top, introduce fresh air, cool to 70°F | | Pins abort before maturing | Low humidity | Mist more frequently, improve enclosure | | Only tiny mushrooms | Needs rehydration | Try dunking in next flush | | Pouch tears on injection | Needle angle too steep | Inject at 45°, use firm corner seam |
Common Mistakes
Injecting too much spore solution — more is not better. Excess moisture promotes bacteria and mold. 1.5mL per pouch is plenty.
Opening the pouch during colonization — every time you open it, you risk contamination. Wait until full white colonization.
Using flavored rice — seasoning ingredients (garlic, butter flavoring) inhibit mycelium growth. Plain brown rice only.
Skipping the consolidation phase — mycelium needs extra time to strengthen after visual colonization. Rushing reduces pin set.
Overwatering during fruiting — water should mist the surface, not pool. Standing water at the base of cakes causes bacterial contamination.
Common Problems & Troubleshooting
See the Contamination Guide for common issues.
Tips for Success
Take notes at every stage. Consistency beats perfection.