Agar Isolation Techniques: Selecting and Working With Cultures
Everything you need to know about Agar Isolation Techniques: Selecting and Working With Cultures — from materials to first harvest.


What You'll Need
- See full supply list in guide below.
Find grow supplies at vendors in our Directory.
Step-by-Step Process
Agar Isolation Techniques: Selecting and Working With Cultures
Agar work sits at the heart of serious mushroom cultivation. It lets you isolate specific genetic strains, remove contamination from a culture before it spreads, and build a library of living mycelium you can return to again and again. Cultivators who learn agar work stop depending on spore syringes for every grow and instead maintain healthy, stable genetics indefinitely. The learning curve is real but manageable — clean technique and an understanding of what you are looking for will get you most of the way there.
What Agar Is and Why Cultivators Use It
Agar is a gelling agent derived from red algae. Combined with a nutrient source, water, and a small amount of salt or gypsum, it sets into a semi-solid gel that supports mycelium growth across its surface. Because mycelium grows on top of the gel rather than through a dense substrate, you can actually watch it develop, observe its characteristics, and selectively transfer only the portions that look healthy and vigorous.
The two most common agar formulas are malt extract agar (MEA) and potato dextrose agar (PDA). MEA uses light dry malt extract as its carbon and nutrient source. PDA uses dehydrated potato starch and dextrose. Both support psilocybe mycelium well. MEA is the more common choice among cultivators because the ingredients are easy to source from homebrew suppliers and the results are consistent.
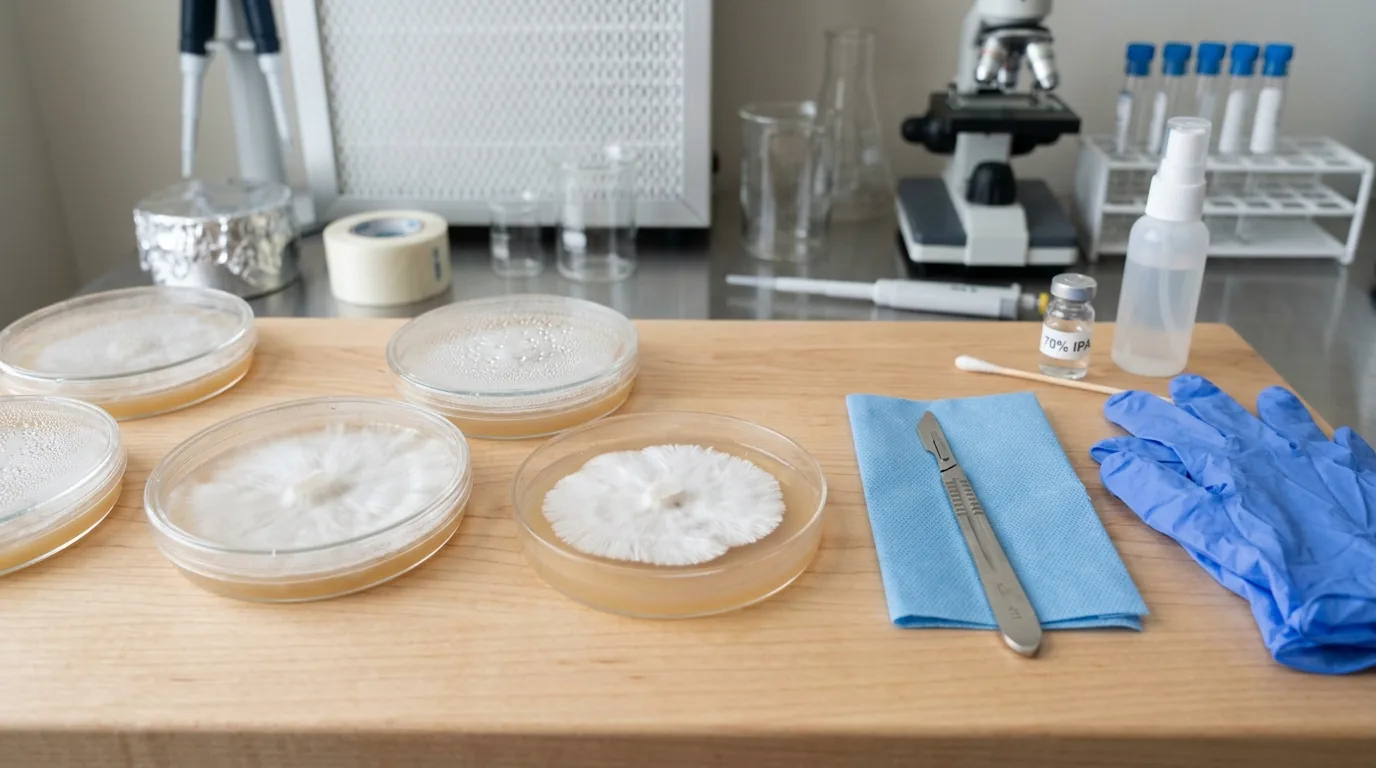
Equipment You Need
Working with agar does not require a laboratory, but it does require a sterile environment and the right tools.
Pressure cooker: Agar plates must be sterilized, not just pasteurized. A stovetop pressure cooker at 15 PSI for 30–45 minutes achieves the temperatures needed to kill bacterial endospores that would otherwise colonize your plates.
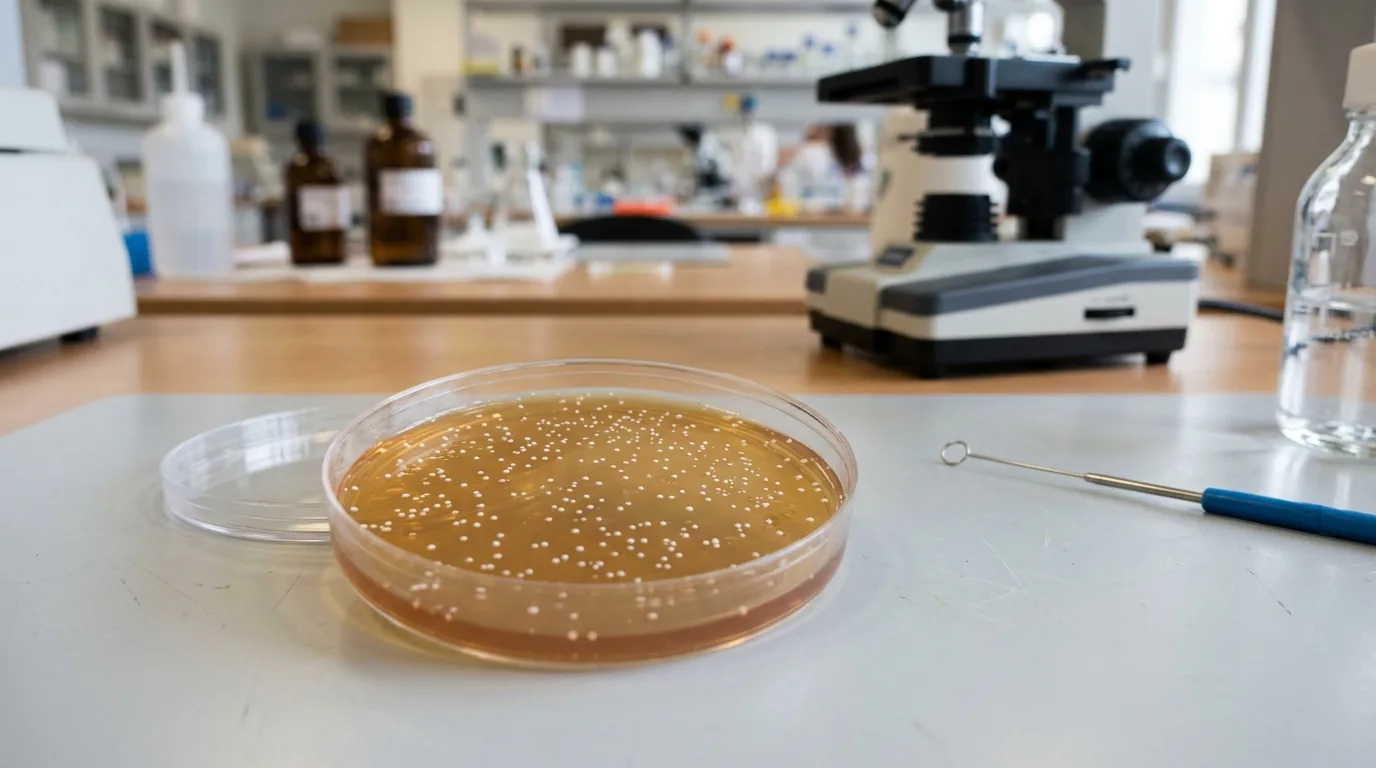
Petri dishes: 90mm polystyrene petri dishes are the standard. Disposable options are convenient and inexpensive. Buy more than you think you need — you will go through them.
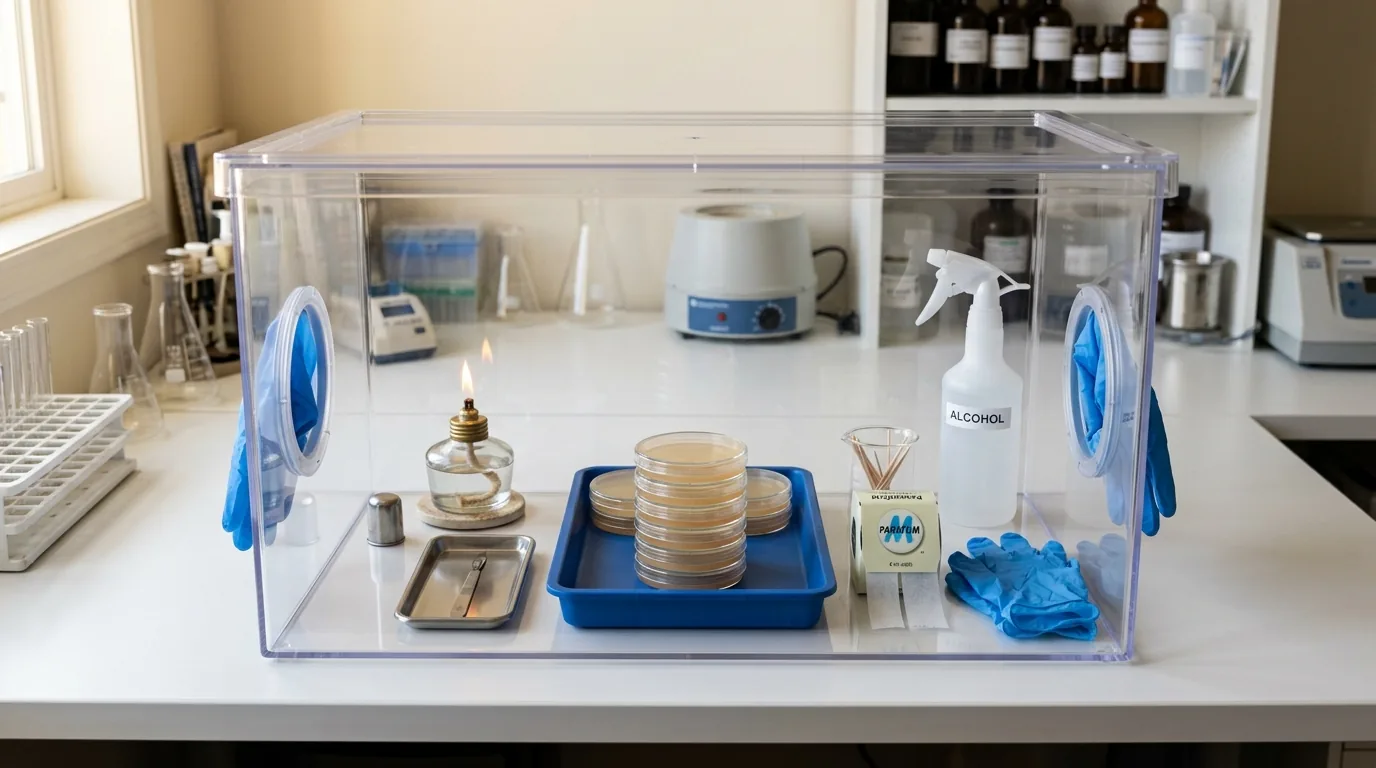
Still air box (SAB) or flow hood: Pouring agar and making transfers must happen in a low-airflow environment. A still air box — a large clear tote with arm holes cut in the side — is effective for home cultivators. A laminar flow hood provides a continuous stream of HEPA-filtered air and is the professional standard.
Scalpel and blades: Disposable #22 scalpel blades work well for wedge cuts. Flame-sterilize between transfers.
Isopropyl alcohol (70%): Used to wipe down all surfaces and gloves before and during work sessions.
Parafilm or micropore tape: Used to seal plates during incubation and storage.
Preparing and Pouring MEA Plates
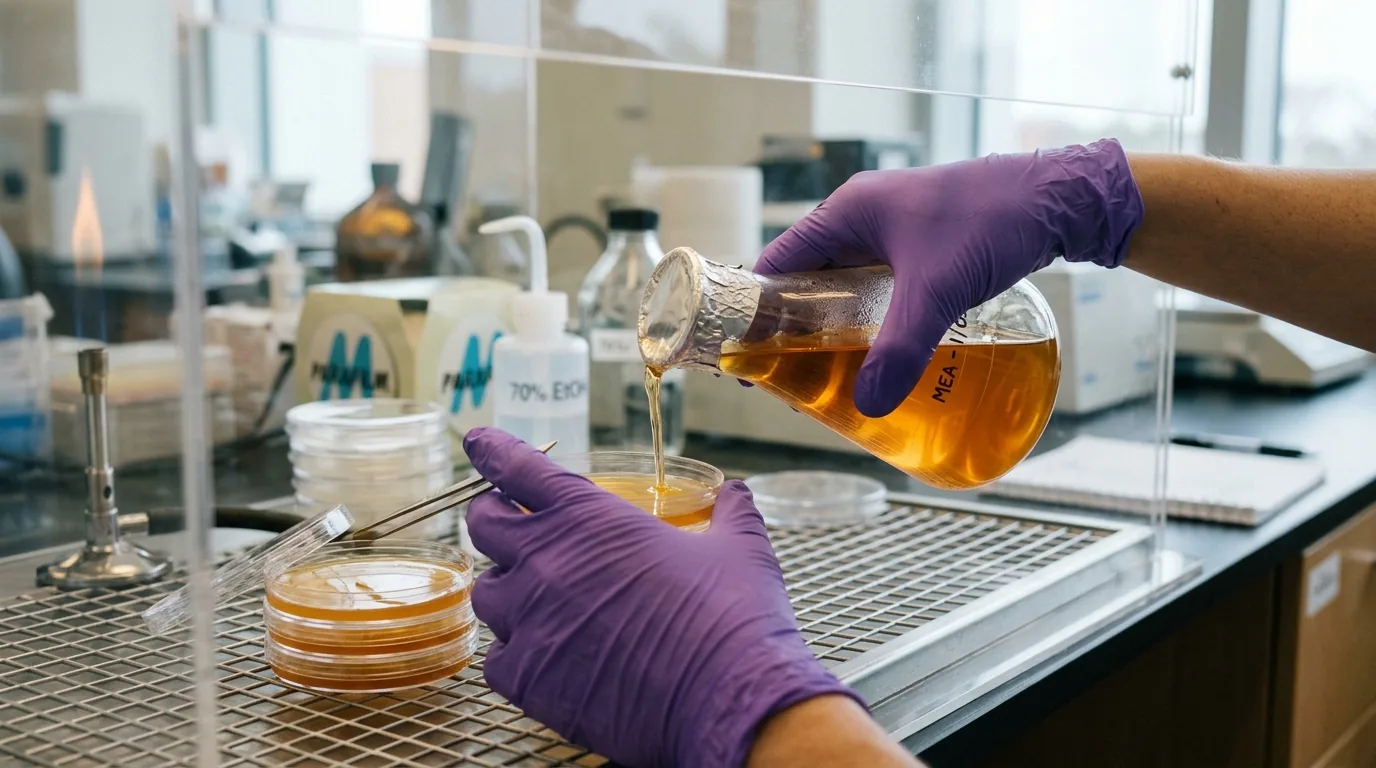
A standard MEA formula: 15g dry malt extract, 15g agar powder, 1L distilled water. Combine in a flask or mason jar, stir to mix, then pressure-cook at 15 PSI for 45 minutes. After the cooker depressurizes naturally, allow the agar to cool to around 55–60°C — hot enough to remain liquid, cool enough not to warp your petri dishes.
Move to your SAB or flow hood. Wipe everything down with 70% isopropyl. Pour approximately 20–25ml of agar into each dish — enough to create a layer roughly 4mm deep. Replace the lid immediately after pouring each plate. Allow plates to solidify at room temperature (1–2 hours), then invert them (lid down) to prevent condensation from dripping onto the agar surface. Incubate inverted at room temperature for 2–3 days before use to check for contamination.
Transferring Mycelium from Grain to Agar
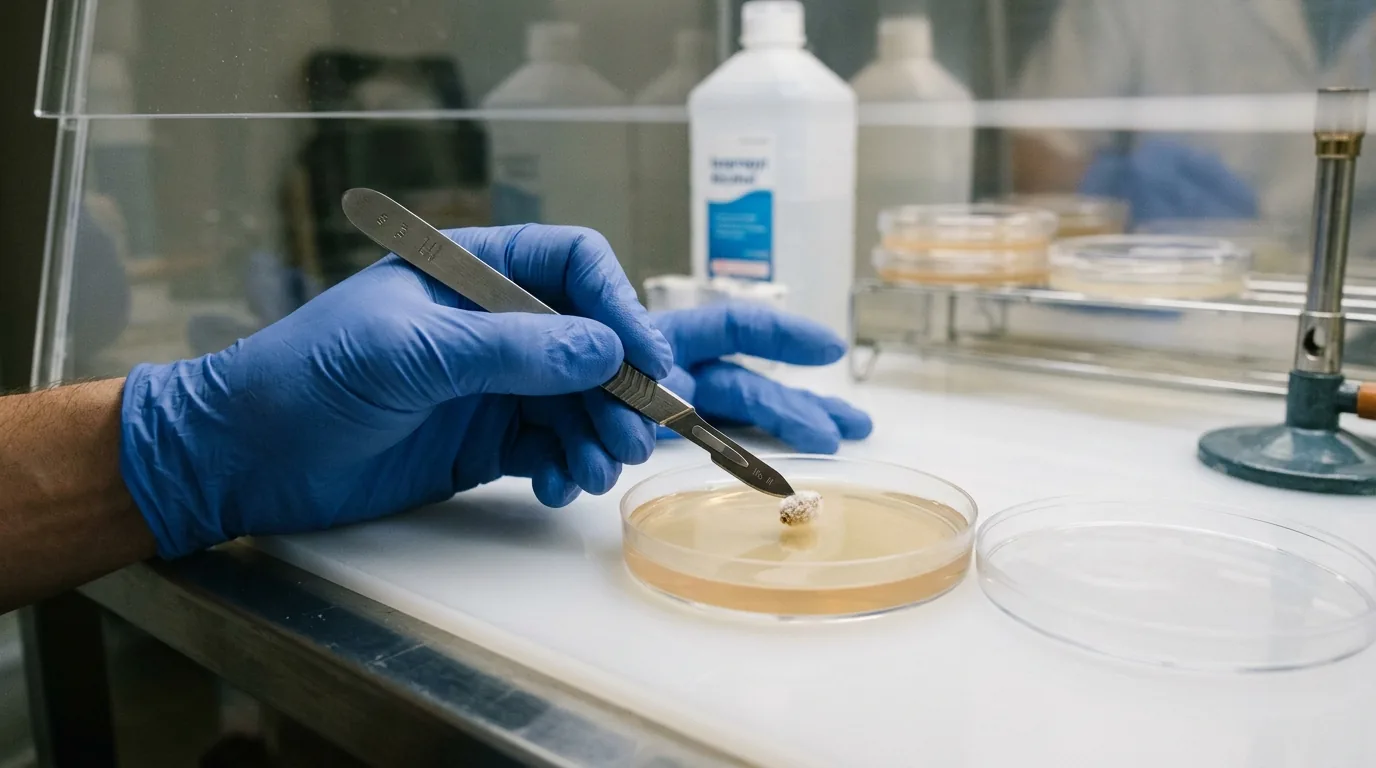
The most common starting point is transferring a small piece of colonized grain to agar, allowing mycelium to spread across the plate, and then observing what grows. To do this, work inside your SAB. Flame-sterilize your scalpel blade until it glows, allow it to cool for 10–15 seconds, then open your grain jar and scrape a small piece of colonized grain — ideally a piece with visible white mycelium attached. Drop it onto the center of a freshly opened agar plate and replace the lid. Seal with Parafilm and incubate at 75–78°F.
Selecting Healthy Sectors
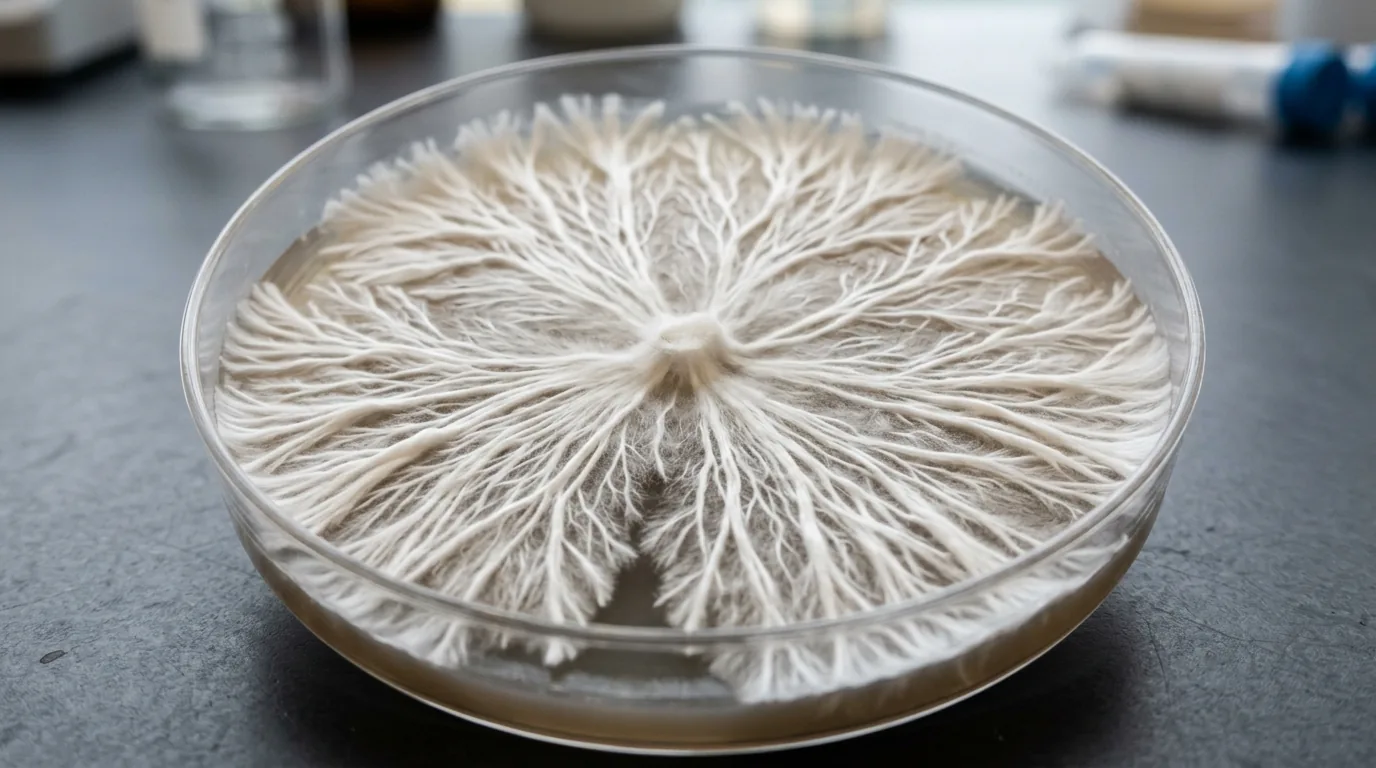
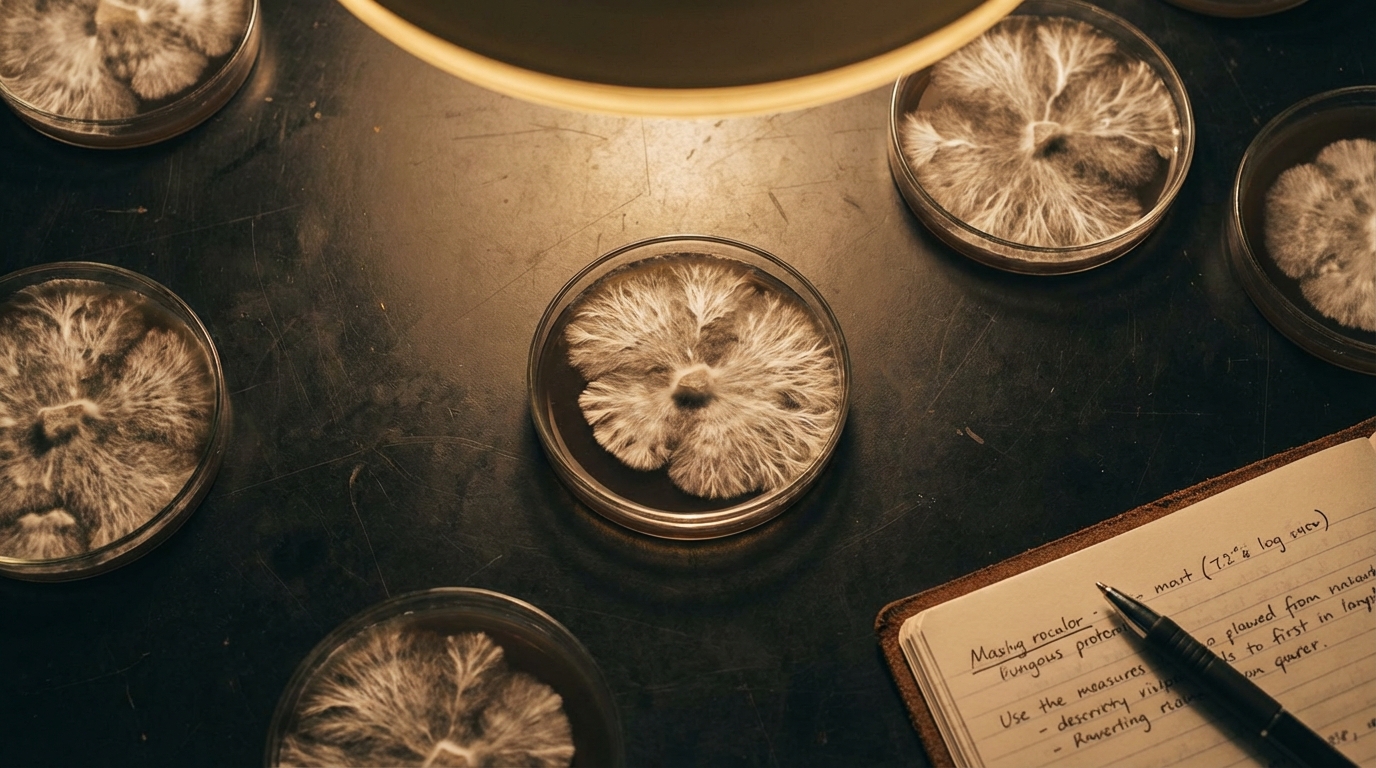
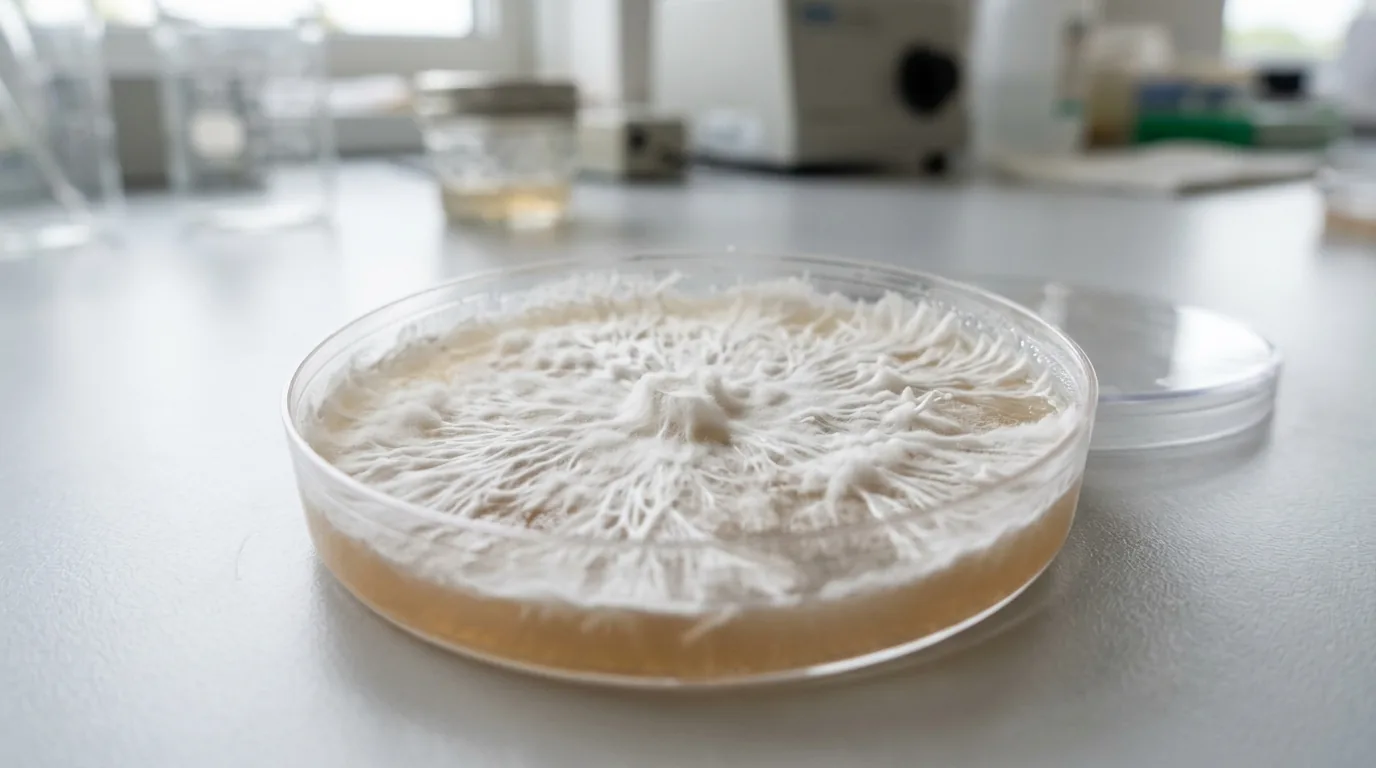
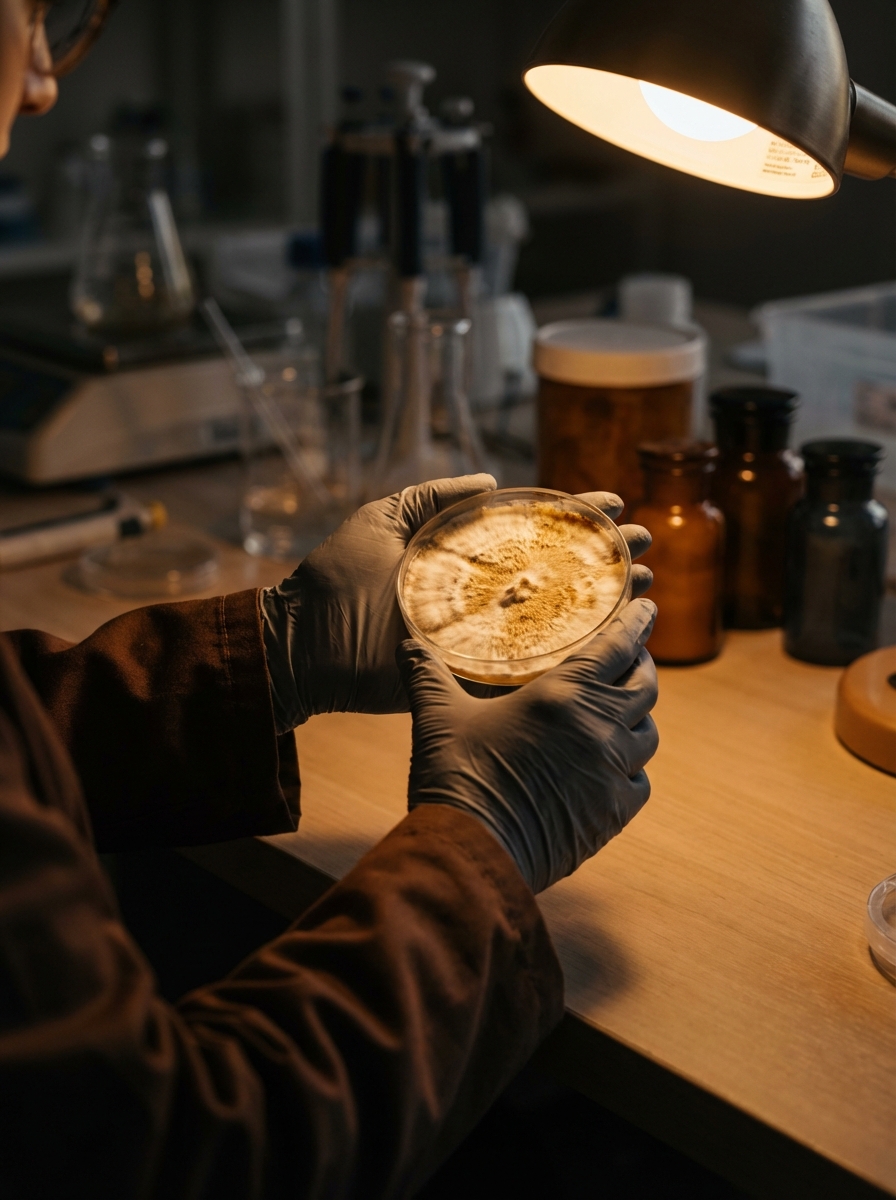
Within 5–10 days, mycelium will radiate outward from your transfer point. This is where agar work becomes genuinely useful. Different sectors of the same plate will often show different growth patterns — reflecting the genetic diversity within a spore-derived culture.
Healthy mycelium sectors typically display: rhizomorphic growth (thin, branching, cord-like strands resembling tree roots), uniform white or off-white color, fast growth rate relative to surrounding sectors, and dense coverage without patchy or thin areas. Sectors showing tomentose growth (fluffy, cotton-like, upright) are often slower fruiters, though this varies by species and strain.
Making Wedge Transfers
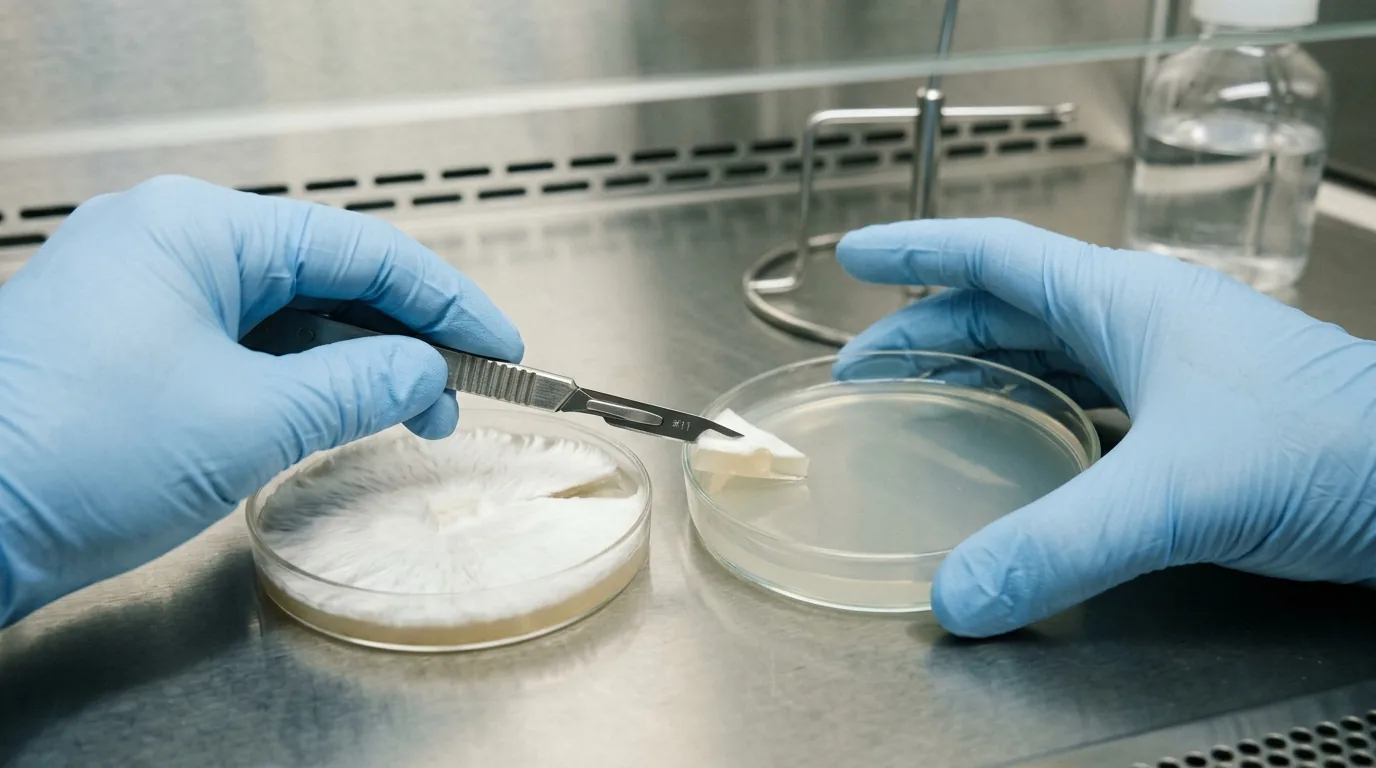
Once you have identified a promising sector, you transfer it forward. Flame-sterilize your scalpel, allow it to cool, then cut a small wedge — roughly 3–5mm — from the leading edge of the healthy sector. Avoid the center of the plate, which accumulates metabolic waste. Transfer the wedge to a fresh plate by placing it mycelium-side down in the center. One plate can produce multiple transfers, each carrying the genetics of the selected sector forward.
Repeat this process across 2–3 transfers, selecting the healthiest growth at each step. By the third transfer from a good sector, you typically have a stable, isolated culture.
Single-Spore Isolation Basics
True single-spore isolation produces cultures from individual germinated spores, yielding completely uniform genetics. It is technically demanding: spores are suspended in sterile water at very high dilution, spread across plates, and individual germination points are identified with a microscope and transferred forward. For most cultivators, multi-spore isolation (selecting sectors from a multi-spore plate) is sufficient and far more practical.
Building a Culture Library
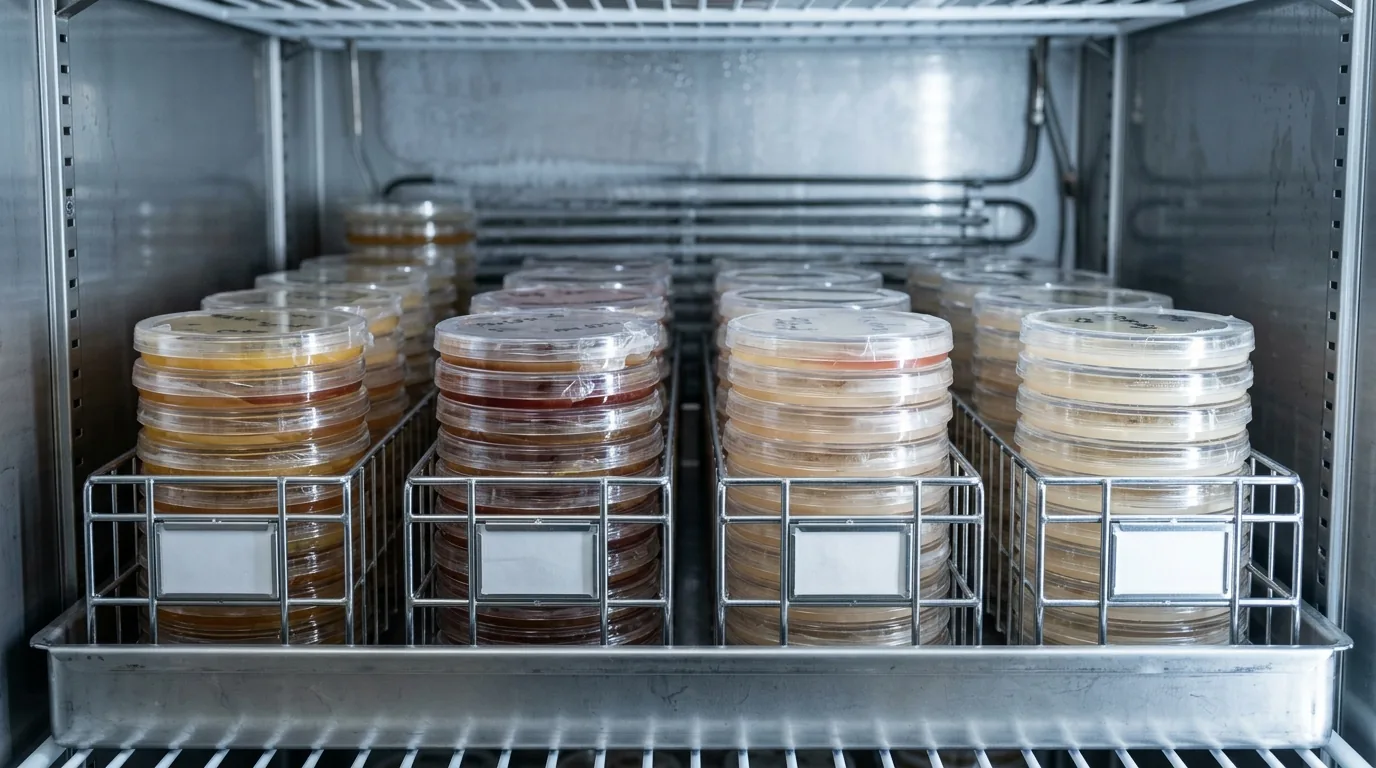
Agar cultures remain viable in a refrigerator (34–38°F) for 6–12 months when sealed with Parafilm. Label every plate with the strain name and date. Once you have an isolated culture you want to preserve long-term, transfer it to agar wedges, seal, refrigerate, and refresh every 3–6 months by transferring to a new plate. Over time, this library becomes a permanent genetics collection you can draw on for any grow.
Common Mistakes
Pouring agar too hot warps petri dish lids and causes excessive condensation. Wait for 55–60°C before pouring.
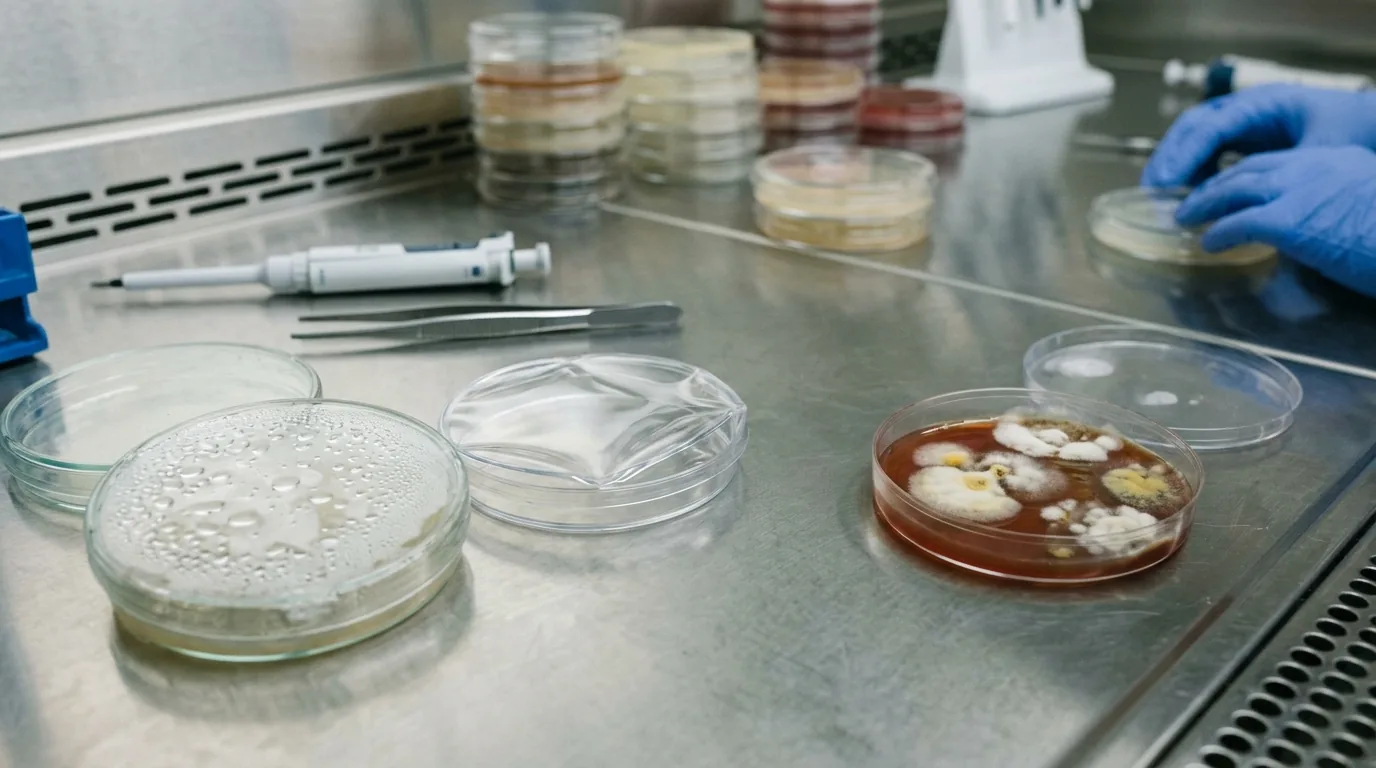
Working in moving air is the most common contamination source. Even a ceiling fan running in the same room will wreck your contamination rate.
Selecting the wrong sector — choosing tomentose or patchy sectors because they looked "different" rather than evaluating for growth speed and rhizomorphic structure.
Not letting plates fully solidify before incubating. Liquid agar pooled against lids causes problems on first transfer.
Storing cultures at room temperature. Refrigerate sealed plates. Room-temperature storage burns through a culture's viability in weeks.
Common Problems & Troubleshooting
See the Contamination Guide for common issues.
Tips for Success
Take notes at every stage. Consistency beats perfection.