PF Tek
Everything you need to know about PF Tek — from materials to first harvest.

What You'll Need
- See full supply list in guide below.
Find grow supplies at vendors in our Directory.
Step-by-Step Process
PF Tek: The Beginner's Complete Guide
PF Tek (Psilocybin Fanaticus Technique) is the foundational method for growing Psilocybe cubensis indoors. Developed in the early 1990s by Robert McPherson (known online as "Psilocybe Fanaticus"), it was the first method specifically designed to make cubensis cultivation accessible to home growers without professional laboratory equipment. Thirty years later it remains the recommended starting point for beginners because it teaches the core skills — sterile technique, mycelium recognition, fruiting chamber management — in a forgiving format.
PF Tek uses half-pint mason jars filled with a substrate of brown rice flour (BRF) and vermiculite, inoculated with a spore syringe, and then colonized and fruited as individual cakes. The entire process from inoculation to harvest takes 4–7 weeks depending on strain, temperature, and conditions.
What You Need
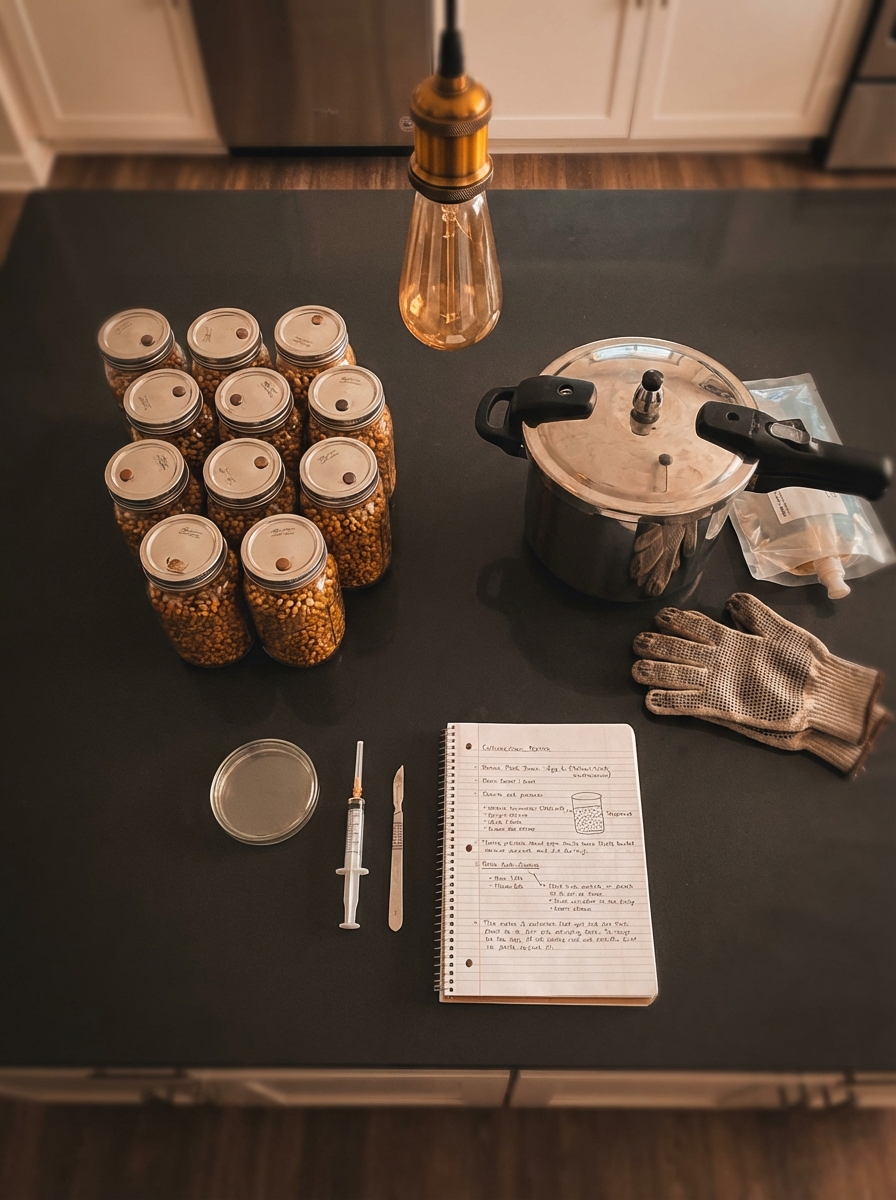
Equipment
- Half-pint (8oz) wide-mouth mason jars — Ball or Kerr brand; wide-mouth is essential for cake removal
- Pressure cooker (at minimum a large pot and oven work for BRF, but a pressure cooker is strongly recommended)
- Spore syringe — from a reputable vendor; confirm it's uncontaminated
- Still air box (SAB) — a clear plastic tote with arm holes; free to make, significantly reduces contamination risk
- Alcohol lamp or butane lighter — for flame-sterilizing needle
- Isopropyl alcohol (70%) — for surface cleaning
- Latex or nitrile gloves
- Surgical mask (optional but recommended)
- Polyfill or synthetic filter fiber — for jar lids
- Hammer and nail — to punch inoculation holes in lids
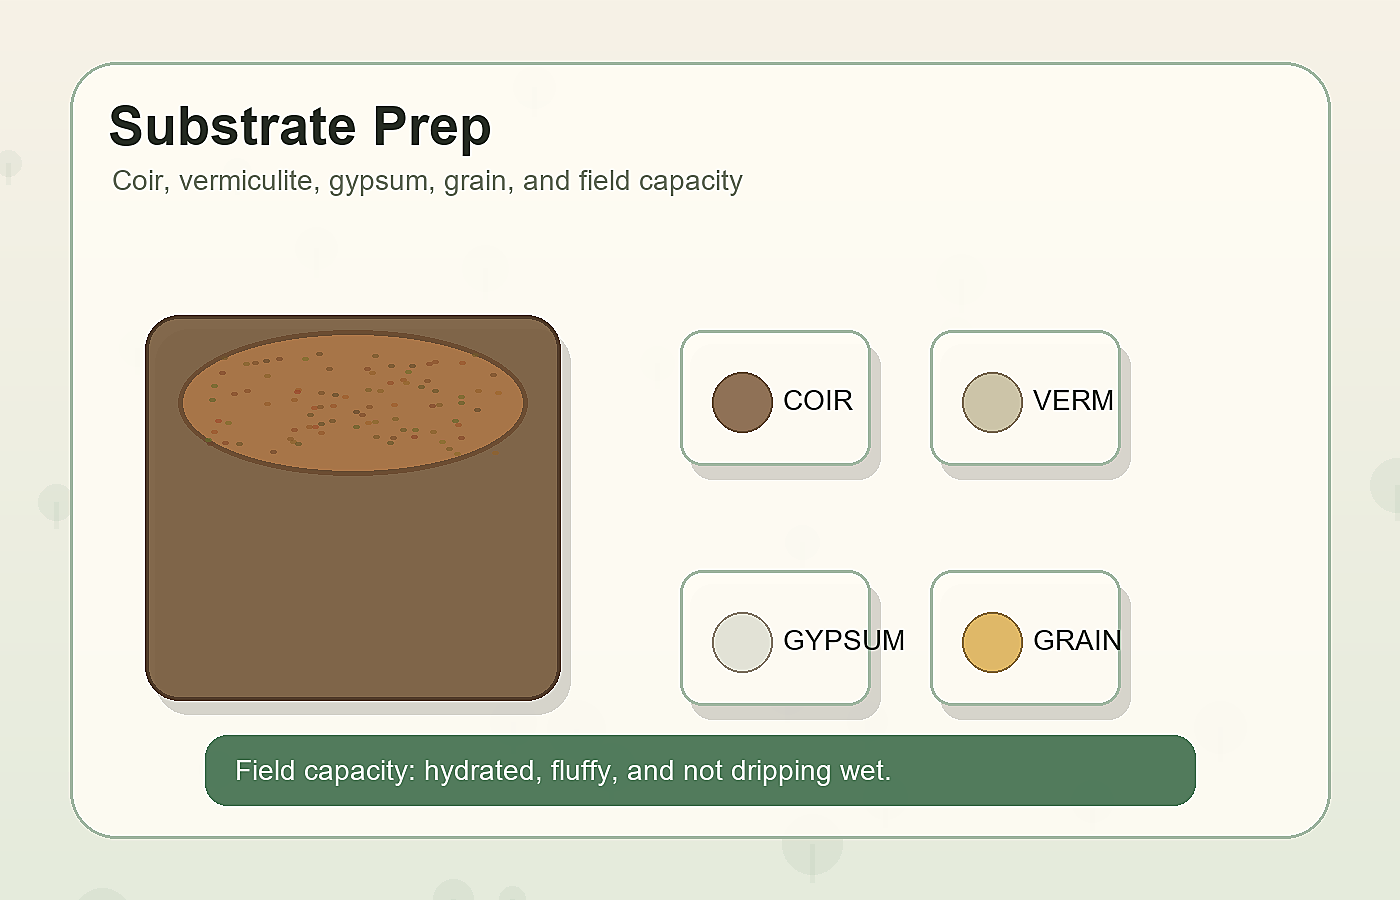
Substrate Ingredients
For 6 half-pint jars (standard first batch):
| Ingredient | Amount | |-----------|--------| | Brown rice flour (BRF) | 2/3 cup | | Fine vermiculite | 2 cups | | Water | 2/3 cup |
These ratios produce the correct field capacity moisture level. The vermiculite creates air pockets that the mycelium fills, while BRF provides nutrients. Do not substitute other flours — BRF's nutritional profile and particle size are specifically suited to this technique.
Step 1: Prepare the Jars
Mix the Substrate
- Combine BRF and water in a bowl. Mix thoroughly until all flour is hydrated — no dry clumps.
- Add vermiculite to the wet BRF mix. Stir until evenly combined.
- Test moisture: squeeze a handful firmly. It should hold its shape and release a few drops of water, but not drip freely. If it drips freely, add more dry vermiculite. If it crumbles, add a small amount of water.
Load the Jars
- Fill each jar approximately 2/3 full with the BRF/vermiculite mixture. Do not pack tightly — the mycelium needs air space.
- Top the remaining 1/3 of each jar with dry vermiculite only — no BRF. This dry layer acts as a contamination barrier between the substrate and the lid. This step is critical — do not skip it.
- Wipe the inside of the jar above the substrate line with a paper towel dampened with isopropyl alcohol.
Prepare the Lids
- Using a hammer and nail, punch 4 holes evenly spaced around the perimeter of each lid — these are inoculation points.
- Cut small squares of polyfill and push them into each hole from the inside of the lid, creating a breathable but contamination-resistant filter. The polyfill allows gas exchange while blocking airborne contaminants.
- Cover the entire top of the lid with a piece of aluminum foil, pressed down firmly. This protects the holes during sterilization.
Sterilize
- Place jars upright in your pressure cooker on a trivet or folded towel (not directly on metal base).
- Add water per your pressure cooker's instructions — typically 1–2 inches.
- Pressure cook at 15 PSI for 60–90 minutes. 60 minutes is the minimum; 90 minutes provides extra safety margin.
- Allow jars to cool completely — minimum 8 hours, overnight is safer. Hot jars introduced to room air can draw in contaminants as they cool, and hot substrate is a poor inoculation environment.
Step 2: Inoculate
Inoculation is the highest-risk step for contamination. Work quickly and cleanly.
Set Up Your Still Air Box
- Wipe the inside of your SAB with isopropyl alcohol. Let dry.
- Place your cooled jars inside the SAB.
- Place your spore syringe, alcohol, and lighter inside the SAB.
- Let the SAB air settle for 5–10 minutes before working.
Inoculate Each Jar
- Put on gloves. Wipe gloves with isopropyl alcohol.
- Remove the needle cap from your spore syringe.
- Flame-sterilize the needle: hold it in the flame of your alcohol lamp or lighter until the tip glows red (2–3 seconds). Allow to cool for 5–10 seconds — do not touch the needle to anything before inoculation.
- Remove the foil from one jar lid.
- Insert the needle into one of the polyfill holes at a slight angle, pushing it through the dry vermiculite layer and just into the substrate below. Inject 0.5–1cc of spore solution (approximately 1–2 full plunges of a 1cc syringe, or a fraction of a larger syringe).
- Repeat for the other 3 holes on the same jar — 4 inoculation points per jar speeds colonization and reduces contamination risk by ensuring the mycelium colonizes from multiple starting points simultaneously.
- Replace the foil. Move to the next jar.
- Flame-sterilize the needle between each jar (not between each hole — within a jar you're already committed). Allow to cool before each new jar.
Total spore solution per jar: 1–2cc. A 10cc syringe is sufficient for 5–10 jars.
Post-Inoculation
- Place jars in a warm, dark location — a cabinet, closet, or dedicated incubation space. Ideal temperature: 77–81°F (25–27°C).
- Keep jars still. Do not move, shake, or disturb them during colonization.
- Check daily — but do not open jars.
Step 3: Colonization
What to Expect
- Days 3–7: White mycelium begins appearing at inoculation points — small fuzzy dots or thin threads emanating from the 4 holes.
- Days 7–14: Mycelium spreads from inoculation points and begins filling the substrate. Distinct white sectors grow and eventually merge.
- Days 14–21: Full colonization — the entire substrate visible through the jar walls is white with mycelium.
Colonization time varies significantly by strain, temperature, and inoculation density. Golden Teacher: 14–21 days typical. Z-Strain: 10–14 days. B+: 14–18 days.
What's Normal
- Yellow-tinged substrate: Metabolite secretion — this is mycelium exuding waste products. Normal in small amounts; heavy yellowing can indicate a sick culture but is often benign.
- Blue bruising: Psilocybin oxidizes to blue when mycelium is physically disturbed. Normal — a sign that psilocybin is present.
- Thick white patches: Healthy, dense mycelium. Desired.
- Rhizomorphic growth (rope-like patterns): Typically a positive sign indicating the mycelium will fruit well.
What's Not Normal
- Green, black, or pink discoloration: Contamination. Mold. Do not open the jar indoors — take it outside, dispose of immediately.
- Wet, slimy appearance with foul smell: Bacterial contamination. Dispose of.
- No growth after 21 days: Dead or non-viable spore solution, or temperature too low. Verify your incubation temperature; try a fresh syringe.
Step 4: Fruit the Cakes
Wait for Full Colonization
Do not fruit partially colonized jars. Wait until the substrate visible through the jar walls is fully white — no visible brown substrate remaining. Then wait an additional 3–7 days beyond full colonization ("consolidation period"). This allows the mycelium to fully knit through the substrate and primes it for fruiting.
Remove the Cakes
- Work in your SAB or with freshly washed hands.
- Remove the lid. Turn the jar upside down over a clean surface. Tap the bottom firmly — the colonized substrate cake should slide out intact.
- If the cake sticks, run a thin knife around the inside edge of the jar carefully.
- Rinse the cake briefly under cool water to remove loose vermiculite from the surface. This also re-hydrates the outer surface.
Dunk and Roll
"Dunking" rehydrates the cake before fruiting. "Rolling" in dry vermiculite coats the surface to help maintain humidity during fruiting.
Dunk: Submerge the cake fully in clean, cool water for 12–24 hours. Use a plate or container to keep it fully submerged if it floats. This restores moisture that evaporated during colonization.
Roll: Remove the cake from the water. Roll it gently in a bowl of dry vermiculite until the surface is evenly coated. This loose vermiculite layer reduces direct surface evaporation.
Set Up a Fruiting Chamber
The most common beginner fruiting chamber is the shotgun fruiting chamber (SGFC): a large clear plastic tote with holes drilled in all 6 sides (including top and bottom), lined on the bottom with wet perlite.
SGFC setup:
- Drill 1/4" holes approximately every 2 inches across all surfaces of the tote.
- Fill the bottom 3–4 inches with perlite. Wet the perlite until water drips from the bottom — then drain it. Wet perlite creates passive humidity through evaporation.
- Place the prepared cakes on a raised surface inside (a piece of foil, a small rack) so they are not sitting directly in the perlite.
Conditions:
- Humidity: 90–95% RH. Fan the inside of the SGFC 2–3 times daily by opening the lid and waving it — this exchanges fresh air (CO₂ build-up stalls pinning) while maintaining humidity through the wet perlite.
- Temperature: 72–78°F (22–26°C)
- Light: 12 hours of indirect light daily — a window across the room, or a fluorescent light on a timer. Direct light is not necessary or beneficial.
Step 5: First Pins and Harvest
Pinning
Within 5–12 days of placing cakes in the fruiting chamber, small white bumps will appear on the surface — pins (primordia). These are the earliest stage of mushroom development. At this point, maintain humidity carefully — pins that dry out will abort.
Pins grow rapidly once initiated. At 74°F, a pin can go from appearing to harvest-ready in 3–7 days.
Harvest
Harvest just before or as the veil breaks. The partial veil is the thin membrane connecting the cap edge to the stem. As the cap expands toward full maturity, this veil stretches and eventually tears. Optimal harvest is just before this tear — psilocybin concentration is highest before spore release.
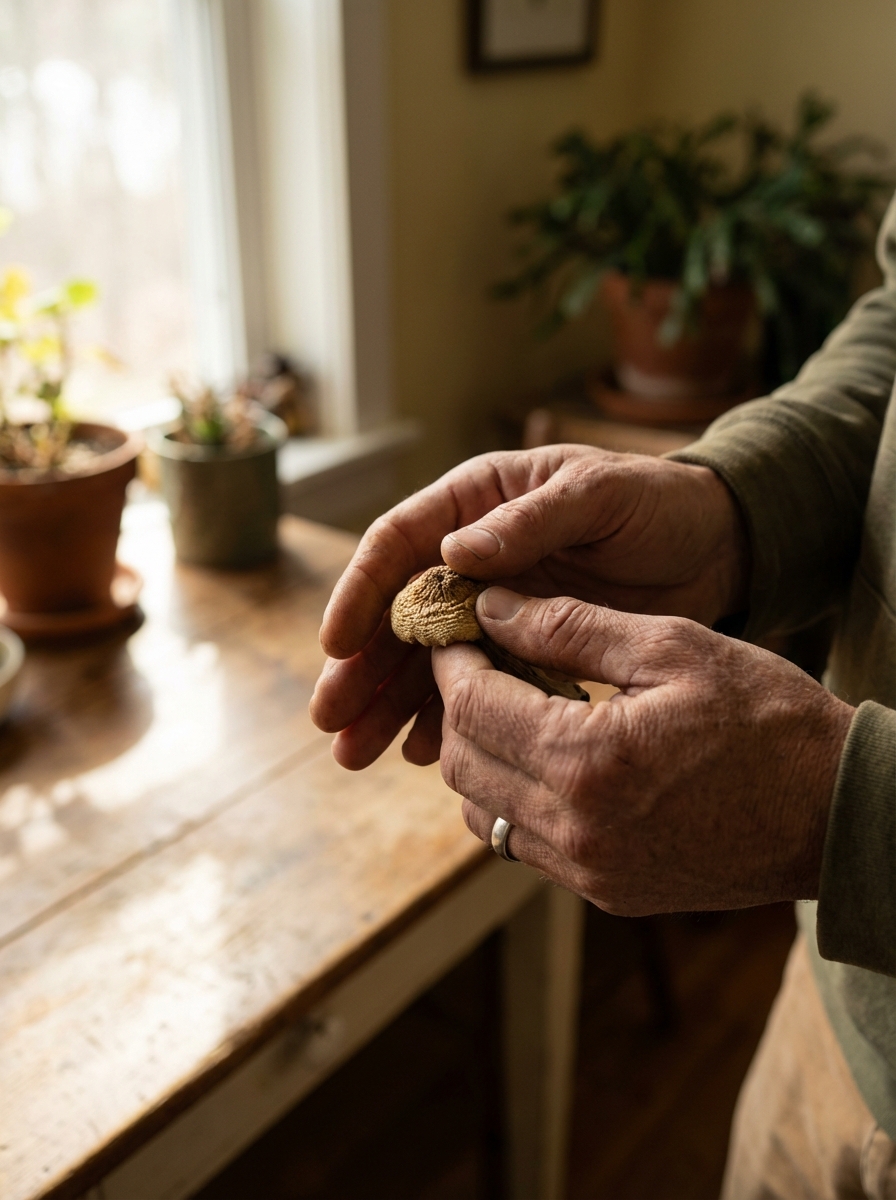
To harvest: grip the mushroom near the base and twist gently while pulling. It should come free cleanly. Do not leave stub bases in the substrate — they rot and can introduce contamination.
Harvest the entire flush at once when most mushrooms are at optimal stage, even if a few are slightly early or slightly past. Leaving some while harvesting others risks missing optimal timing.
Step 6: Subsequent Flushes
After harvesting, a healthy BRF cake will produce 2–5 additional flushes with proper rehydration between each.
Between flushes:
- Remove all remaining pins and stubs from the cake surface.
- Dunk the cake again in cool water for 12–24 hours.
- Return to the fruiting chamber.
- Expect the next flush within 5–14 days.
Subsequent flushes typically yield less than the first flush. Yields decrease with each flush as the substrate nutrients are depleted. A cake is exhausted when it no longer pins after dunking, begins to turn dark or slimy, or shows contamination.
Drying and Storage
Fresh mushrooms are approximately 90% water by weight. Dry them for potency-stable storage.
Drying method:
- Arrange harvested mushrooms on a wire rack or paper towel in a single layer.
- Use a fan to blow air across them at room temperature — not heat, which degrades psilocybin.
- After 24–48 hours of fan drying, transfer to a sealed container with food-grade desiccant (silica gel packets) for final drying. Mushrooms are fully dry when they snap cleanly — no bending.
Storage: Airtight container (mason jar) with desiccant in a cool, dark location. Properly dried mushrooms stored this way retain potency for 1–2+ years.
Troubleshooting
| Problem | Likely Cause | Solution | |---------|-------------|----------| | No growth after 14 days | Dead syringe, temp too low | Check temp; try fresh syringe | | Green/black mold | Contamination | Dispose of jar outside immediately | | Pins aborting (turning brown, dying) | Low humidity or excessive CO₂ | Fan more frequently; check perlite moisture | | No pins after 14 days in FC | Low humidity, insufficient light, or over-dried cake | Re-dunk; verify humidity; add light | | Weak, spindly mushrooms | Excessive CO₂ | Fan more aggressively for fresh air exchange | | Mushrooms growing inside jar | Insufficient colonization time before fruiting, or jar opened too early | Allow full colonization + consolidation period |
Next Steps After PF Tek
PF Tek teaches the fundamentals. Once you've completed 2–3 successful PF Tek grows, you have the skills to progress:
- Monotub Tek — grain spawn inoculated to bulk substrate in a large tote; dramatically higher yields than PF Tek cakes
- Agar work — working with agar plates for culture isolation, contamination identification, and phenotype selection
- Substrate formulation — experimenting with manure-based, straw, and specialty substrates for different strains
See our Monotub Tek and Agar Work guides for the next steps.
Common Problems & Troubleshooting
See the Contamination Guide for common issues.
Tips for Success
Take notes at every stage. Consistency beats perfection.