
Agar Work
Everything you need to know about Agar Work — from materials to first harvest.


What You'll Need
- See full supply list in guide below.
Find grow supplies at vendors in our Directory.
Step-by-Step Process
Agar Work: Culture Isolation and Genetic Selection
Agar work is the practice of growing fungal mycelium on nutrient-enriched gelatin plates to isolate clean cultures, eliminate contamination, and select for desirable genetic traits. It is the bridge between basic home cultivation and serious mycology — the technique that separates growers who start from spore syringes every time from growers who maintain stable, high-performing genetic lineages indefinitely.
You do not need agar work to grow mushrooms successfully. PF Tek and monotub grows from spore syringes produce excellent results without it. But agar work becomes valuable when you want to:
- Isolate a single high-performing mushroom's genetics from a spore mix
- Eliminate contamination from a culture before it spreads to substrate
- Maintain a living culture long-term without repeated spore syringe purchases
- Work with strains like APE that produce few viable spores and cannot be reliably started from syringes
- Multiply grain spawn without consuming spore solution
This guide covers the equipment, media, and core techniques for beginning agar work.
Beginner Scope
Before buying plates or scalpels, define the scope of your agar work:
- Best beginner use: clean up edible mushroom cultures, compare healthy growth patterns, and learn contamination signs.
- Clean-work requirement: agar exposes every lapse in handling, so use a still air box or flow hood and keep sessions short.
- Decision rule: questionable plates get isolated or discarded; do not scale uncertain cultures into grain.
- Legal boundary: agar technique is not a permission slip to propagate restricted species.
Equipment
Non-Negotiable
Pressure cooker — agar media must be sterilized at 15 PSI for 20–30 minutes before pouring. No substitute for sterilization; boiling alone does not reach the temperatures required to kill bacterial endospores.
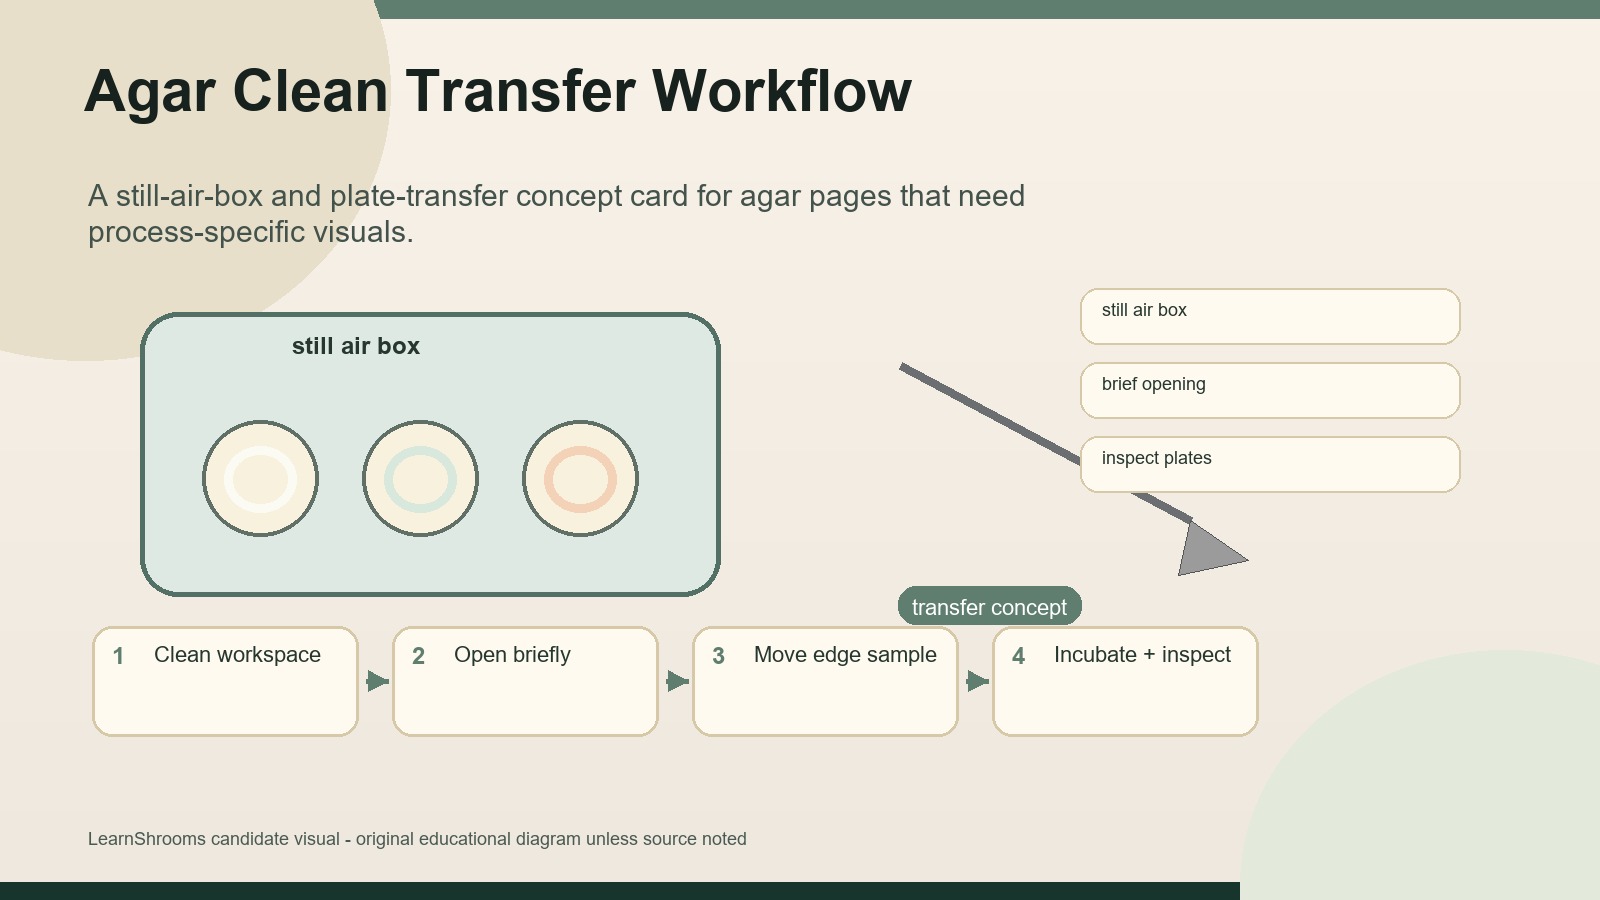
Flow hood or still air box — agar plates are extremely contamination-sensitive. Professional mycologists use laminar flow hoods (HEPA-filtered horizontal airflow). Home cultivators use still air boxes (SABs) — a clear plastic tote with arm holes that allows work in a dead air environment. A well-made SAB is sufficient for most agar work; a flow hood is better and worth the investment if you intend to work with agar regularly.
Petri dishes — 90mm diameter polystyrene petri dishes, sterile. Available in sleeves of 20 from lab supply vendors. Single-use plastic dishes are standard; reusable glass dishes require autoclaving between uses.
Erlenmeyer flask or mason jar — for preparing and sterilizing agar media.
Pressure-rated silicone plugs or foil — to cover flasks during sterilization.
Scalpel with #10 or #22 blades — for making agar transfers. Disposable scalpels or reusable handles with sterile blades both work.
Alcohol lamp or butane lighter — for flame-sterilizing the scalpel between transfers.
Parafilm or plastic wrap — to seal poured plates during storage.
Useful Additions
- Magnetic stir plate and stir bar — makes agar mixing easier; not essential
- Digital thermometer — for confirming agar temperature before pouring
- Mycobag or grain jar with self-healing injection port — for transferring agar cultures to grain spawn
Agar Media
Light Malt Extract Agar (LMEA) — Recommended for Beginners
LMEA is the most common cultivation agar. Light malt extract (available at homebrew supply stores) provides nutrients; agar powder provides the gel matrix.
Recipe for 500ml (fills approximately 20–25 petri dishes):
| Ingredient | Amount | |-----------|--------| | Light malt extract (LME) | 10g | | Agar powder | 10g | | Water | 500ml |
Preparation:
- Combine all ingredients in an Erlenmeyer flask or wide-mouth mason jar.
- Swirl to combine — agar will not fully dissolve until heated.
- Cover with foil or a silicone plug. Do not seal tightly — steam must be able to escape during sterilization.
- Pressure cook at 15 PSI for 20 minutes. The agar will dissolve fully during sterilization.
- Allow to cool to approximately 55–60°C (130–140°F) before pouring — hot enough to remain liquid, cool enough not to crack cold petri dishes or kill any cultures you're working with. Test by placing the flask against your forearm — it should feel very warm but not painfully hot.
Other Common Media
Malt Extract Agar (MEA): Higher nutrient concentration (20g LME per 500ml). Supports faster growth but also faster contamination growth — not ideal for beginners.
Potato Dextrose Agar (PDA): Commercial media available pre-made. Reliable but more expensive per plate than homemade LMEA.
Water Agar (WA): Agar + water only, no nutrients. Used for germinating spores when you want to slow mycelium growth for easier observation, or for "sectoring" slow-growing cultures that would overgrow on nutrient media.
Step 1: Pour Plates
Pouring plates is done in your flow hood or SAB immediately after the agar cools to pouring temperature.
- Wipe your work surface with isopropyl alcohol. Allow to dry.
- Arrange your sterile petri dishes in stacks of 4–5 inside the SAB, lids on.
- Flame-sterilize the flask opening briefly if using a lab burner.
- Open each dish just enough to pour — lift the lid at a low angle, pour approximately 20–25ml of agar (enough to cover the bottom evenly), and replace the lid immediately.
- Allow plates to solidify undisturbed for 20–30 minutes. Do not move or stack until fully gelled.
- Once solid, invert plates (agar-side down) to prevent condensation droplets from falling onto the agar surface.
Condensation: Some condensation inside newly poured plates is normal as they cool. Inverting the plates directs condensation to the lid rather than the agar surface.
Storage: Wrap plates in parafilm or plastic wrap to prevent drying. Store in a sealed bag in the refrigerator. Properly stored LMEA plates remain usable for 4–8 weeks.
Step 2: Inoculate Plates from Spore Solution
Starting an agar culture from a spore syringe is the most common first agar operation.
Technique
- Work inside your SAB. Flame-sterilize your scalpel, allow to cool.
- Flame-sterilize the needle of your spore syringe briefly (until the metal glows), allow to cool for 5 seconds.
- Open a petri dish at a low angle. Place 2–4 small drops of spore solution onto the agar surface — spread widely apart, not concentrated in one spot.
- Close the plate immediately. Label with strain name, date, and syringe source.
- Store at room temperature (72–76°F) in a dark location.
What to Expect
- Days 3–7: Germination — tiny white dots or fine threads appear at each spore deposit point.
- Days 7–14: Mycelial sectors grow outward from germination points. Because spore solution contains many individual spores with different genetics, you will see multiple distinct sectors growing — different growth rates, textures, and patterns.
- Days 14–21: Sectors fill the plate. This is when isolation transfers become possible.
Step 3: Isolation Transfers
A spore-inoculated plate contains mycelium from many individual spores — genetic diversity is high. Isolation transfers take a small sample from a single sector and move it to a fresh plate, progressively reducing the genetic mix toward a single isolate.
Reading Plates
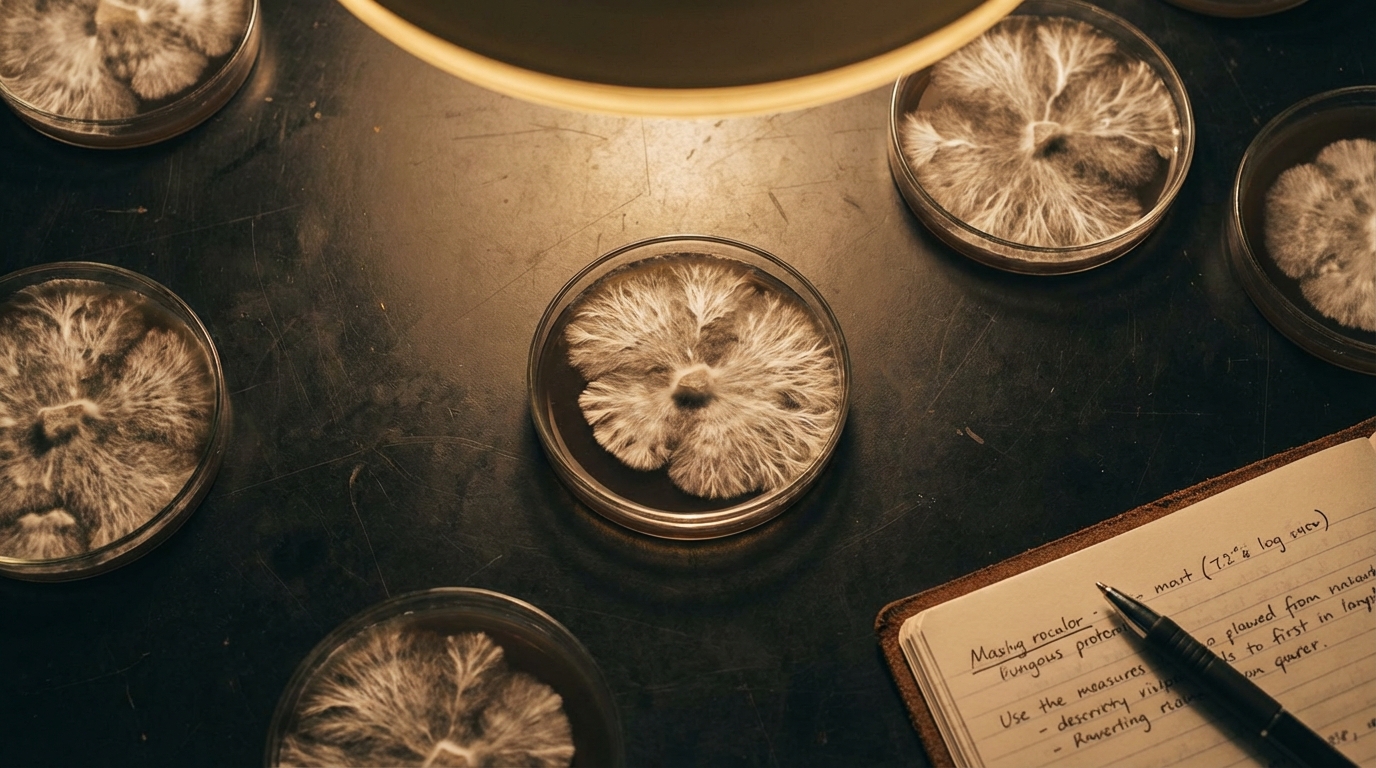
Before transferring, study the plate. Sectors to look for:
Healthy sectors (desirable):
- Rhizomorphic growth — rope-like, branching, fast-spreading mycelium
- Even, regular growth patterns
- Dense, white appearance
- Fast growth rate relative to other sectors on the same plate
Less desirable sectors:
- Tomentose growth — cottony, fluffy, slow-growing; often indicates sectors that will pin poorly
- Very slow growth relative to other sectors
- Irregular or patchy appearance
Contamination (discard the plate):
- Green, black, pink, or yellow patches
- Unusual odor when the plate is opened
- Wet, slimy appearance
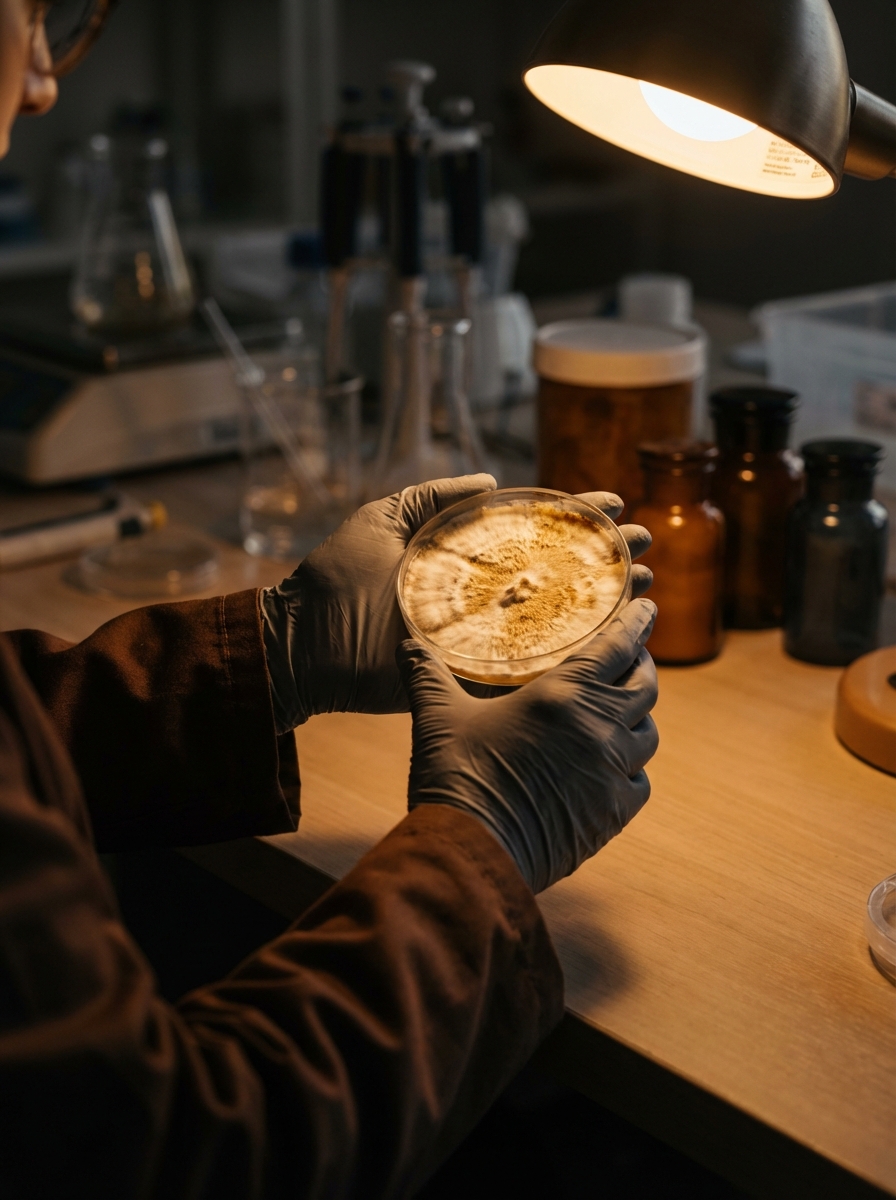
Performing a Transfer
- Work inside your SAB. Flame-sterilize your scalpel until the blade glows red. Allow to cool for 10 seconds.
- Open the source plate at a low angle.
- Use the cooled scalpel to cut a small square (4–6mm) from the leading edge of your target sector — the growing frontier of the mycelium, not the center.
- Transfer the agar square to a fresh plate — open it at a low angle, place the square agar-side down in the center, close immediately.
- Flame-sterilize between each transfer. You can transfer multiple sectors to multiple plates in one session.
- Label each plate: strain, isolation generation (G1, G2...), date.
Isolation Generations
- G1 (Generation 1): First transfer from spore plate — still contains genetic diversity from multiple spores
- G2: Transfer from a selected G1 sector — significantly narrowed genetics
- G3+: Further selection; by G3–G4 you are working with a near-clonal isolate
Most cultivators find 2–3 isolation generations sufficient to reach a stable, high-performing culture.
Step 4: Tissue Culture (Cloning)
Tissue culture takes mycelium directly from a living fruiting body — bypassing spores entirely. This preserves the exact genetics of a specific mushroom.
When to clone:
- You have an exceptionally high-performing flush and want to preserve those genetics
- You are working with APE or another low-spore strain
- You want to maintain a stable culture derived from a specific phenotype (albino, large cap, etc.)
Technique
- Select a freshly harvested mushroom — not yet dried. Freshest possible for best germination.
- Work in your SAB. Wipe the outer surface of the mushroom stem with isopropyl alcohol.
- Flame-sterilize your scalpel, cool for 10 seconds.
- Tear (don't cut) the mushroom lengthwise to expose the interior — tearing exposes internal tissue without dragging surface contamination inward.
- Using the sterile scalpel, cut a small piece (2–4mm) from the interior of the stem, midway between cap and base.
- Place the tissue piece on a fresh agar plate. Close immediately.
- Incubate at 72–76°F in the dark.
Germination
Tissue cultures germinate within 2–5 days — faster than spore plates. A single sector of mycelium will grow from the tissue piece, free from the genetic diversity of spore germination. This is clonal mycelium — genetically identical to the source mushroom.
Step 5: Agar to Grain Transfer
Once you have a clean, isolated culture on agar, transfer it to grain spawn to scale up for bulk grows.
Method
- Prepare sterilized grain jars as normal.
- Allow grain jars to cool completely.
- Work in your SAB. Flame-sterilize your scalpel.
- Cut 3–5 agar squares from the leading edge of your target culture.
- Open the grain jar lid briefly and drop the agar squares onto the grain. Close immediately.
- Shake the jar gently to distribute the agar pieces among the grain.
- Incubate at 77–81°F.
Grain jars inoculated from agar cultures typically colonize faster than spore-syringe inoculated jars, as the mycelium is already germinated and actively growing. Expect full colonization in 7–14 days depending on strain.
Contamination Identification on Agar
| Contaminant | Appearance | Action | |------------|-----------|--------| | Trichoderma (green mold) | Green, powdery patches | Discard plate immediately | | Aspergillus | Black or yellow-green | Discard plate immediately | | Bacterial contamination | Wet, translucent, slimy; often with odor | Discard plate immediately | | Penicillium | Blue-green | Discard plate immediately | | Yeast | White, creamy, smooth — but no mycelial threads | Discard plate |
Never attempt to work around contamination on agar plates. A contaminated plate must be sealed and discarded. The value of agar work is that contamination is visible early — before it spreads to expensive grain or bulk substrate. Treat a contaminated plate as a success: you caught it early.
Long-Term Culture Storage
Refrigerator Storage (Short-Term)
Wrapped agar plates with active mycelium can be stored in the refrigerator (35–40°F) for 2–6 months. The cold slows but does not stop metabolic activity. Revive by bringing to room temperature and transferring a fresh section to new agar.
Grain Storage (Medium-Term)
Fully colonized grain jars stored in a sealed bag in the refrigerator remain viable for 4–6 months. Transfer a section of colonized grain to fresh sterilized grain to revive.
Agar Slants (Long-Term)
Agar slants — agar poured into test tubes at an angle and allowed to solidify — are the standard long-term culture storage method. Inoculate with a small agar transfer, allow to colonize partially, then seal and refrigerate. Slants stored at 35–40°F remain viable for 1–2 years. This is how culture libraries are maintained.
Agar Work as Skill Development
The techniques in this guide — pouring plates, isolation transfers, tissue culture, contamination identification — are foundational mycology skills that extend well beyond cubensis cultivation. The same methods are used by researchers, gourmet mushroom cultivators, and commercial producers working with any fungal species.
Beginning agar work with Psilocybe cubensis is practical because it is a fast and forgiving species — short generation times, visible and distinctive mycelium, and clear indicators of health and contamination. Skills developed here transfer directly to working with slower or more demanding species.
See Contamination Guide for detailed identification of common contamination organisms and prevention strategies.
Common Problems & Troubleshooting
See the Contamination Guide for common issues.
Tips for Success
Take notes at every stage. Consistency beats perfection.