Grain Spawn
Everything you need to know about Grain Spawn — from materials to first harvest.
What You'll Need
- See full supply list in guide below.
Find grow supplies at vendors in our Directory.
Step-by-Step Process
Grain Spawn: The Foundation of Bulk Cultivation
Grain spawn is the intermediate step between a spore syringe and a bulk fruiting block. Where PF Tek and Uncle Ben's Tek treat colonized substrate as the fruiting medium itself, grain spawn is designed to be broken up and mixed into a larger, nutrient-rich bulk substrate. This multiplication effect — one jar of colonized grain can inoculate a block ten times larger — is what makes bulk cultivation efficient.
Mastering grain spawn production separates casual growers from those who can produce meaningful quantities consistently. The process requires more equipment upfront but scales efficiently.
Understanding Grain Spawn
When you colonize grain, you're creating millions of colonization points. Each grain becomes a node of dense mycelium. When mixed with bulk substrate (coco coir, CVG, pasteurized straw, etc.), each grain node immediately begins colonizing surrounding substrate, resulting in full colonization in days rather than weeks.
Why Grain Over Brown Rice?
| Property | Brown Rice (PF Tek) | Grain Spawn | |-----------|---------------------|-------------| | Colonization speed | Slow (3–4 weeks) | Fast (7–14 days) | | Multiplication ratio | 1:1 | 1:5 to 1:10 | | Equipment required | Basic | Pressure cooker required | | Contam risk | Low | Medium (requires sterile technique) | | Yield per cycle | Low | High |
Grain Options
Rye Berries (Best for Beginners)
Rye berries are the industry standard for spawn production. They colonize quickly, buffer pH slightly, and have an ideal surface area to nutrition ratio. Organic rye berries are widely available at natural food stores and online.
Oats (Steel-Cut or Whole)
Whole oats are an excellent alternative to rye — faster colonization, slightly stickier texture when hydrated (this is fine). Avoid rolled/flaked oats; only whole or steel-cut.
Wheat Berries
Similar to rye, widely available, excellent results. Some growers prefer wheat for specific strains.
Popcorn (Budget Option)
Whole kernel popcorn (plain, unpopped) works well and is extremely cheap. The hard outer shell requires longer pressure cooking to achieve full hydration.
Wild Bird Seed (WBS)
A popular budget option containing millet, milo, and mixed seeds. Easy to find, colonizes quickly, and the high millet content creates dense spawn. Avoid varieties with sunflower seeds (too much fat, promotes contamination).
What You Need
Equipment
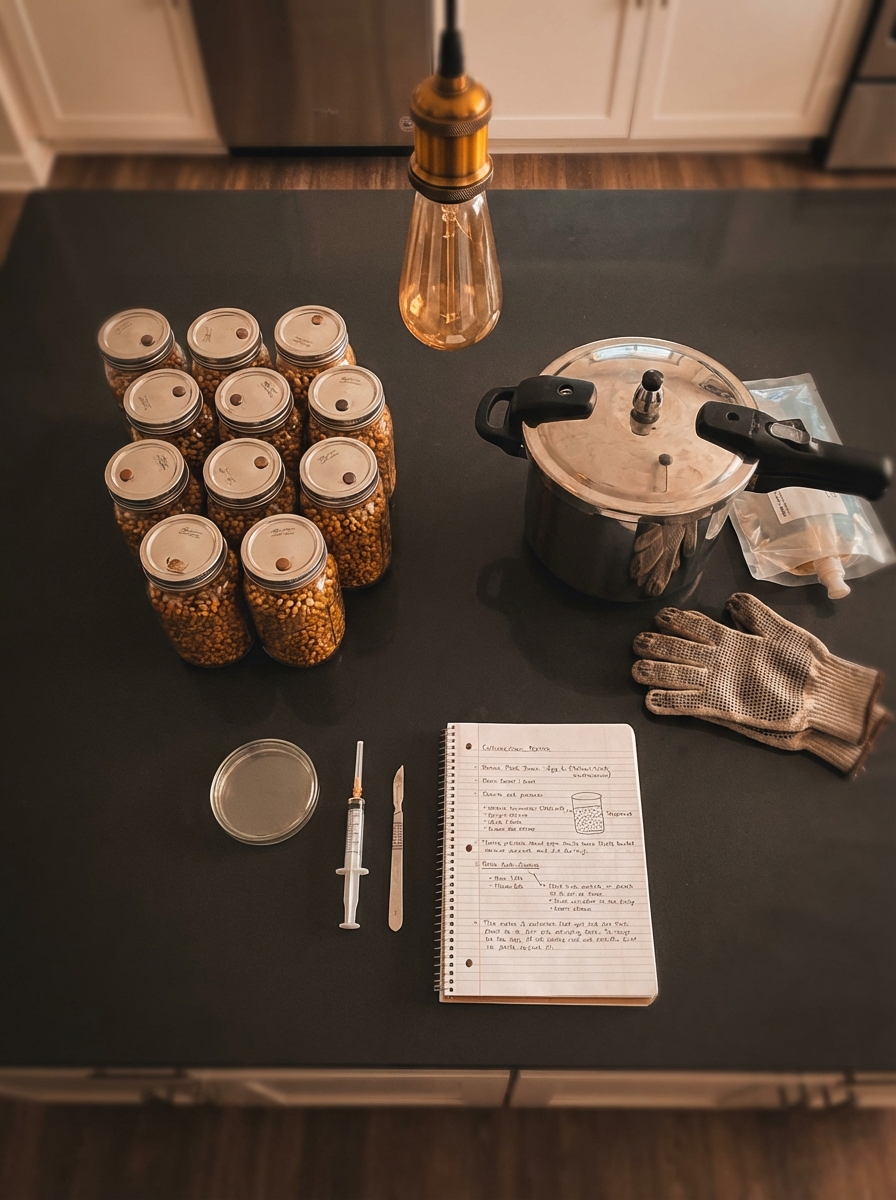
- Pressure cooker (minimum 23-quart capacity; All American 921 or Presto 23qt are popular)
- Quart-size wide-mouth mason jars — Ball or Kerr; 6–12 jars per batch
- Polyfill fiber or Tyvek — for breathable jar lids
- Large wire bail or canning lids with holes — for lid modification
- Still air box (SAB) or laminar flow hood — for inoculation
- Alcohol lamp and isopropyl alcohol
- Latex or nitrile gloves and surgical mask
- pH meter or pH test strips (optional but helpful)
Materials
- 2 lbs dry rye berries (or grain of choice) per 6 quart jars
- Water (filtered preferred)
- Gypsum / calcium sulfate — 1 tablespoon per quart of grain (prevents clumping; optional but recommended)
Step 1: Hydrate the Grain
Simmer Method (Recommended)
- Measure grain into a large pot. Rinse thoroughly under cold water until water runs clear.
- Cover with water, add a small amount of gypsum (prevents clumping during sterilization).
- Bring to a boil, then reduce heat to a gentle simmer.
- Simmer for 15–20 minutes — until the grains are soft but not split open. Check by squeezing a grain between thumb and forefinger: it should compress easily but hold its shape. If grains split open, you've over-cooked them.
- Drain through a colander.
Soak Method (Overnight, Less Supervision)
- Soak grain in cold water for 12–24 hours.
- Drain.
- Simmer for 10 minutes to fully hydrate.
- Drain.
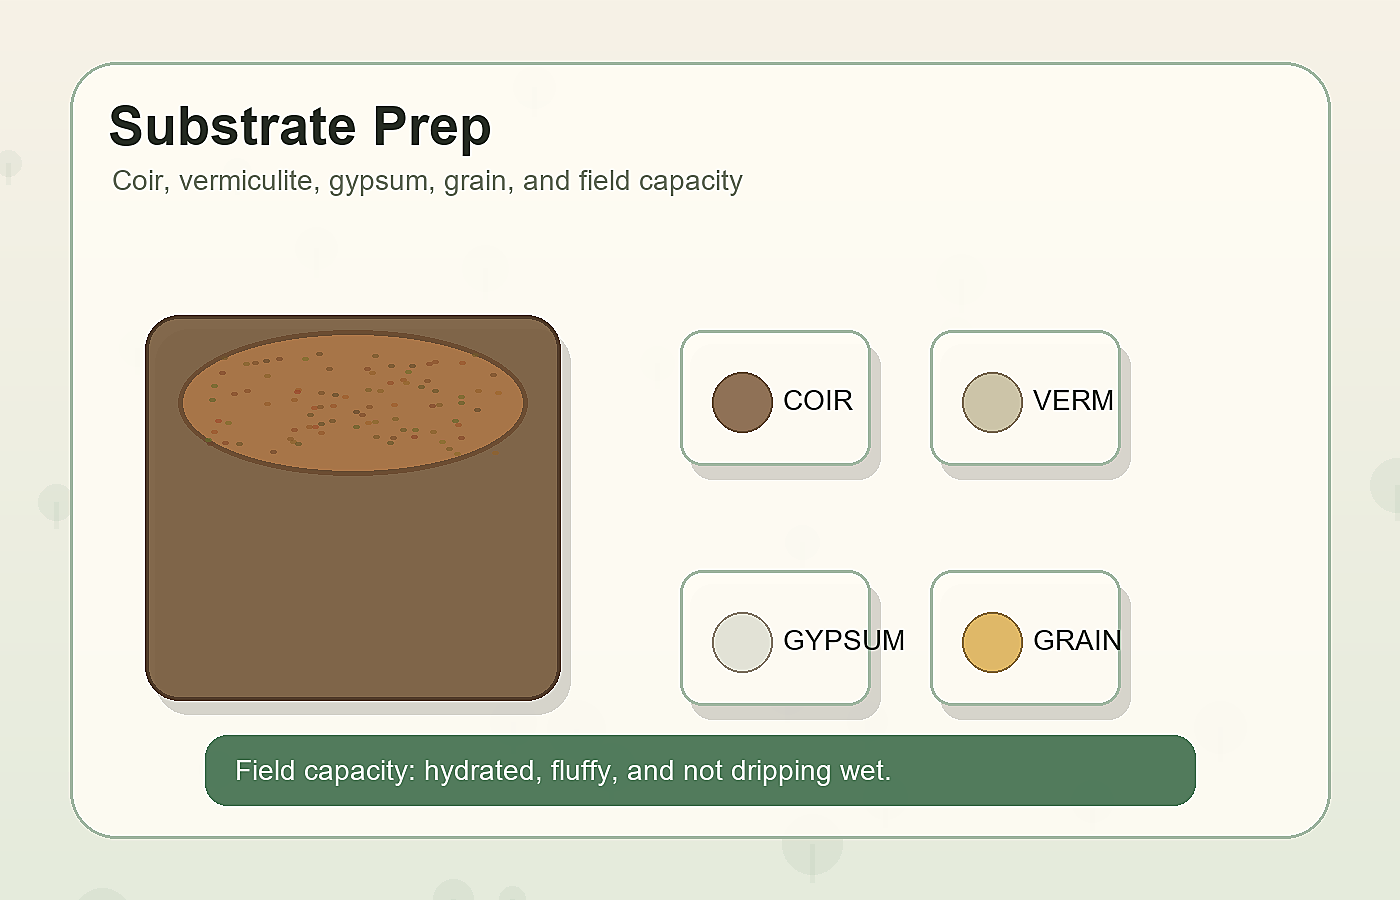
Check Field Capacity
Spread the drained grain on a clean baking sheet or paper towel and let surface moisture evaporate for 20–30 minutes. The grain should look matte (not glossy/wet) on the surface, but feel slightly moist to the touch. This is field capacity — the correct moisture level.
Overly wet grain causes bacterial contamination during sterilization. Overly dry grain produces slow, poor colonization.
Step 2: Load and Sterilize Jars
Prepare the Lids
Drill or punch two holes in each metal canning lid:
- One ¼-inch hole for a self-healing injection port (fill with RTV silicone; let cure 24 hours)
- One small hole (⅛ inch) covered with polyfill fiber on the inside secured with tape — this is the filter for gas exchange
Alternatively, use pre-made grain jar lids available from mycology supply vendors.
Fill Jars
- Fill each quart jar ¾ full with the prepared grain.
- Wipe the rims clean with isopropyl-dampened paper towel.
- Apply lids tightly.
Pressure Cook
- Place jars in the pressure cooker on a rack (not directly on the bottom).
- Add 2–3 cups of water to the cooker.
- Bring to pressure (15 PSI) and process for 90 minutes for quart jars.
- Let pressure drop naturally — never force-cool grain jars. Thermal shock can cause condensation inside the jar that creates wet spots.
- Remove from cooker and let cool to room temperature (minimum 8 hours, ideally overnight).
Never inoculate warm jars. Heat kills spores. Jars must be fully cooled (below 80°F) before inoculation.
Step 3: Inoculation
Inoculation must be performed in a clean environment. A still air box (SAB) is the minimum. A laminar flow hood eliminates nearly all contamination risk.
In the Still Air Box
- Let the SAB sit undisturbed for 10–15 minutes before working inside it — air currents settle.
- Wipe gloves, jar exterior, and syringe with isopropyl alcohol.
- Flame sterilize the needle until glowing red. Let cool 5 seconds.
- Pierce the silicone injection port.
- Inject 2–3mL of spore solution per quart jar. Angle toward the glass so liquid coats the side of the jar and contacts more grain surface area.
- Withdraw needle. Repeat for all jars, re-flaming between jars.
Step 4: Colonization and Shaking
Initial Colonization
Place inoculated jars in a warm location (75–80°F). Mycelium will appear at injection sites within 5–10 days.
First Shake
When mycelium covers approximately 30% of the grain surface (usually 7–12 days after inoculation), shake the jar vigorously. This breaks up the mycelium colonies and distributes them throughout the jar, dramatically accelerating full colonization.
To shake: hold the lid firmly and shake side-to-side, not up-down, for 10–15 seconds.
Second Shake (Optional)
Shake again when colonization reaches approximately 50–60% if growth has stalled in patches.
Full Colonization
Grain spawn is fully colonized when every grain appears white and no un-colonized brown grain remains visible. This typically takes 14–21 days total.
Let fully colonized grain sit an additional 7 days without opening for consolidation.
Step 5: Using Spawn
Colonized grain spawn can be used three ways:
1. Inoculate Bulk Substrate
The primary use. Mix 1 part grain spawn with 3–5 parts bulk substrate (coco coir + vermiculite, pasteurized straw, manure-based mix) in a fruiting container. This "bulk" approach produces significantly more mushrooms per cycle.
2. Spawn to More Grain (Grain-to-Grain Transfer)
Transfer a small amount of fully colonized grain to sterilized grain jars. This allows you to multiply spawn exponentially without using additional spore solution. One original jar can produce 5–10 more jars through G2G transfer.
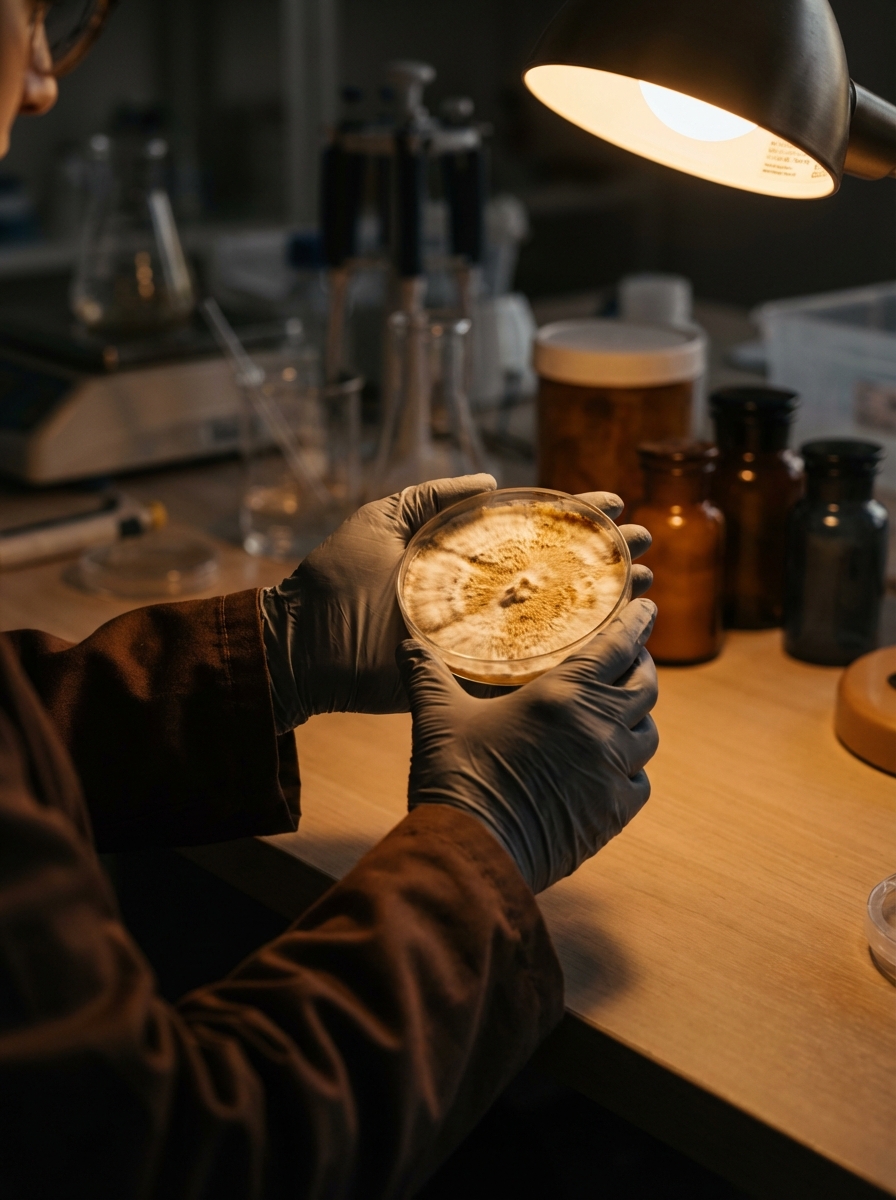
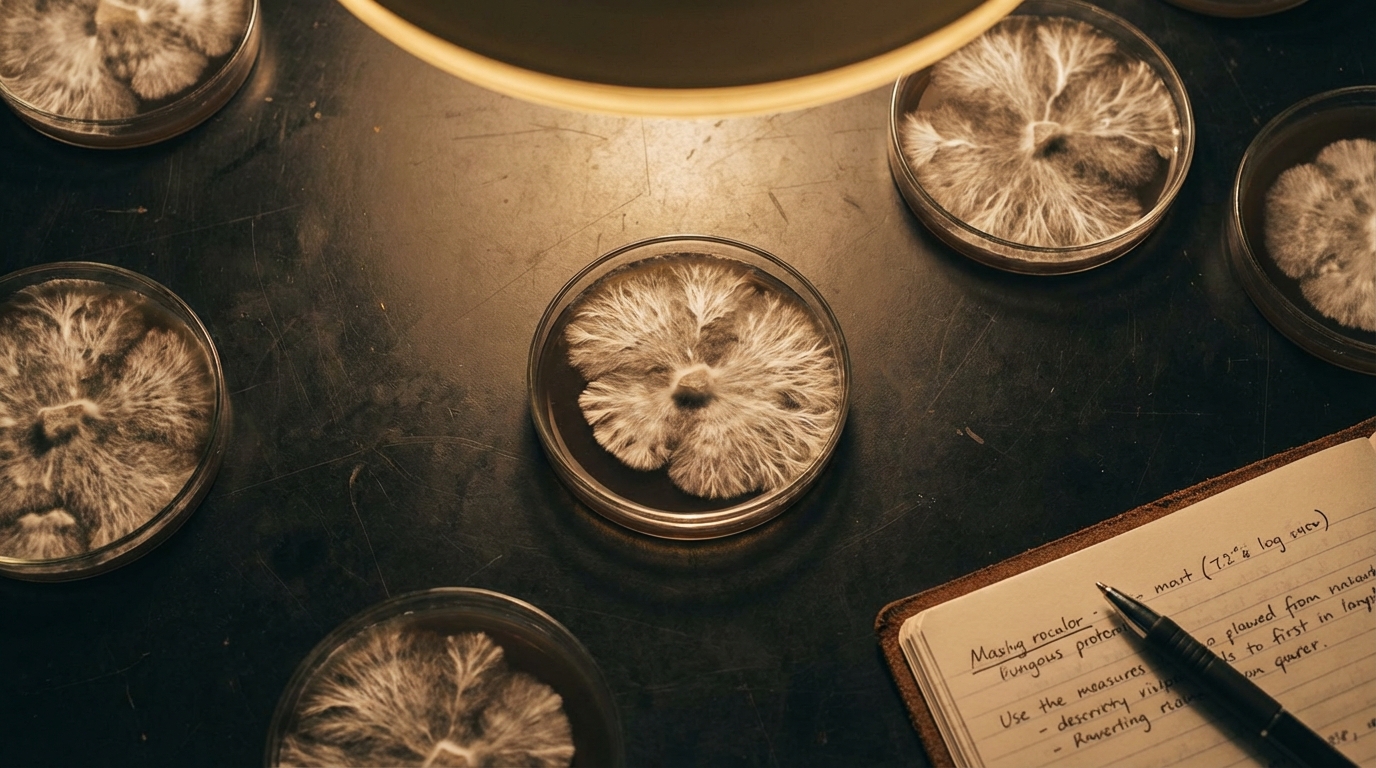
3. Agar Expansion (Advanced)
Transfer a piece of colonized grain to an agar plate to isolate genetics, select healthy sectors, or create long-term storage cultures.
Troubleshooting
| Problem | Cause | Solution | |---------|-------|----------| | Grain turns green/black | Trichoderma or other mold | Discard in sealed bag; review sterile technique | | Slow colonization past 3 weeks | Low temp or dead spores | Warm location; restart with fresh syringe | | Grain smells sour | Bacterial contamination from wet grain | Reduce moisture before sterilizing; longer cook time | | Mycelium looks yellow/metabolite seeping | Normal secretion | Usually fine; wipe inner glass and continue | | Grain clumps and won't shake | Overcooked grain | Reduce simmer time next batch; add gypsum | | Contamination only at lid | Filter or port failure | Check polyfill density; replace silicone injection port |
Sanitation Discipline
Contamination is the main cause of failure at every stage:
- Never skip flame sterilization — even one contaminated inoculation ruins the whole batch
- Always let jars cool fully — warm glass sweats; condensation creates bacteria-friendly wet zones
- Work quickly in SAB — speed in clean air reduces exposure time
- Use alcohol liberally — wipe everything: gloves, jar lids, syringe, bench surface
- Inspect every jar at day 5 and day 10 — catch and remove contaminated jars before they sporulate and spread
Common Problems & Troubleshooting
See the Contamination Guide for common issues.
Tips for Success
Take notes at every stage. Consistency beats perfection.